Translations:Archive:Kdenlive/Manual/Effects/Blur and hide/Auto Mask/12/en: Difference between revisions
Appearance
Importing a new version from external source |
m FuzzyBot moved page Translations:Kdenlive/Manual/Effects/Blur and hide/Auto Mask/12/en to Translations:Archive:Kdenlive/Manual/Effects/Blur and hide/Auto Mask/12/en without leaving a redirect: Part of translatable page "Kdenlive/Manual/Effects/Blur and hide/Auto Mask" |
||
| (One intermediate revision by the same user not shown) | |||
| Line 1: | Line 1: | ||
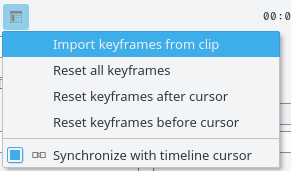
[[File:Kdenlive Affine options menu.png|400px|thumb|right|Figure 3.]]Next step is to import the motion data in the transition. To do this, first select the clip you have | [[File:Kdenlive Affine options menu.png|400px|thumb|right|Figure 3.]]Next step is to import the motion data in the transition. To do this, first, select the clip you have analyzed, then select the transition using the <keycap>CTRL</keycap> key so that both items are selected. Finally, go in the transitions's Options menu [[File:Kdenlive Affine options button.png]] and select <menuchoice>Import keyframes from clip</menuchoice>. You can now delete the "Auto Mask" effect from the clip in the timeline and play the project to see your title clip following the object. | ||
Latest revision as of 11:34, 15 August 2023

Next step is to import the motion data in the transition. To do this, first, select the clip you have analyzed, then select the transition using the CTRL key so that both items are selected. Finally, go in the transitions's Options menu ![]() and select . You can now delete the "Auto Mask" effect from the clip in the timeline and play the project to see your title clip following the object.
and select . You can now delete the "Auto Mask" effect from the clip in the timeline and play the project to see your title clip following the object.
