K3b/pl: Difference between revisions
Yecril71pl (talk | contribs) Created page with "250px|thumb|center" |
Updating to match new version of source page |
||
| (22 intermediate revisions by 4 users not shown) | |||
| Line 1: | Line 1: | ||
<languages /> | <languages /> | ||
{{MultiBreadCrumbs|1=K3b}} | |||
{|style="text-align:center" | {|style="text-align:center" | ||
| Line 14: | Line 15: | ||
== Przygotowanie == | == Przygotowanie == | ||
Kiedy | Kiedy uruchamiasz [[K3b/pl|K3b]] po raz pierwszy, możesz otrzymać powiadomienie, że program nie odnalazł sterowników do Twojej nagrywarki. To znaczy że nie możesz zapisywać na płytach optycznych. Nie ma jednak powodów do obaw: [[K3b/pl|K3b]] otworzy okno konfiguracyjne z zakładką '''Uprawnienia''' gdzie można zmienić uprawnienia. We wszystkich nowoczesnych systemach napędy optyczne należą do osobnej grupy użytkowników ("cdrom"). Jeśli aktywny użytkownik nie należy do tej grupym to może dodać się tam samodzielnie w tej zakładce. | ||
[[File:K3bsetup-pl.png|250px|thumb|center]] | [[File:K3bsetup-pl.png|250px|thumb|center]] | ||
| Line 31: | Line 32: | ||
Przydałyby Wam się skróty do jednego lub kilku spośród tych zadań? | Przydałyby Wam się skróty do jednego lub kilku spośród tych zadań?  Użytek [[K3b/pl|K3b]] może Wam to również zapewnić.  Po prostu wybierzcie jedną z czynności z wachlarza kontekstowego pulpitu, a odpowiedni przycisk znajdzie się na pulpicie: | ||
[[Image:K3bAddButton-pl.png|250px|thumb|center]] | [[Image:K3bAddButton-pl.png|250px|thumb|center]] | ||
== | ==Ustawienia wewnętrzne== | ||
Większość ustawień domyślnych można po prostu zostawić w spokoju.  Jednakowoż zaleca się zajrzeć na kartę '''Ustawienia zaawansowane''', gdzie w razie potrzeby można zmienić różne ważne ustawienia. | |||
[[Image:K3bAdvancedSettings.png|250px|thumb|center]] | [[Image:K3bAdvancedSettings-pl.png|250px|thumb|center]] | ||
:* ''' | :* Warto włączyć usługę '''Burnfree''' — nadzoruje ona wypalanie, zapewniając że zapas danych nie wyczerpie się przedwcześnie (co zmniejsza ilość błędnych wypaleń). | ||
:* | :* Rozważcie możliwość samoczynnego ścierania płyt wielokrotnego zapisu. | ||
:* | :* Nastawa '''Nie wysuwaj płyty po zakończeniu nagrywania''' będzie nieoceniona jeśli Wasz napęd zamyka się zbyt wolno, uniemożliwiając sprawdzenie wypalonej płyty. | ||
== | ==Przygotowanie do wypalenia płyty== | ||
Rozpoczynając nowe nagranie upewnijcie się, że użytek [[K3b/pl|K3b]] prawidłowo wykrył nośniki optyczne takie jak [[Glossary/CD/pl|CD]] lub [[Glossary/DVD/pl|DVD]].  Na pasku stanu u dołu okna widać rozmiar wybranej obecnie płyty.  W przypadku gdy nie jest on poprawny lub Wasze nagranie wymaga innego rozmiaru, po prostu wybierzcie pożądany rozmiar z wachlarza możliwości paska stanu. | |||
[[Image:K3bDiskChoice.png|250px|thumb|center]] | [[Image:K3bDiskChoice-pl.png|250px|thumb|center]] | ||
Teraz wybierz co ma zostać wypalone na nośniku. | |||
The top | The top half of the screen is the ''source pane''; it functions like a file manager. You can choose ordinary files from mounted data volumes or audio tracks from inserted audio discs. Names of audio tracks are automatically read from CD-TEXT data, if your CD drive supports reading it, or generated using [http://libcddb.sourceforge.net/ CDDB]; the exact format is controlled by a button in the bottom pane. If the names are incorrect or simply do not match the description of the disc, you can edit them using the toolbar button. Your changes will be cached locally and submitted to the master registry at [http://www.freedb.org/ FreeDB]. <small>Internet connection fees apply.</small> | ||
{{Tip|If the whole record is performed by the same artist, leave the track artist entries blank, fill the Album artist, save to CDDB and requery.}} | |||
Now that you have your sources at hand, simply drag and drop the files and directories you wish to burn onto the large pane to the right at the bottom; this is the ''model pane''. Behold a tree of your chosen files forming to the left. Should there be some files or directories which you do not want to burn, these can be easily removed from the project by simply removing them from the panel at the bottom. Select the file to be removed (you can control-click to select multiple ones), then choose <menuchoice>Remove</menuchoice> from the context menu. | |||
{{Tip|If you need to compress audio, create a new audio CD project, add the files to be converted and press the button <menuchoice>Convert Tracks</menuchoice>. This will not affect the contents of the CD if you decide to burn it; however, you will be able to use the compressed files elsewhere. Make sure the original files are lossless (''wav'' or ''FLAC''), otherwise the result will be unsatisfactory.}} | |||
The top line will be the title of the disk. In many cases this will be fine, but if you would like to change this to something else, simply rename it using the context menu. | |||
==Ostatnie kroki== | |||
Teraz możesz kliknąć przycisk '''Nagraj'''. | |||
[[Image:K3bSetVerify.png|250px|thumb|center]] | [[Image:K3bSetVerify.png|250px|thumb|center]] | ||
| Line 68: | Line 77: | ||
==Burning an Audio CD== | ==Burning an Audio CD== | ||
[[Special:myLanguage/K3b/Burn_an_Audio_Cd_with_K3b|This page]] tells you how to burn an audio CD from your stored files. | |||
[[Category:Multimedia]] | [[Category:Multimedia/pl]] | ||
Latest revision as of 14:28, 6 September 2020
Home » Applications » Multimedia » K3b
K3b jest prostym ale jednocześnie krzepkim i giętkim użytkiem graficznym do wypalania płytek optycznych zawierających dźwięki, obrazy i inne dane.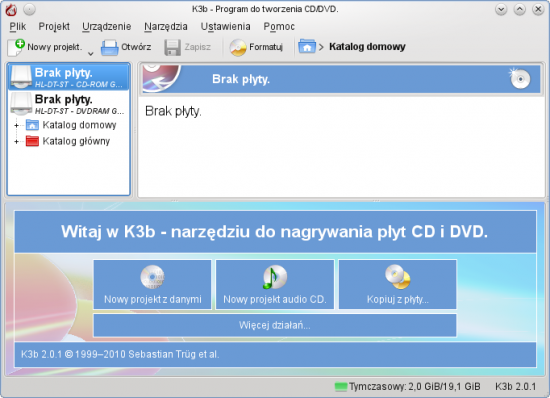 |
Wprowadzenie
Jeśli korzystałeś kiedyś z użytku do wypalania podobnego do Nerona w środowisku Windows, użytek K3b wygląda całkiem znajomo.
Posiadając prostą ale skuteczną funkcjonalność graficzną, K3b dostarcza rozmaitych możliwości dla wypalenia płyty CD, DVD lub BD (niebieski promień). K3b obsługuje rozmaite rodzaje projektów dysków optycznych, włączając bez ograniczenia dźwięki, dane archiwalne, projekty obrazowe dla płyt DVD i VCD, jak również płyty wielokrotnie nagrywane i zespolone. K3b ma też możliwość starcia nośnika do wielokrotnego zapisu, a również wykonywania bardziej złożonych zadań, jak np. kodowanie i odkodowywanie strumieni słuchowo-wzrokowych.
Przygotowanie
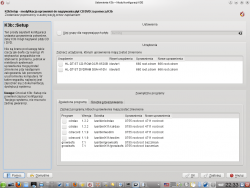
Kiedy uruchamiasz K3b po raz pierwszy, możesz otrzymać powiadomienie, że program nie odnalazł sterowników do Twojej nagrywarki. To znaczy że nie możesz zapisywać na płytach optycznych. Nie ma jednak powodów do obaw: K3b otworzy okno konfiguracyjne z zakładką Uprawnienia gdzie można zmienić uprawnienia. We wszystkich nowoczesnych systemach napędy optyczne należą do osobnej grupy użytkowników ("cdrom"). Jeśli aktywny użytkownik nie należy do tej grupym to może dodać się tam samodzielnie w tej zakładce.
Wybór oprawy użytkowej
Otwierając użytek K3b możesz przejść skrótem do jednego z trzech najczęstszych zadań:
- Nowy projekt z danymi
- Nowy projekt audio CD
- Kopiuj z płyty…
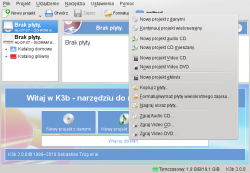
Użytek K3b może jednak wykonać znacznie więcej niż te zadania, i w ten sposób może się okazać, że niektóre spośród innych możliwości są równie przydatne. Przyjrzyjcie się poniższemu spisowi, aby liznąć innych dostępnych działań (obrazek powiększa się przez pstryknięcie):
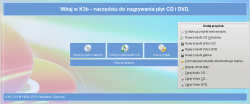
Przydałyby Wam się skróty do jednego lub kilku spośród tych zadań? Użytek K3b może Wam to również zapewnić. Po prostu wybierzcie jedną z czynności z wachlarza kontekstowego pulpitu, a odpowiedni przycisk znajdzie się na pulpicie:
Ustawienia wewnętrzne
Większość ustawień domyślnych można po prostu zostawić w spokoju. Jednakowoż zaleca się zajrzeć na kartę Ustawienia zaawansowane, gdzie w razie potrzeby można zmienić różne ważne ustawienia.
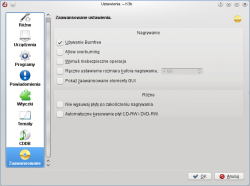
- Warto włączyć usługę Burnfree — nadzoruje ona wypalanie, zapewniając że zapas danych nie wyczerpie się przedwcześnie (co zmniejsza ilość błędnych wypaleń).
- Rozważcie możliwość samoczynnego ścierania płyt wielokrotnego zapisu.
- Nastawa Nie wysuwaj płyty po zakończeniu nagrywania będzie nieoceniona jeśli Wasz napęd zamyka się zbyt wolno, uniemożliwiając sprawdzenie wypalonej płyty.
Przygotowanie do wypalenia płyty
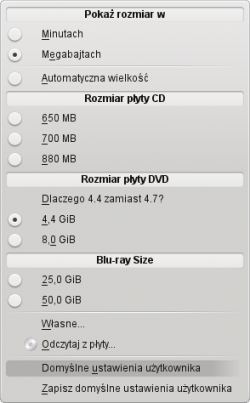
Rozpoczynając nowe nagranie upewnijcie się, że użytek K3b prawidłowo wykrył nośniki optyczne takie jak CD lub DVD. Na pasku stanu u dołu okna widać rozmiar wybranej obecnie płyty. W przypadku gdy nie jest on poprawny lub Wasze nagranie wymaga innego rozmiaru, po prostu wybierzcie pożądany rozmiar z wachlarza możliwości paska stanu.
Teraz wybierz co ma zostać wypalone na nośniku.
The top half of the screen is the source pane; it functions like a file manager. You can choose ordinary files from mounted data volumes or audio tracks from inserted audio discs. Names of audio tracks are automatically read from CD-TEXT data, if your CD drive supports reading it, or generated using CDDB; the exact format is controlled by a button in the bottom pane. If the names are incorrect or simply do not match the description of the disc, you can edit them using the toolbar button. Your changes will be cached locally and submitted to the master registry at FreeDB. Internet connection fees apply.
Now that you have your sources at hand, simply drag and drop the files and directories you wish to burn onto the large pane to the right at the bottom; this is the model pane. Behold a tree of your chosen files forming to the left. Should there be some files or directories which you do not want to burn, these can be easily removed from the project by simply removing them from the panel at the bottom. Select the file to be removed (you can control-click to select multiple ones), then choose from the context menu.
The top line will be the title of the disk. In many cases this will be fine, but if you would like to change this to something else, simply rename it using the context menu.
Ostatnie kroki
Teraz możesz kliknąć przycisk Nagraj.
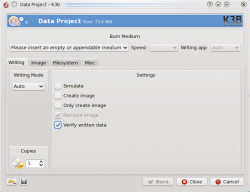
You will see on my screenshot that no disk was present. When you have inserted the appropriate disk you will see a description of it on that line.
There are still one or two choices to be made. I would recommend that you set Verify written data, then hit the Save icon at the bottom of the screen, ensuring that it becomes your personal default. For most modern drives it's safe to leave mode and speed to Auto. If you may wish to burn another copy of the disk at a later date, select Create image, which will save having to set up the burn again. Set the number of copies you want to burn, then, when you are satisfied, hit Burn.
Burning an Audio CD
This page tells you how to burn an audio CD from your stored files.

