Parley/Manual/nl: Difference between revisions
No edit summary |
Updating to match new version of source page |
||
| (15 intermediate revisions by 3 users not shown) | |||
| Line 36: | Line 36: | ||
In deze handleiding refereert de term ''Vocabulairecollectie'' aan een bestand dat lessen en het vocabulaire van de lessen bavat. | In deze handleiding refereert de term ''Vocabulairecollectie'' aan een bestand dat lessen en het vocabulaire van de lessen bavat. | ||
Both, the Editor and the Practice can be reached from the [[Special:myLanguage/Parley/Manual#Start Page|Start Page]]. | |||
De [[Special:myLanguage/Parley/Manual#Practice|Oefening]] bestaat uit drie delen: als eerste de [[Special:myLanguage/Parley/Manual#Practice Setup|Oefeningsopzet]] waar u kunt kiezen wat u wilt oefenen. | De [[Special:myLanguage/Parley/Manual#Practice|Oefening]] bestaat uit drie delen: als eerste de [[Special:myLanguage/Parley/Manual#Practice Setup|Oefeningsopzet]] waar u kunt kiezen wat u wilt oefenen. | ||
| Line 42: | Line 42: | ||
Tip | {{Tip|Like in all applications try to use the right-click if you explore features and functionality in Parley. The right-click displays a "context menu" that shows what you can do with your present situation. Try right-clicking lessons and words to find some options.}} | ||
=Startpagina= | =Startpagina= | ||
| Line 57: | Line 55: | ||
De woorden worden samengevoegd tot lessen. | De woorden worden samengevoegd tot lessen. | ||
To ''start practicing'', click one of the vocabulary collections in the list. You are taken to the [[Special:myLanguage/Parley/Manual#Practice_Setup|practice setup]]. | |||
Note that a small '''Editor Icon''' appears to the right of the document name when you move the mouse over it. The '''Editor Icon''' lets you open the collection in the editor instead of practice mode. | |||
To [[Special:myLanguage/Parley/Manual#Vocabulary_Editing|edit]] a collection, click on the '''Editor Icon''' on its right hand side. | |||
If you'd like to start your own collection of vocabulary, click on <menuchoice>Create a New Collection</menuchoice>. | |||
U kunt ook een [[Special:myLanguage/Parley/Manual#Open an existing collection|collectie openen]] als u die al op uw computer aanwezig is, maar nog niet in de lijst is opgenomen. | |||
U kunt ook een [[#Open an existing collection|collectie openen]] als u die al op uw computer aanwezig is, maar nog niet in de lijst is opgenomen. | |||
The last button on the '''Start Page''' offers you to download vocabulary collections made by others. When you've created a file that you'd like to share with others, you can easily upload it from the editor. | |||
Parley kent verschillende thema's en in de instellingen kunt u een andere vormgeving instellen. | Parley kent verschillende thema's en in de instellingen kunt u een andere vormgeving instellen. | ||
| Line 96: | Line 85: | ||
Now, the file is loaded, and you move on to the '''Practice Setup''' screen: see the following section for further details. | |||
<span id="Vocabulary Practice"></span> | <span id="Vocabulary Practice"></span> | ||
=Woordenschat oefenen= | =Woordenschat oefenen= | ||
| Line 129: | Line 118: | ||
In de '''Gevorderde oefeningsinstellingen''' kunt u meer instellingen maken die de wijze waarop de oefening wordt aangeboden bepalen. | In de '''Gevorderde oefeningsinstellingen''' kunt u meer instellingen maken die de wijze waarop de oefening wordt aangeboden bepalen. | ||
In | In the [[Special:myLanguage/Parley/Manual#Practice_Setup|Practice Setup]] page you reach the '''Advanced Practice Configuration''' with the '''Configure Practice''' button in the toolbar. The button with the green icon. | ||
<span id="Blocking"></span> | <span id="Blocking"></span> | ||
====Blokkeren==== | ====Blokkeren==== | ||
If you plan to practice your vocabulary regularly, you should make sure that the ''Blocking'' feature is enabled. The '''Blocking''' options are part of the [[Special:myLanguage/Parley/Manual#Advanced Practice Configuration|Advanced Practice Configuration]]. There you go to the blocking page and tick the checkbox that says '''Blocking'''. Now you can even configure the interval in which words that you answered correctly will be repeated. | |||
'''Blokkeren''' betekent dat woorden een bepaalde periode niet opnieuw gevraagd worden na de laatste oefening. | '''Blokkeren''' betekent dat woorden een bepaalde periode niet opnieuw gevraagd worden na de laatste oefening. | ||
| Line 153: | Line 136: | ||
You can decide to practice only words that you know better or less well than some grade. Or you can select only words that you have practiced a certain number of times | You can decide to practice only words that you know better or less well than some grade. Or you can select only words that you have practiced a certain number of times. | ||
<span id="Advanced Practice Settings"></span> | <span id="Advanced Practice Settings"></span> | ||
==== Gevorderde oefeningsinstellingen ==== | ==== Gevorderde oefeningsinstellingen ==== | ||
| Line 187: | Line 170: | ||
On the left hand side bottom of the screen you have 7 boxes that show how good you know the vocabulary. These 7 boxes correspond to the blocking levels set under '''[[Special:myLanguage/Parley/Manual#Blocking|Blocking]]''' in the '''Advanced Practice Configuration''' | On the left hand side bottom of the screen you have 7 boxes that show how good you know the vocabulary. These 7 boxes correspond to the blocking levels set under '''[[Special:myLanguage/Parley/Manual#Blocking|Blocking]]''' in the '''Advanced Practice Configuration''' | ||
Tip | {{Tip|Instead of clicking '''Continue''' you can also use the <keycap>Spacebar</keycap> of your keyboard.}} | ||
[[File:Parley practice grey flash solution.png|500px]] | [[File:Parley practice grey flash solution.png|500px]] | ||
| Line 209: | Line 192: | ||
[[File:Parley mixed letters 0-9-4 002.png|500px]] | [[File:Parley mixed letters 0-9-4 002.png|500px]] | ||
Should you enter a wrong answer, you will be told to | Should you enter a wrong answer, you will be told to ''try again'': | ||
[[File:Parley mixed letters 0-9-4 003.png|500px]] | [[File:Parley mixed letters 0-9-4 003.png|500px]] | ||
| Line 222: | Line 205: | ||
You can overrule how your answer is counted. See [[Special:myLanguage/Parley/Manual#Counting an Answer as Right|Counting an Answer as Right]]. | You can overrule how your answer is counted. See [[Special:myLanguage/Parley/Manual#Counting an Answer as Right|Counting an Answer as Right]]. | ||
==== | ==== Meerkeuzevragen==== | ||
=====Automatic selection of the possible answers===== | =====Automatic selection of the possible answers===== | ||
| Line 255: | Line 238: | ||
If you have just ''two choices'' like | If you have just ''two choices'' like ''yes/no'' in the section '''Multiple Choice''' set the '''Number of choices''' to '''2'''. | ||
====Written==== | ====Written==== | ||
| Line 347: | Line 330: | ||
The exercise requires you to enter the comparison forms for the term shown. In this case the translation of the English word | The exercise requires you to enter the comparison forms for the term shown. In this case the translation of the English word ''old'' to German. The German language has three forms: ''absolute, comparative'' and ''superlative''. To go on with the exercise just click on '''Continue'''. | ||
[[File:Parley comparison eng-deu 0-9-4 003.png|500px]] | [[File:Parley comparison eng-deu 0-9-4 003.png|500px]] | ||
| Line 378: | Line 361: | ||
=== About the Collection === | === About the Collection === | ||
Entering meta data like a title and your contact info is relevant if you plan to make your collection available for other people. Use ''' | Entering meta data like a title and your contact info is relevant if you plan to make your collection available for other people. Use '''File→Properties''' to edit the data. | ||
[[File:Parley document properties.png|500px]] | [[File:Parley document properties.png|500px]] | ||
| Line 384: | Line 367: | ||
===Vocabulary Columns=== | ===Vocabulary Columns=== | ||
Depending on what your learning sessions are going to be about it can be relevant to have further Vocabulary Columns show up in your edit section. To choose these columns select '''View''' from the Menu bar and then '''Vocabulary Columns'''. There you can determine if the columns for | Depending on what your learning sessions are going to be about it can be relevant to have further Vocabulary Columns show up in your edit section. To choose these columns select '''View''' from the Menu bar and then '''Vocabulary Columns'''. There you can determine if the columns for ''Pronunciation, Word Type, Synonym, Antonym, Example, Comment'' and/or ''Paraphrase'' are to be shown. | ||
[[File:Parley trainer eng-deu 0-9-4 010.png|500px]] | [[File:Parley trainer eng-deu 0-9-4 010.png|500px]] | ||
<span id="Languages and Grammar"></span> | <span id="Languages and Grammar"></span> | ||
=== | === Talen en grammatica === | ||
Set up some grammar details to let Parley help you. Use ''' | Set up some grammar details to let Parley help you. Use '''Edit→Languages''' to pull up the grammar dialog. | ||
Articles in English are simply '''the''' which is the definite article and '''a''' as indefinite article. Most other languages have more articles which can be filled in at the articles tab.<br /> | Articles in English are simply '''the''' which is the definite article and '''a''' as indefinite article. Most other languages have more articles which can be filled in at the articles tab.<br /> | ||
| Line 423: | Line 406: | ||
On the '''General''' tab the basic language settings, like here | On the '''General''' tab the basic language settings, like here | ||
*''' | *'''Taal''' = Spaans | ||
*''' | *'''Naam''' = Spaans | ||
*''' | *'''Toetsenbord''' = de (voor Duits) | ||
You can leave '''Keyboard layout''' empty if you are not sure about what you are using. Parley will then simply take the standard layout of your computer. | You can leave '''Keyboard layout''' empty if you are not sure about what you are using. Parley will then simply take the standard layout of your computer. | ||
| Line 446: | Line 429: | ||
[[File:Parley new_document_lang_tenses.png|500px]] | [[File:Parley new_document_lang_tenses.png|500px]] | ||
== | == Lessen == | ||
On the left you have a list of lessons. If you started a new collection, this list might be empty except for one lesson that was created by default for you. | On the left you have a list of lessons. If you started a new collection, this list might be empty except for one lesson that was created by default for you. | ||
If you cannot see the list of lessons, you might have to enable it in the View menu - '' | If you cannot see the list of lessons, you might have to enable it in the View menu - '''View→Lessons'''. | ||
The check boxes in front of the lesson name show which lessons are currently included in your practice. The number next to it is the number of words in the lesson. | The check boxes in front of the lesson name show which lessons are currently included in your practice. The number next to it is the number of words in the lesson. | ||
=== | === Nieuwe les === | ||
Add a new lesson: Select where this lesson belongs to, for example the collection '''My Spanish Lessons'''. | Add a new lesson: Select where this lesson belongs to, for example the collection '''My Spanish Lessons'''. | ||
| Line 466: | Line 449: | ||
Please make sure to select the right point in the tree structure of lessons before selecting '''New Lesson'''. In our case, wanting a | Please make sure to select the right point in the tree structure of lessons before selecting '''New Lesson'''. In our case, wanting a ''Sub-Lesson'' of '''Collection: My Spanish Lessons''' it is exactly that one that needs to be selected before going ahead with '''New Lesson'''. | ||
=== Moving, Renaming and Deleting Lessons === | === Moving, Renaming and Deleting Lessons === | ||
| Line 476: | Line 459: | ||
=== Splitting a Lesson === | === Splitting a Lesson === | ||
If your lessons grow too big, you can choose to split them up to make learning easier in small units. 20 words for a lesson is probably a good size. Right click a lesson, or use ''' | If your lessons grow too big, you can choose to split them up to make learning easier in small units. 20 words for a lesson is probably a good size. Right click a lesson, or use '''Lesson→Split Lesson into Smaller Lessons''' and the lesson will be separated into child lessons. You can choose to randomize the words that are put into the new lessons before assigning them, or to keep them in order. | ||
=== What is Shown in the Table === | === What is Shown in the Table === | ||
| Line 500: | Line 483: | ||
=== Adding New Vocabulary === | === Adding New Vocabulary === | ||
Use '''Add New Entry''' in the toolbar to add new words. You can start typing the word in the first language right away. By default Parley lets you enter another word when you press <keycap>Enter</keycap> in the last row, so you don't have to keep using the '''Add''' button. After entering the first word, press | Use '''Add New Entry''' in the toolbar to add new words. You can start typing the word in the first language right away. By default Parley lets you enter another word when you press <keycap>Enter</keycap> in the last row, so you don't have to keep using the '''Add''' button. After entering the first word, press <keycap>Tab</keycap> to go to the next language. | ||
=== Editing Words === | === Editing Words === | ||
| Line 508: | Line 491: | ||
Press <keycap>Tab</keycap> to go to the next word. <keycap>Enter</keycap> leaves the editing mode. You can use the arrow keys to move around. | Press <keycap>Tab</keycap> to go to the next word. <keycap>Enter</keycap> leaves the editing mode. You can use the arrow keys to move around. | ||
== | == Synoniemen == | ||
Synonyms are hard to set up and do not always work really well. Here is how you set them up in any case: | Synonyms are hard to set up and do not always work really well. Here is how you set them up in any case: | ||
| Line 514: | Line 497: | ||
*Use '''View→Synonyms''' to see the synonyms tool. | *Use '''View→Synonyms''' to see the synonyms tool. | ||
*Select first word (A) you want to make synonyms, then click on the second word (B) | *Select first word (A) you want to make synonyms, then click on the second word (B) | ||
*The button in the synonym tool changes it's text to | *The button in the synonym tool changes it's text to '''A and B are synonyms''' | ||
The words will now be shown as connected in the synonym tool and can be recognized as synonyms in the practice. | The words will now be shown as connected in the synonym tool and can be recognized as synonyms in the practice. | ||
| Line 522: | Line 505: | ||
First show the image tool by selecting '''View''' in the menu bar and then clicking on '''Image'''. The checkbox in front of '''Image''' will then be activated. This will show up the picture section on the right hand side of the Parley screen | First show the image tool by selecting '''View''' in the menu bar and then clicking on '''Image'''. The checkbox in front of '''Image''' will then be activated. This will show up the picture section on the right hand side of the Parley screen | ||
To add an image to a word make sure the word is highlighted. In the image section on the right hand side click on the | To add an image to a word make sure the word is highlighted. In the image section on the right hand side click on the '''Folder icon''' and choose the picture you wish to associate. | ||
[[File:Parley trainer eng-deu 0-9-4 006.png|500px]] | [[File:Parley trainer eng-deu 0-9-4 006.png|500px]] | ||
| Line 529: | Line 512: | ||
First show the sound tool by selecting '''View''' in the menu bar and then clicking on '''Sound'''. This will show up the sound section on the right hand side of the Parley screen. | First show the sound tool by selecting '''View''' in the menu bar and then clicking on '''Sound'''. This will show up the sound section on the right hand side of the Parley screen. | ||
To add a sound to a word make sure the word is highlighted. In the sound section on the right hand side click on the | To add a sound to a word make sure the word is highlighted. In the sound section on the right hand side click on the '''Folder icon''' and choose the sound you wish to associate. | ||
[[File:Parley trainer eng-deu 0-9-4 007.png|500px]] | [[File:Parley trainer eng-deu 0-9-4 007.png|500px]] | ||
| Line 589: | Line 572: | ||
Let's start from the Start Page which is shown once you launch Parley: | Let's start from the '''Start Page''' which is shown once you launch Parley: | ||
[[File:Parley_initial_screen_0-9-4.png|500px]] | [[File:Parley_initial_screen_0-9-4.png|500px]] | ||
| Line 640: | Line 623: | ||
Select the English word | Select the English word ''apple'' by clicking on it. It is highlighted, so let's add the picture. In the image section on the right hand side click on the '''Folder''' icon and choose the picture you wish to associate. | ||
To add the pronunciation for the English apple, do the same in the Sound section, selecting the relevant sound file. | To add the pronunciation for the English apple, do the same in the Sound section, selecting the relevant sound file. | ||
| Line 658: | Line 641: | ||
Just go ahead like this for all terms. | Just go ahead like this for all terms. | ||
Time to add adjectives and verbs as lessons to our project. So just do as before with the lesson | Time to add adjectives and verbs as lessons to our project. So just do as before with the lesson ''Fruit'' and create two new lessons: ''Adjectives'' and ''Verbs''. Let's assume we will add ''big, small, old, young, narrow'' in the adjective lesson and ''to go, to come, to buy, to drink, to eat'' in the verb lesson. | ||
The following shows a screenshot with all inserted terminology. Now, words are mixed and it would be nice to see what is a | The following shows a screenshot with all inserted terminology. Now, words are mixed and it would be nice to see what is a ''noun, adjective'' or ''verb''. | ||
[[File:Parley_trainer_eng-deu_0-9-4_009.png|500px]] | [[File:Parley_trainer_eng-deu_0-9-4_009.png|500px]] | ||
As the next step we are going to show the '''Word Type'''. Select '''View''' in the menu bar and then select '''Vocabulary Columns'''. We activate '''Word Type''' for | As the next step we are going to show the '''Word Type'''. Select '''View''' in the menu bar and then select '''Vocabulary Columns'''. We activate '''Word Type''' for ''English'' and ''German'' by clicking on the checkbox in front of '''Word Type'''. Then click on '''OK''' to accept the changes. | ||
[[File:Parley_trainer_eng-deu_0-9-4_010.png|500px]] | [[File:Parley_trainer_eng-deu_0-9-4_010.png|500px]] | ||
By clicking on the fields in the column '''Word Type''' you can select the word type and for those languages where nouns have a gender you can also select the | By clicking on the fields in the column '''Word Type''' you can select the word type and for those languages where nouns have a gender you can also select the ''Noun/Gender'' combination. Below the '''Word Type''' column with part of the selections already done. | ||
[[File:Parley_trainer_eng-deu_0-9-4_011.png|500px]] | [[File:Parley_trainer_eng-deu_0-9-4_011.png|500px]] | ||
Once we have specified all the word types, we will first consider | Once we have specified all the word types, we will first consider ''Adjectives'', adding '''Comparison Forms''' to them. So let's move to the ''Adjectives'' lesson only. | ||
[[File:Parley_trainer_eng-deu_0-9-4_012.png|500px]] | [[File:Parley_trainer_eng-deu_0-9-4_012.png|500px]] | ||
| Line 685: | Line 668: | ||
Edit the | Edit the '''Comparison Forms''' by adding '''Comparative''' and '''Superlative''' to the single adjectives. First, click on the adjective for which you wish to add the comparison forms, in our case ''big'', and add ''bigger'' and ''biggest''. Then, continue with the next adjective to complete, until all comparison forms have been entered. | ||
[[File:Parley_trainer_eng-deu_0-9-4_014.png|500px]] | [[File:Parley_trainer_eng-deu_0-9-4_014.png|500px]] | ||
Finally, let's consider the '''Conjugation''' form of the '''Verbs'''. Select the '''Verbs''' lesson and then activate the conjugation section on the right hand side by selecting '''View''' from the menu bar and activating '''Conjugation'''. As an example we edit the present tense ('''Präsens''') form of | Finally, let's consider the '''Conjugation''' form of the '''Verbs'''. Select the '''Verbs''' lesson and then activate the conjugation section on the right hand side by selecting '''View''' from the menu bar and activating '''Conjugation'''. As an example we edit the present tense ('''Präsens''') form of ''gehen''. Please first select '''Präsens''' from the drop down menu and then add the verb forms. | ||
[[File:Parley_trainer_eng-deu_0-9-4_015.png|500px]] | [[File:Parley_trainer_eng-deu_0-9-4_015.png|500px]] | ||
| Line 701: | Line 684: | ||
===New Collection: Single Names and Collective Names=== | ===New Collection: Single Names and Collective Names=== | ||
This exercise was created for the 3rd class of an Italian primary school. Pupils are supposed to connect single names with collective names, such as ''' | This exercise was created for the 3rd class of an Italian primary school. Pupils are supposed to connect single names with collective names, such as ''tree'' → ''woods'' | ||
When you start Parley you get the start page, eventually also listing some previously used files (that you cannot see here). | When you start Parley you get the start page, eventually also listing some previously used files (that you cannot see here). | ||
| Line 713: | Line 696: | ||
Fill in the title, here '''nomi singoli e collettivi''', your name, e-mail address, in the '''Comment''' section you can write down a more detailed description, select your category and license. Then there we have something special: instead of indicating the first and second language, like it normally would happen, we added | Fill in the title, here '''nomi singoli e collettivi''', your name, e-mail address, in the '''Comment''' section you can write down a more detailed description, select your category and license. Then there we have something special: instead of indicating the first and second language, like it normally would happen, we added ''nome singolo'' (single name) and ''nome collettivo'' (collective name). '''Setup Grammar Details''' and '''Download Grammar''' are not needed here. In the screenshot they are still activated - please deactivate them by just clicking on the checkboxes. When you are done, please click on '''OK'''. | ||
The '''Properties | The '''Properties''' page for ''nome singolo'' comes up and here you see it already with the necessary changes made: | ||
[[File:Parley create new exercise collective names4.jpeg|500px]] | [[File:Parley create new exercise collective names4.jpeg|500px]] | ||
On the left hand side you can see where the data you are adding belongs to. | On the left hand side you can see where the data you are adding belongs to. ''nome singolo''. Choose the language, here ''Italian'' and insert ''nome singolo'' in the following editable field. Then click on '''OK'''. | ||
Now the '''Properties | Now the '''Properties''' page for ''nome collettivo'' is shown: | ||
[[File:Parley create new exercise collective names5.jpeg|500px]] | [[File:Parley create new exercise collective names5.jpeg|500px]] | ||
Like before: choose | Like before: choose ''Italian'' as language and insert ''nome collettivo'' and click on '''OK'''. | ||
And now you can start to edit: | And now you can start to edit: | ||
| Line 734: | Line 717: | ||
Just insert the | Just insert the ''nome singolo'' (single name) in the first column and the corresponding ''nome collettivo'' (collective name) in the second column. | ||
[[File:Parley create new exercise collective names8.jpeg|500px]] | [[File:Parley create new exercise collective names8.jpeg|500px]] | ||
| Line 765: | Line 748: | ||
=== Theme Tab === | === Theme Tab === | ||
The configuration opens with the '''Theme''' section. This is the place where you can choose how Parley should greet you when launching it: an elegant | The configuration opens with the '''Theme''' section. This is the place where you can choose how Parley should greet you when launching it: an elegant '''Grey''' version, the all time busy '''Bees''' or the '''Fluffy Bunny''' for all those who love pink. Note that it could well be that '''Fluffy Bunny''' is not in your version: if you want it, read the following section. | ||
Once you selected your preferred theme, click on '''OK'''. | Once you selected your preferred theme, click on '''OK'''. | ||
Screenshots of the | Screenshots of the '''Bees''' and '''Fluffy Bunny''' themes: | ||
[[File:Parley practice bees.png|thumb|200px]] | [[File:Parley practice bees.png|thumb|200px]] | ||
| Line 810: | Line 793: | ||
The steps to be followed in short: | The steps to be followed in short: | ||
Download | Download het installatieprogramma [http://windows.kde.org/download.php hier]. | ||
Then follow the installation procedure like for any other Windows software - screenshots are [http://www.winkde.org/pub/kde/ports/win32/installer/manual/ here]. | Then follow the installation procedure like for any other Windows software - screenshots are [http://www.winkde.org/pub/kde/ports/win32/installer/manual/ here]. | ||
| Line 838: | Line 821: | ||
In either case the files will show up in the '''Download New Collections''' dialog on the '''Start Page'''. | In either case the files will show up in the '''Download New Collections''' dialog on the '''Start Page'''. | ||
== | == Bestandsformaat == | ||
If you are interested in the file formats that Parley can read and stores the vocabulary collections in, visit: | If you are interested in the file formats that Parley can read and stores the vocabulary collections in, visit: | ||
Latest revision as of 06:50, 2 January 2019
Home >> Applications >> Education >> Parley >> Parley Manual
Deze handleiding is geschreven door Sabine Eller, Daniel Laidig en Frederik Gladhorn.
Auteursrechten 2010 Sabine Eller, Daniel Laidig en Frederik Gladhorn
Inleiding
Parley is een woordenschattrainer. Het programma kan ondersteunen bij het leren van uw woordenschat, bijvoorbeeld als u een vreemde taal probeert te leren. U kunt uw eigen verzamelingen maken met de woorden die u nodig hebt, of kiezen uw een grote verzameling beschikbare Vocabulairecollecties. Er zijn collecties die taalvocabuliare bevatten en ook collecties met betrekking tot anatomie, muziek, geografie, scheikunde, of voorbereidingen voor examens.
Parley is erg flexibel en gebruiker de leermethode met flitskaarten. Parley volgt automatisch uw leerproces. Met Parley kunt u uw woordenschat ordenen zoals u wilt, en u kunt uw eigen lessen ontwerpen. In tegenstelling tot wanneer u echte flitskaarten gebruikt, kunt u verschillende leermethoden gebruiken met Parley.
Flitskaarten bevatten aan de voorkant expressies en hun vertalingen staan aan de achterkant. U begint met een stapel kaarten. Als u de vertaling van een kaart kent, kunt u de kaart op een tweede stapel leggen. Als u de vertaling niet kent, houdt u de kaart in de eerste stapel en probeert het later nog een keer.
Parley probeert u geen grammatica aan te leren, hoewel er wel een aantal lesvormen zijn die het mogelijk maken hierbij te ondersteunen.
Parley heeft twee onderdelen: Woordenschattraining en een Tekstverwerker voor vocabulairecollecties.
In deze handleiding refereert de term Vocabulairecollectie aan een bestand dat lessen en het vocabulaire van de lessen bavat.
Both, the Editor and the Practice can be reached from the Start Page.
De Oefening bestaat uit drie delen: als eerste de Oefeningsopzet waar u kunt kiezen wat u wilt oefenen. Vanaf daar start u de eigenlijke Oefening en als u klaar bent krijgt u een Samenvatting.
Startpagina
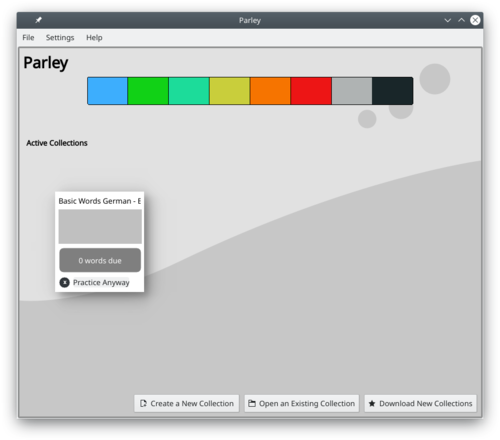
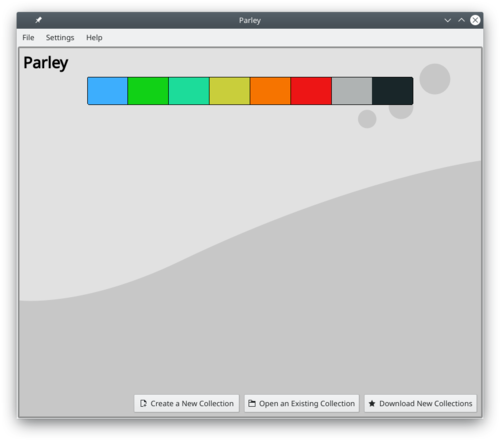
When you first launch Parley the Start Page welcomes you. At first the Start Page is empty, once you opened some vocabulary collections, it shows you the ones you worked with most recently.
Een vocabuliarecollectie is een bebestand dat woorden en hun vertalingen in andere talen bevat of andere woordparen en zinnen die u wilt leren.
De woorden worden samengevoegd tot lessen.
To start practicing, click one of the vocabulary collections in the list. You are taken to the practice setup.
Note that a small Editor Icon appears to the right of the document name when you move the mouse over it. The Editor Icon lets you open the collection in the editor instead of practice mode. To edit a collection, click on the Editor Icon on its right hand side.
If you'd like to start your own collection of vocabulary, click on .
U kunt ook een collectie openen als u die al op uw computer aanwezig is, maar nog niet in de lijst is opgenomen.
The last button on the Start Page offers you to download vocabulary collections made by others. When you've created a file that you'd like to share with others, you can easily upload it from the editor.
Parley kent verschillende thema's en in de instellingen kunt u een andere vormgeving instellen. Meer informatie staat in Parley instellen.
Een bestaande collectie openen
We nemen aan dat uw collectie al op uw harde schijf staat.
Zo ziet het scherm eruit als u Parley voor de eerste keer start:
Klik op Bestaande collectie openen.
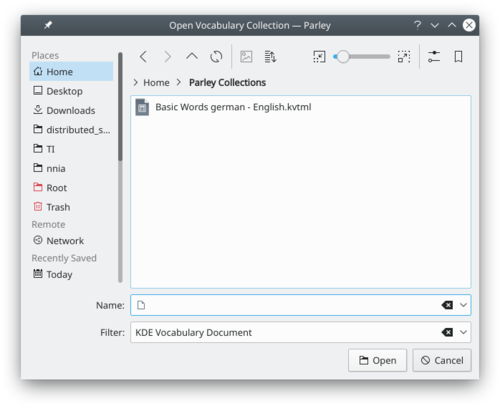
Navigeer in het dialoog voor bestandsselectie naar de map die het gegevensbestand bevat en selecteer het door erop te klikken. Afhankelijk van uw systeem opent het bestand direct of moet u nog op OK klikken.
Now, the file is loaded, and you move on to the Practice Setup screen: see the following section for further details.
Woordenschat oefenen
Selecteer een document na het starten van Parley om te beginnen met oefenen. Als u het document al in de tekstverwerker hebt geopend, klik dan op Oefenen in de werkbalk.
Oefeningsinstellingen
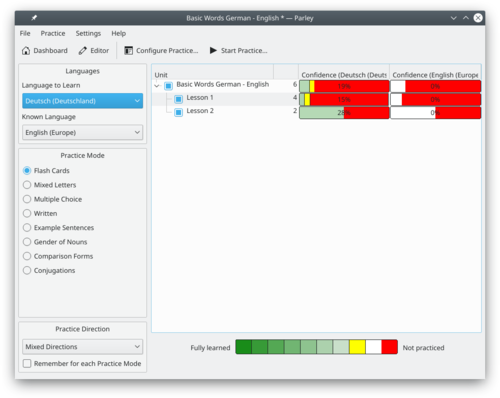
Voordat het eigenlijke oefenen begint, krijgt u altijd de pagina Oefeningsinstellingen te zien. Er zijn drie gebieden waar u kunt kiezen wat u wilt oefenen:
- Talen kiezen;
- Oefenmodus kiezen;
- Te oefenen lessen waarvoor ook voortgang gerapporteerd wordt.
Aan de linkerzijde kunt u de combinatie van te oefenen talen kiezen.
Als u bijvoorbeeld Engels naar Frans selecteert, krijgt u Engelstalige woorden te zien en Parley vraagt u dan de Franse vertaling in te voeren.
Onder de taalkeuze kunt u de oefenmodus kiezen. De Oefenmodus bepaalt hoe de vragen aan u gesteld worden.
In het grote deel van het venster recht, ziet u de lessen van de vocabuliarecollectie. U kunt selecteren welke lessen u wilt oefenen met een vinkje dat voor de naam van de les staat. Het aantal woorden dat iedere les bevat wordt naast de naam van de les weergegeven. Rechts van de naam staat de huidige voortgang voor de les.
Gevorderde oefeningsinstellingen
In de Gevorderde oefeningsinstellingen kunt u meer instellingen maken die de wijze waarop de oefening wordt aangeboden bepalen.
In the Practice Setup page you reach the Advanced Practice Configuration with the Configure Practice button in the toolbar. The button with the green icon.
Blokkeren
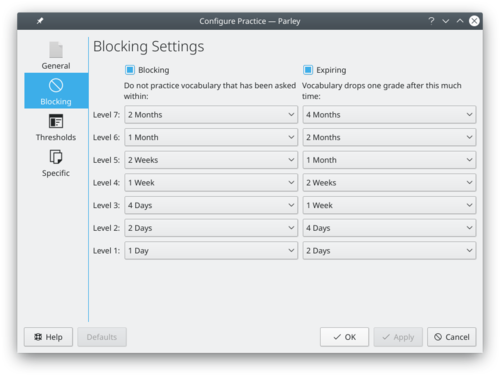
If you plan to practice your vocabulary regularly, you should make sure that the Blocking feature is enabled. The Blocking options are part of the Advanced Practice Configuration. There you go to the blocking page and tick the checkbox that says Blocking. Now you can even configure the interval in which words that you answered correctly will be repeated.
Blokkeren betekent dat woorden een bepaalde periode niet opnieuw gevraagd worden na de laatste oefening. Deze periode hangt af van hoe goed u het woord kende, zodat woorden die u nog niet zo goed kende vaker langskomen.
Drempelwaardes
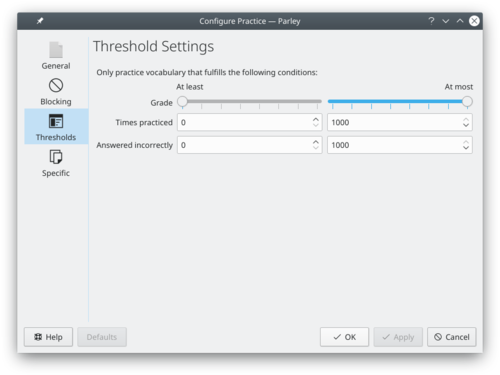
Drempelwaardes zijn een andere manier om te beperken wat u wilt oefenen.
You can decide to practice only words that you know better or less well than some grade. Or you can select only words that you have practiced a certain number of times.
Gevorderde oefeningsinstellingen
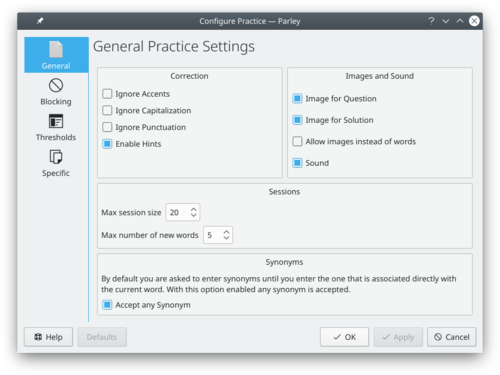
You can find several more configuration options for the practice in the advanced settings page.
De belangrijkste instellingen zijn:
* Fouten met accenten negeren: als u met deze instelling  optie als u een woord mete in plaats van é invoert, wordt het niet fout gerekend.
* Fouten met hoofdletters negeren: met deze instellingen worden fouten in hoofdlettergebruik niet fout gerekend.
* Afbeeldingen inschakelen: Als deze instelling is ingeschakeld, worden tijdens het oefenen beschikbare afbeeldingen weergegeven.
* Actieve vragen tijdens het oefenen: hoeveel worden worden herhaald voordat er een nieuw woord wordt toegevoegd. Als u deze instelling op een laag getal instelt, komen woorden sneller terug, terwijl het bij een hoge instelling langer duurt voor een woord opnieuw wordt gevraagd.
Oefenen
Flash Cards
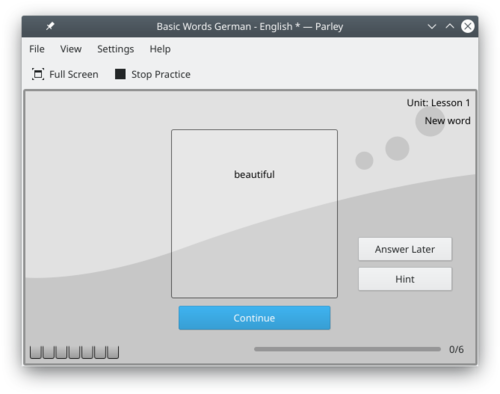
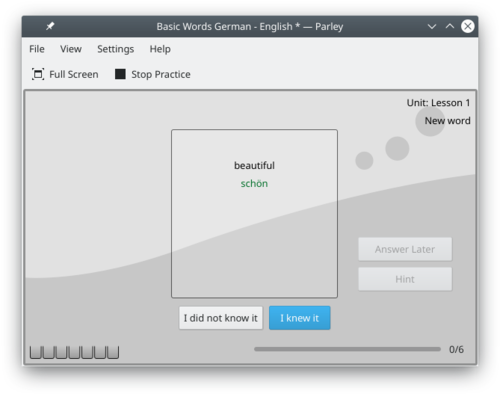
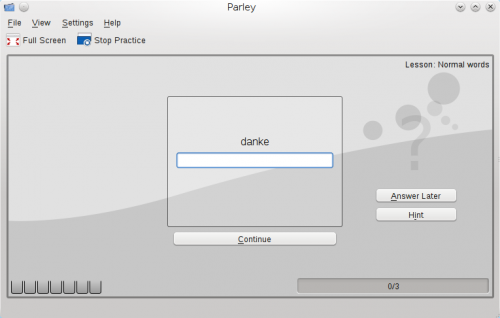
After having activated the Flash Card Practice Mode and having clicked on Start Practice the following screen shows up. The Flash Card training mode works just as if you would do it with "real" flash cards. You imagine the result and should you wish some help, you can click on Hint which will start to give you the result one letter at a time.
U kunt ook besluiten om een woord over te slaan. Wanneer u klikt opLater beantwoorden komt het woord op een later moment weer opdagen.
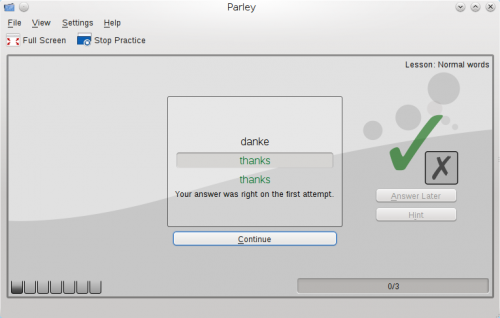
Klikken op "Doorgaan" geeft het antwoord.
Op dat moment moet u aangeven of u het antwoord wist.
Als u het niet wist, klik dan op Ik wist het niet.
Als u het antwoord wist, klikt u op Ik wist het.
Daarna komt de volgende vraag.
On the left hand side bottom of the screen you have 7 boxes that show how good you know the vocabulary. These 7 boxes correspond to the blocking levels set under Blocking in the Advanced Practice Configuration
You can stop practicing anytime by clicking on Stop Practice.
Mixed Letters
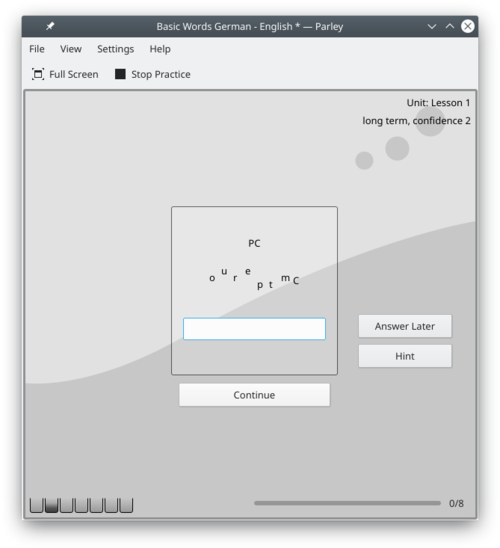
Mixed Letters is a training method that provides you with an immediate help: all letters that are part of the solution are shown mixed up:
Should you wish some help, you can click on Hint which will give you the solution one letter at a time. Of course you can also decide to Answer Later by clicking on that button.
To give the answer type it in the blank field below the mixed letters and press the Enter key or Continue button.
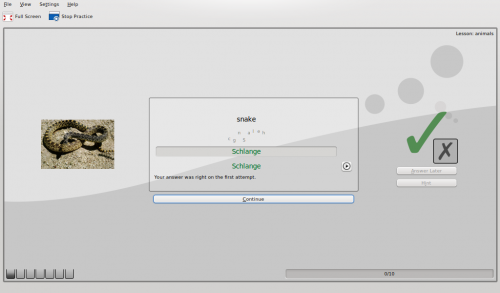
If your answer was correct Parley will tell you so and you can press Enter again or click on Continue to go ahead with the next question.
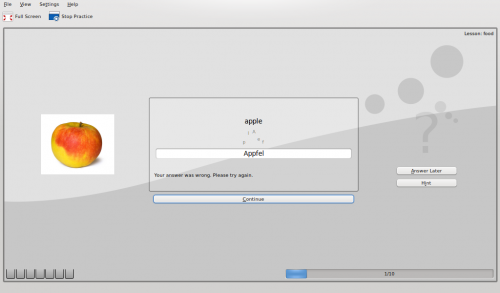
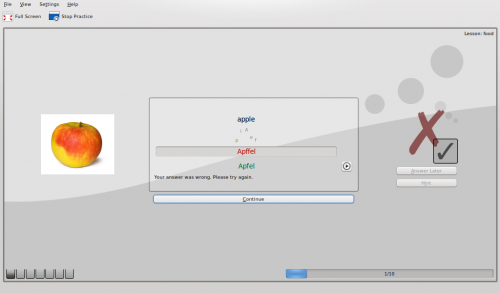
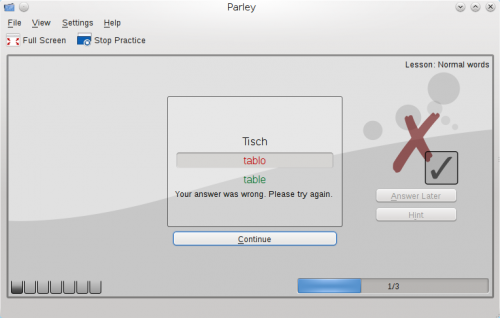
Should you enter a wrong answer, you will be told to try again:
If you don't know the answer, just click on Continue a second time. Then the following comes up and you are shown the solution. Go ahead with Continue.
After the solution is revealed, you see a big icon on the right that indicates if your answer will count as right or wrong.
You can overrule how your answer is counted. See Counting an Answer as Right.
Meerkeuzevragen
Automatic selection of the possible answers
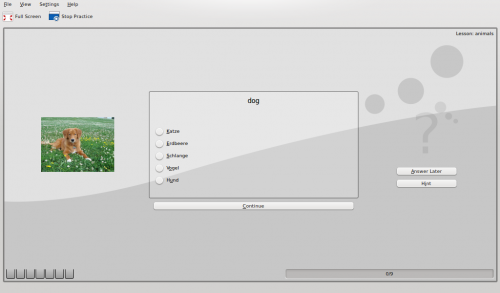
In Multiple Choice mode you are shown a number of potential answers, of which only one is correct. By clicking on Hint Parley excludes one of the wrong answers so that your choice gets more and more restricted with each further click on Hint. Of course you may also choose to Answer Later.
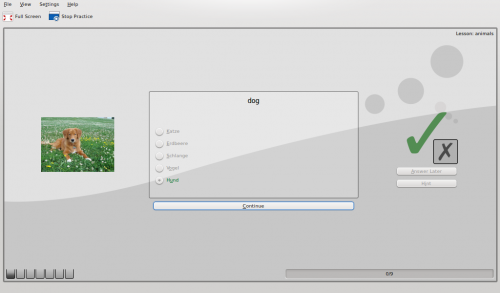
Once you made your choice by clicking on what you believe to be correct, Parley shows up with the screen below if the answer was right. Go ahead with the next question by clicking on Continue.
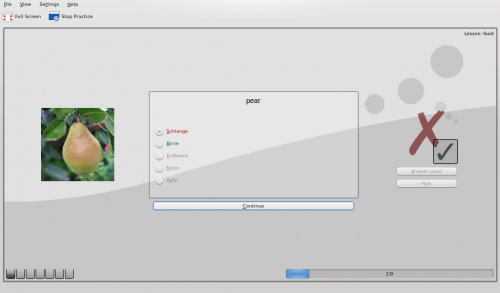
If your answer instead was wrong, the correct answer will be shown in green and the wrong one in red. Also here you go ahead by clicking on Continue.
After the solution is revealed, you see a big icon on the right that indicates if your answer will count as right or wrong.
You can overrule how your answer is counted. See Counting an Answer as Right.
If you wish to stop practice, just click on the Stop Practice button.
With yes/no answers
Normally Parley automatically proposes one correct and several wrong answers in Multiple Choice mode. For some exercises instead you will have preset answers like yes/no or similar. And for these you have to configure the practice by clicking on Configure Practice.
Select the tab Advanced and you will get something very similar to the following screenshot:
If you have just two choices like yes/no in the section Multiple Choice set the Number of choices to 2.
Written
When you select the option Written to do your practice you are supposed to type in the solution. You can use the button Hint which will start to give you the result one letter at a time. Of course you can also decide to Answer Later by clicking on that button.
Once you have entered the solution, click on Continue and Parley will show whether your answer was correct. Go ahead by clicking on Continue again.
Should you give a wrong answer, you may try again several times to find the right answer. If you don't try again, and just click on Continue, the solution will be shown.
Go ahead practicing by clicking on Continue or stop by clicking on the button Stop Practice.
When the solution is revealed, you see a big icon on the right that indicates if your answer will count as right or wrong. You can overrule how your answer is counted. See Counting an Answer as Right.
Counting an Answer as Right
After the solution is revealed, you see a big icon on the right that indicates if your answer will count as right or wrong. If you see the big checkmark, Parley thinks you were right.
If you needed more than one attempt to answer correctly, your answer will be counted as wrong.
You can click the small icon next to the indicator to change how your answer is counted. The big symbol always indicates how the answer is counted.
Reset Practice to Initial State
You can reset all your practice scores (remove the grades) to the initial state. When being in edit mode select Edit from the menu bar and then Remove Grades.
Furthermore you can reset your grades for individual lessons from within the Practice Setup by right clicking on the lesson to reset and choose Remove Grades.
Summary After Practice
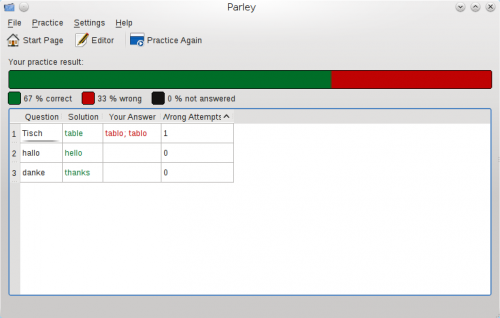
The summary shows up when you finish a learning session. In the big bar on the top it shows you how well you did.
Below is a table with all the words you practiced, together with the mistakes you made. The words with the most mistakes are on top so you can easily see what you do not know yet.
Grammar Practice Modes
With Parley you can also learn specific grammar structures, such as the gender of nouns, the comparison forms of adjectives and the conjugation of verbs. Let's look at some examples.
Articles and Gender of Nouns
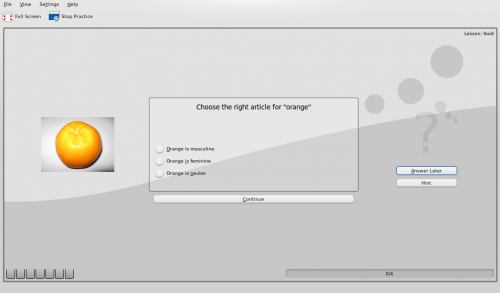
Once the practice mode Gender of Nouns is activated, click on Start Practice.
In the case below we use German as language to learn and so you have three genders to choose from: masculine, feminine and neuter. By clicking on Hint one of the wrong answers gets excluded. Of course you can also decide to Answer Later by clicking on that button.
You should enter the articles for the language in the Editor to see the articles instead of the grammatical gender terms. Also note that this only works, if the gender of the words has been set up properly. See Word Types for more information how to change the word type to the right gender.
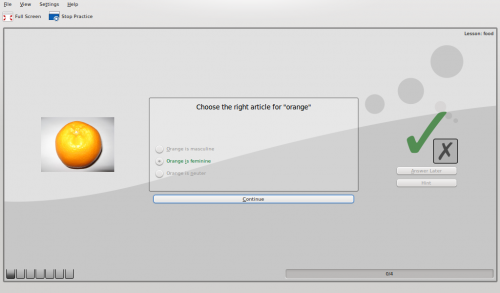
When you give the correct answer the following is shown and you go ahead practicing by clicking on Continue.
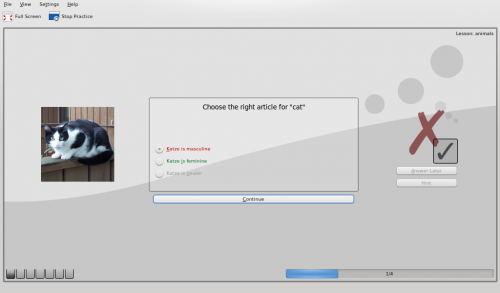
Should you give the wrong answer the following is shown and you go ahead practicing by clicking on Continue.
You can stop practicing anytime by clicking on Stop Practice.
Comparison Forms of Adjectives and Adverbs
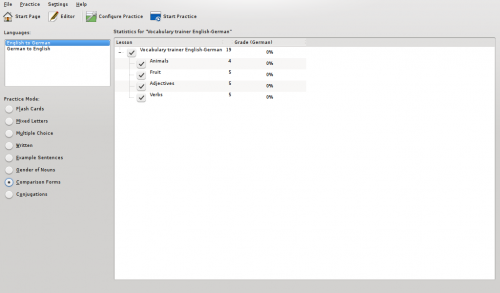
On the Practice screen select Comparison Forms and then click on Start Practice to go ahead.
This only works when the conjugation forms of the word have been entered in the vocabulary collection. See Entering Comparison Forms.
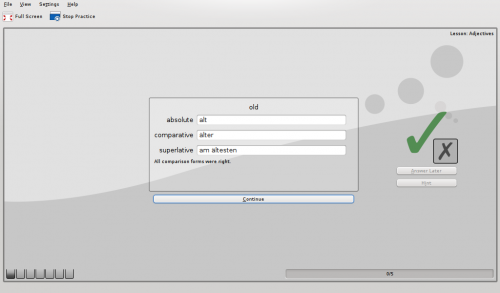
The exercise requires you to enter the comparison forms for the term shown. In this case the translation of the English word old to German. The German language has three forms: absolute, comparative and superlative. To go on with the exercise just click on Continue.
Conjugations
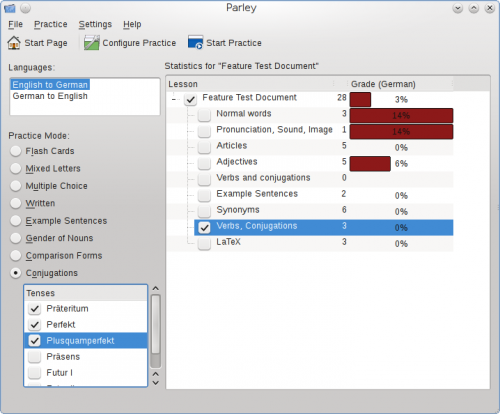
To practice conjugations choose the Conjugations mode and the tenses you wish to exercise.
In the document the conjugation forms of the words have to be entered in order to allow this practice mode to work. See Entering Conjugation Forms.
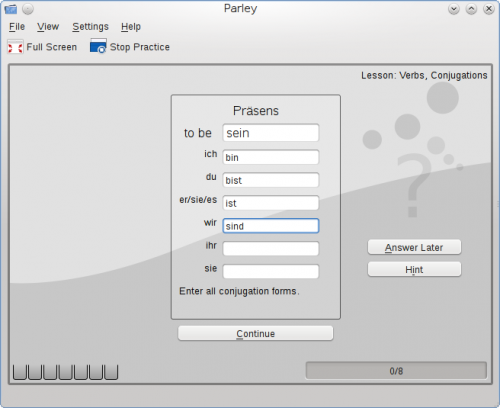
Then click on Start Practice. You are required to enter the correct conjugation forms according to the tense shown. To go ahead click on Continue
Vocabulary Editing
Setup
Before you start using a vocabulary collection or create your own it is helpful to understand the different elements in Parley and configure them accordingly. The next sections will guide you step by step through this process. There are several locations in Parley for settings:
- File→Properties This is the place for the "General Document Properties", meaning some information about your vocabulary collection and yourself.
- Edit→Languages Find here settings around the languages you use
- Practice→Configure Practice Here are settings how you practice your vocabulary. Depending on what you want to do during the specific learning session you change them on the fly.
- Settings→Configure Parley For more general and display settings
About the Collection
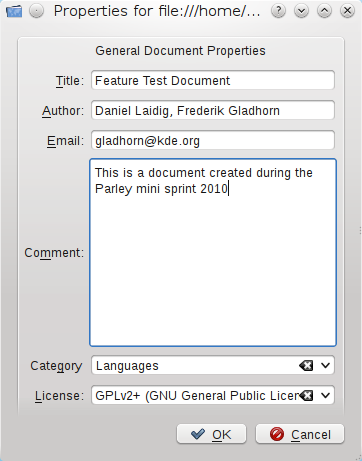
Entering meta data like a title and your contact info is relevant if you plan to make your collection available for other people. Use File→Properties to edit the data.
Vocabulary Columns
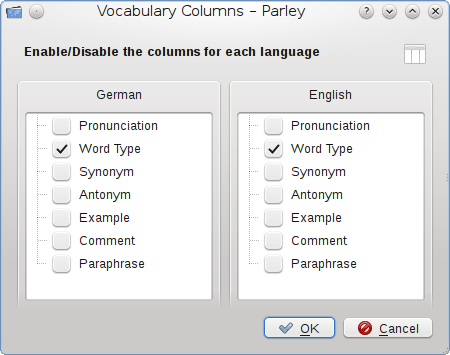
Depending on what your learning sessions are going to be about it can be relevant to have further Vocabulary Columns show up in your edit section. To choose these columns select View from the Menu bar and then Vocabulary Columns. There you can determine if the columns for Pronunciation, Word Type, Synonym, Antonym, Example, Comment and/or Paraphrase are to be shown.
Talen en grammatica
Set up some grammar details to let Parley help you. Use Edit→Languages to pull up the grammar dialog.
Articles in English are simply the which is the definite article and a as indefinite article. Most other languages have more articles which can be filled in at the articles tab.
For conjugations the personal pronouns should be filled out. Most languages do not have different conjugation forms for he/she/it, in that case, you should not check Male/Female have different conjugations! Simply enter the pronouns for all three forms. Personal Pronouns in English:
| Enkelvoud | Meervoud | |
| 1e persoon | ik | wij |
| 2e persoon | jij | jullie |
| 3e persoon | hij/zij/het | zij |
Tenses: Depending on the language, you can enter the right tenses which you later want to learn how to conjugate. Examples are: Simple Present, Simple Past, Future I etc.
Btw. by clicking on the Add New Language button you can add an additional language to your collection.
Let's Have a Closer Look at Spanish
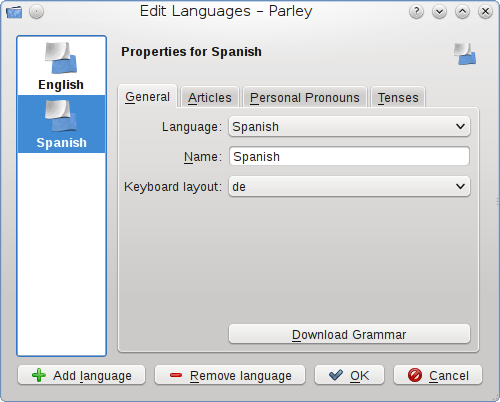
On the General tab the basic language settings, like here
- Taal = Spaans
- Naam = Spaans
- Toetsenbord = de (voor Duits)
You can leave Keyboard layout empty if you are not sure about what you are using. Parley will then simply take the standard layout of your computer.
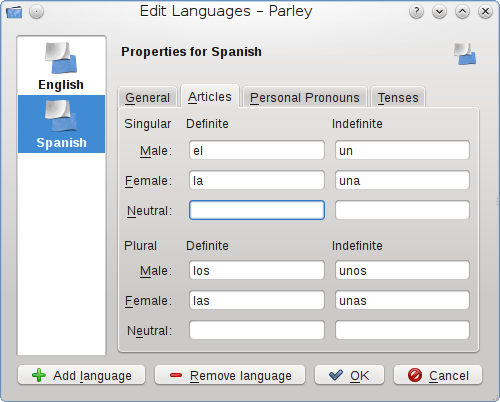
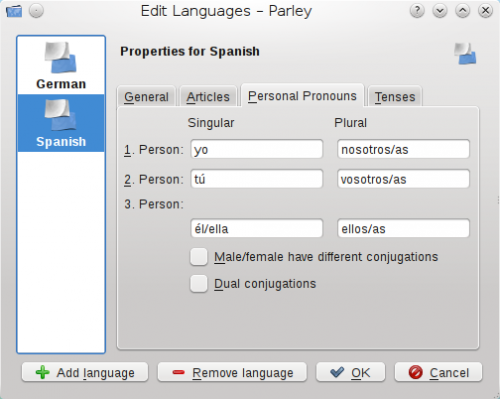
Let's have a look at the Articles tab: Spanish knows only male and female nouns, therefore the field Neutral remains empty.
Spanish Personal Pronouns have multiple forms for 3rd person singular and 1st, 2nd and 3rd person plural. To remain consistent, the possibilities should be entered with a / between the two forms.
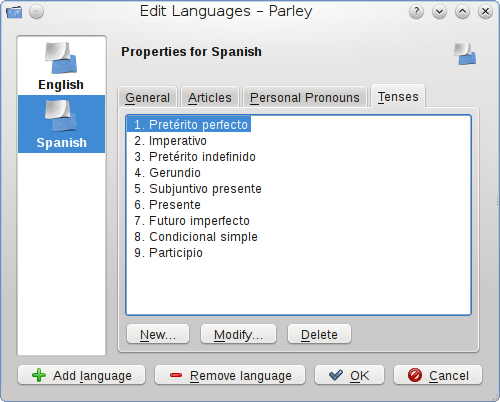
Under Tenses you will find the various tenses that are available for a verb form. You can add to the tenses that are already there by clicking on New, modify with Modify or in case something does not actually exist simply Delete the tense after having it selected.
Lessen
On the left you have a list of lessons. If you started a new collection, this list might be empty except for one lesson that was created by default for you.
If you cannot see the list of lessons, you might have to enable it in the View menu - View→Lessons.
The check boxes in front of the lesson name show which lessons are currently included in your practice. The number next to it is the number of words in the lesson.
Nieuwe les
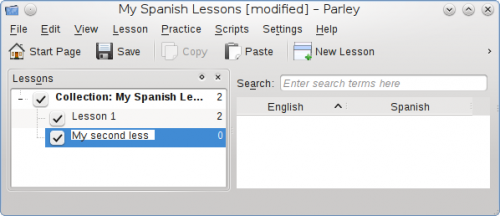
Add a new lesson: Select where this lesson belongs to, for example the collection My Spanish Lessons.
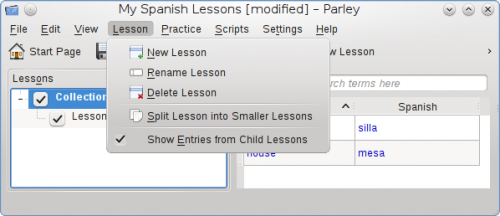
In the Lesson menu, select New Lesson.
Please make sure to select the right point in the tree structure of lessons before selecting New Lesson. In our case, wanting a Sub-Lesson of Collection: My Spanish Lessons it is exactly that one that needs to be selected before going ahead with New Lesson.
Moving, Renaming and Deleting Lessons
To change the name of a lesson, double click it, or right click on the lesson and choose Rename. You can also delete it this way (but you'll lose its contents also then).
If you don't like the arrangement of lessons, you can move a lesson with the mouse. You can drag it onto another lesson, then it will become a child of that lesson.
Splitting a Lesson
If your lessons grow too big, you can choose to split them up to make learning easier in small units. 20 words for a lesson is probably a good size. Right click a lesson, or use Lesson→Split Lesson into Smaller Lessons and the lesson will be separated into child lessons. You can choose to randomize the words that are put into the new lessons before assigning them, or to keep them in order.
What is Shown in the Table
Parley shows always the words of the lesson that you have currently selected. You can enable to see the words in sub-lessons contained in this lesson also. Use Lesson→Show Entries from Child Lessons to enable this. That way, you can browse all words by selecting the document lesson at the very top.
Word Types
Parley lets you associate word types with the words. Word types are for example: Nouns, Verbs, Adjectives and Adverbs.
In order to work with word types, enable the word type tool: View→Word Types
You can categorize the word types just like lessons.
If you want to see all words of a certain type - e.g. all nouns, simply select the noun category, and you will see only nouns in the table.
The easiest way to set the word type, is to drag and drop a word onto its type. You can even do this with multiple words at the same time.
Words or Sentences
Adding New Vocabulary
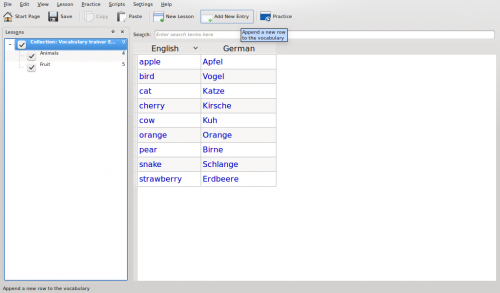
Use Add New Entry in the toolbar to add new words. You can start typing the word in the first language right away. By default Parley lets you enter another word when you press Enter in the last row, so you don't have to keep using the Add button. After entering the first word, press Tab to go to the next language.
Editing Words
If you want to replace a word, select its entry and start typing. To change the word instead, double click the entry and you can change the contents of the cell without losing the old word.
Press Tab to go to the next word. Enter leaves the editing mode. You can use the arrow keys to move around.
Synoniemen
Synonyms are hard to set up and do not always work really well. Here is how you set them up in any case:
- Use View→Synonyms to see the synonyms tool.
- Select first word (A) you want to make synonyms, then click on the second word (B)
- The button in the synonym tool changes it's text to A and B are synonyms
The words will now be shown as connected in the synonym tool and can be recognized as synonyms in the practice.
Afbeeldingen toevoegen
First show the image tool by selecting View in the menu bar and then clicking on Image. The checkbox in front of Image will then be activated. This will show up the picture section on the right hand side of the Parley screen
To add an image to a word make sure the word is highlighted. In the image section on the right hand side click on the Folder icon and choose the picture you wish to associate.
Adding Sound
First show the sound tool by selecting View in the menu bar and then clicking on Sound. This will show up the sound section on the right hand side of the Parley screen.
To add a sound to a word make sure the word is highlighted. In the sound section on the right hand side click on the Folder icon and choose the sound you wish to associate.
Entering Comparison Forms
In order to enter comparison forms, make sure the comparison forms tool is enabled. You open it with the menu: View→Comparison Forms
Selecteer eerst een woord dat een bijvoeglijk naamwoord of bijwoord is.
Klik daarna op de knop Bijvoeglijk naamwoord of Bijwoord in het hulpmiddel voor vergelijkingsvormen.
Voer de vergelijkingsvormen is.
Nu kunt u de modus Vergelijkingsvormen oefenen gebruiken.
Vervoegingen invoeren
In order to enter conjugation forms, make sure the conjugation forms tool is enabled. You open it with the menu: View→Conjugation
First select a word that is a verb.
Click the ... is a Verb button in the conjugations tool.
After selecting the right tense in the tense selection box, enter the conjugation forms.
The tenses can be configured for each language: Languages and Grammar.
Now you can use the Conjugations Practice mode.
Creating New Files
In this section we will describe how to create new files and this not only with the usual vocabulary learning part, but also for grammar exercises, mathematics etc.
New Collection: Vocabulary English-German
In this section we describe how you can create a vocabulary training file including pictures and sound. In a second stage we will also add adjectives and verbs. This is a very complete example and therefore quite long. Eventually you will not need all points for your project.
Since we wish to add sound-files and pictures, we should make sure that these will all be in one folder which for convenience is being called eng-deu. Our data file we create with Parley will be saved in the same folder. This will help a lot when you decide to share your work with others.
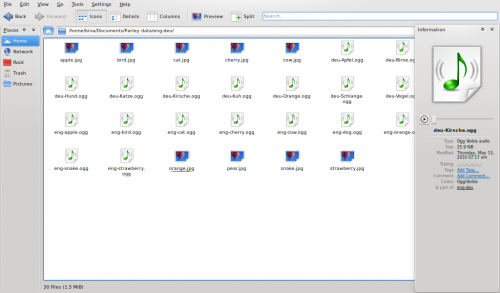
So this is what we have in terms of sound files and pictures:
Let's start from the Start Page which is shown once you launch Parley:
Click on the button Create a New Collection.
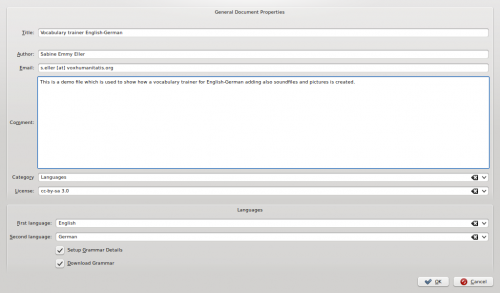
The General Document Properties page shows up which is being filled as follows (just adapt to what your file is about):
Next click on OK. The following screen asks you to set up the language details. Here we don't want to change anything and therefore we just click on OK.
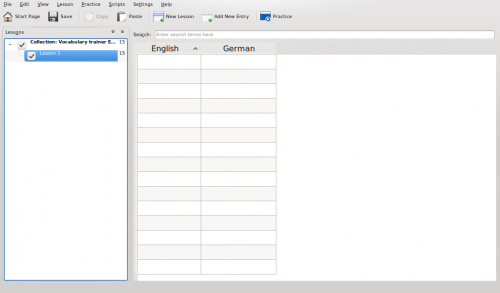
As a first step, let's create the vocabulary part. We will think about the addition of the sound files and pictures in a second stage. This is what the lesson looks like:
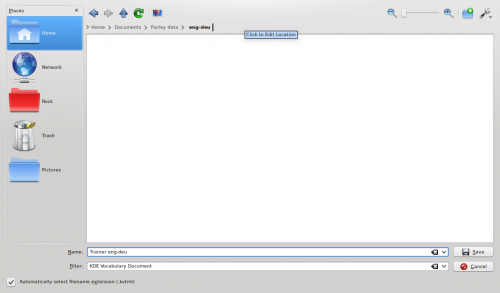
Before we do anything else, let's save the file to the folder with the pictures and sound-files. Click on the Save icon and select the folder using the navigation. In this example we will call the file Trainer eng-deu - once you entered the name just click on save.
If you now check your folder where the sound-files and pictures are, you will also find the file Trainer eng-deu.kvtml
Let's have a short look at the words we want to add: apple, bird, cat, cherry, cow, orange, pear, snake, strawberry. We have animals and fruit and therefore we decide to create two lessons that are called: Animals and Fruit.
We now rename Lesson 1 to Animals and then we add a lesson called Fruit. Right-click on Lesson 1 and choose Rename Lesson from the options shown. Now Lesson 1 is highlighted and you can simply overwrite it by typing in Animals. When done, hit the Enter key. Now right-click on Collection: Vocabulary trainer E... which is the root of the lesson tree and choose New Lesson from the options shown. In the new field write Fruit and hit the Enter key again.
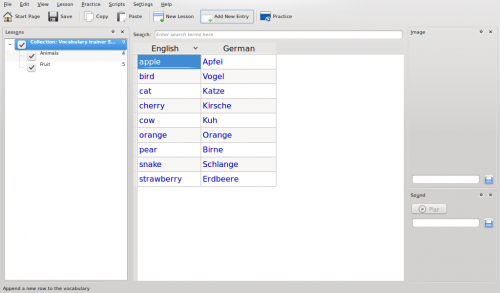
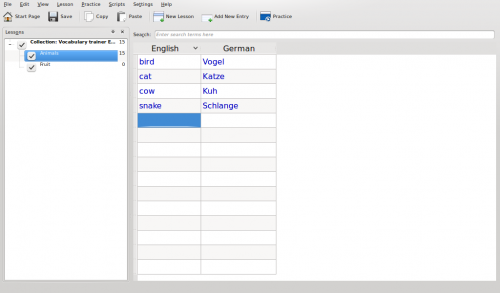
First, let's insert the animals. Please click on the lesson Animals and you will get an empty table you can fill in. Click with your mouse in the first field, and insert the source terms. Then, insert the target terms in the second column. Once you've inserted all 4 English animal names with their German translation the screen looks like this:
In our case we want only 4 entries in the animals lesson. There are many empty lines that should be deleted. To do this click on the first empty field, and keep the Shift key pressed while clicking on the last empty field. All lines to be deleted will be highlighted. Then, press the Del key and confirm the question Do you really want to delete the selected entries? by clicking on the Delete button.
Let's add the fruit terminology. Just click on the lesson named Fruit. This second lesson is completely empty. Since we have five fruit terms we need to add five lines. Therefore, press the Ins key five times, and then, just like before, we add our terminology.
Don't forget to save every now and then ...
A click on the root of our lesson tree Collection: Vocabulary trainer E... and Parley will show us all entries that are present in the two lessons:
Time to add sound and images. First of all we need to activate the Image and Sound views. From the menu bar select View and there click on Image and then Sound. Once these options are activated, two new sections are shown on the right hand side of the Parley editing screen: Image and Sound.
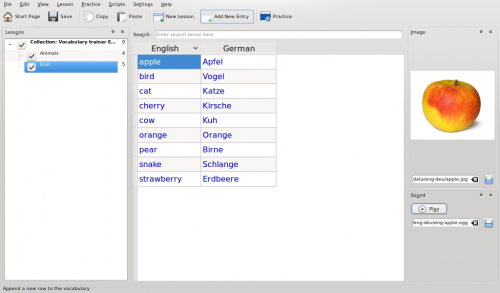
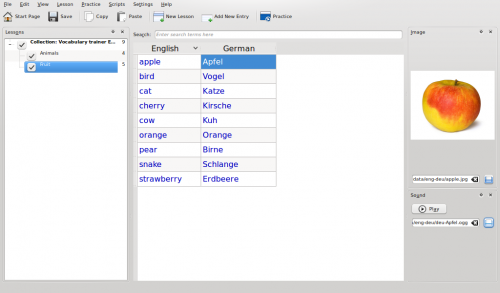
Select the English word apple by clicking on it. It is highlighted, so let's add the picture. In the image section on the right hand side click on the Folder icon and choose the picture you wish to associate.
To add the pronunciation for the English apple, do the same in the Sound section, selecting the relevant sound file.
By clicking on the Play button in the sound tool you can listen to the pronunciation.
The screen will then look like this:
Then click on the German translation Apfel. The field is now highlighted to indicate the selection. You will note the picture with the apple is associated also to the German term. In the sound section select the pronunciation, just like before.
Just go ahead like this for all terms.
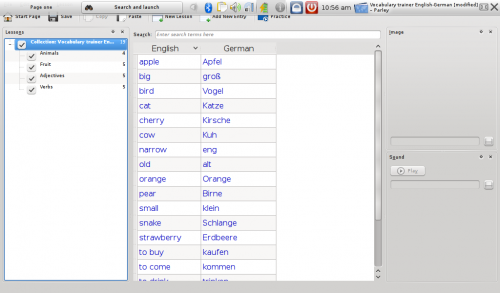
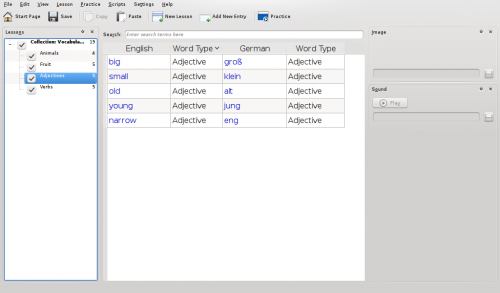
Time to add adjectives and verbs as lessons to our project. So just do as before with the lesson Fruit and create two new lessons: Adjectives and Verbs. Let's assume we will add big, small, old, young, narrow in the adjective lesson and to go, to come, to buy, to drink, to eat in the verb lesson.
The following shows a screenshot with all inserted terminology. Now, words are mixed and it would be nice to see what is a noun, adjective or verb.
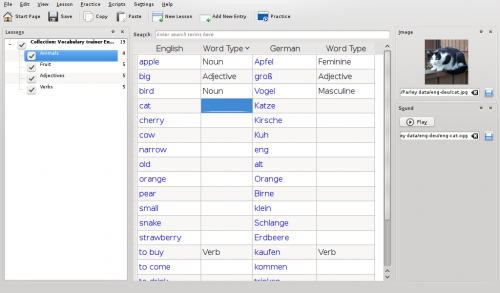
As the next step we are going to show the Word Type. Select View in the menu bar and then select Vocabulary Columns. We activate Word Type for English and German by clicking on the checkbox in front of Word Type. Then click on OK to accept the changes.
By clicking on the fields in the column Word Type you can select the word type and for those languages where nouns have a gender you can also select the Noun/Gender combination. Below the Word Type column with part of the selections already done.
Once we have specified all the word types, we will first consider Adjectives, adding Comparison Forms to them. So let's move to the Adjectives lesson only.
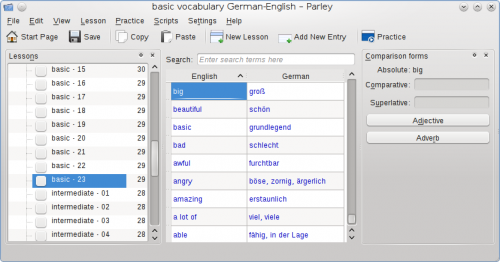
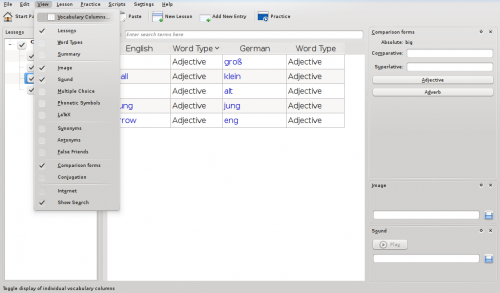
To show the Comparison Forms on the right hand side of the screen, select the View in the menu bar and activate the Comparison Forms checkbox.
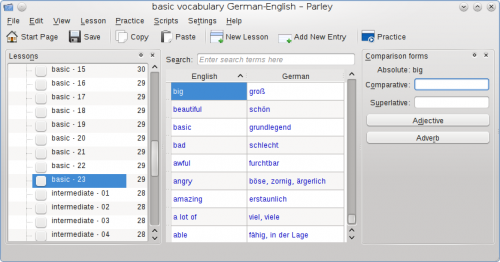
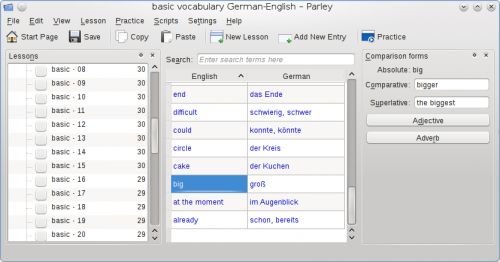
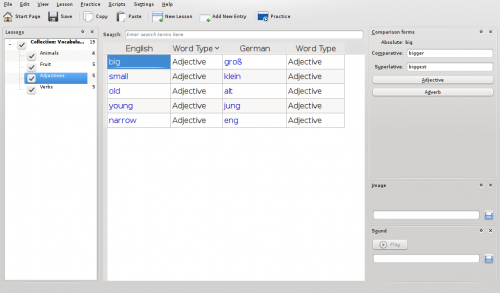
Edit the Comparison Forms by adding Comparative and Superlative to the single adjectives. First, click on the adjective for which you wish to add the comparison forms, in our case big, and add bigger and biggest. Then, continue with the next adjective to complete, until all comparison forms have been entered.
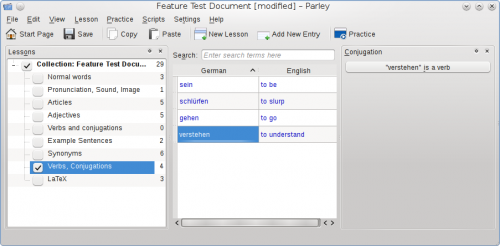
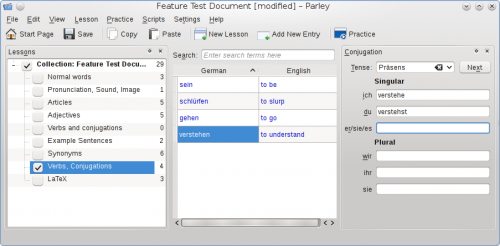
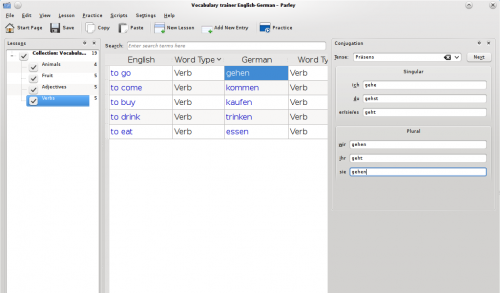
Finally, let's consider the Conjugation form of the Verbs. Select the Verbs lesson and then activate the conjugation section on the right hand side by selecting View from the menu bar and activating Conjugation. As an example we edit the present tense (Präsens) form of gehen. Please first select Präsens from the drop down menu and then add the verb forms.
This needs to be done for all verbs, and in all possible tenses.
Once you are done you can start to practice by clicking on the Practice button.
New Collection: Single Names and Collective Names
This exercise was created for the 3rd class of an Italian primary school. Pupils are supposed to connect single names with collective names, such as tree → woods
When you start Parley you get the start page, eventually also listing some previously used files (that you cannot see here).
Click on Create a New Collection and the following screen with empty or partly filled fields will show up:
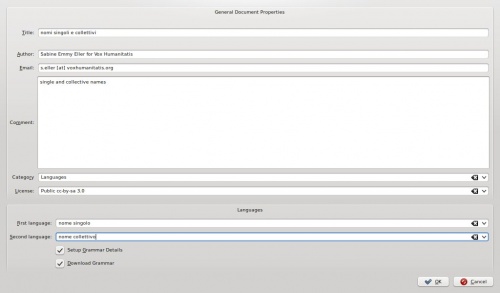
Fill in the title, here nomi singoli e collettivi, your name, e-mail address, in the Comment section you can write down a more detailed description, select your category and license. Then there we have something special: instead of indicating the first and second language, like it normally would happen, we added nome singolo (single name) and nome collettivo (collective name). Setup Grammar Details and Download Grammar are not needed here. In the screenshot they are still activated - please deactivate them by just clicking on the checkboxes. When you are done, please click on OK.
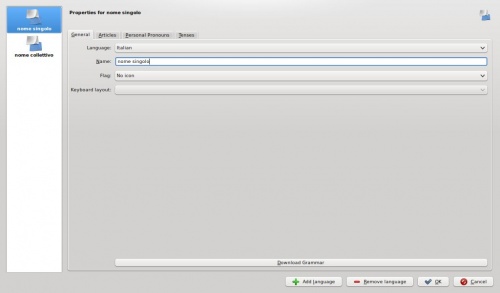
The Properties page for nome singolo comes up and here you see it already with the necessary changes made:
On the left hand side you can see where the data you are adding belongs to. nome singolo. Choose the language, here Italian and insert nome singolo in the following editable field. Then click on OK.
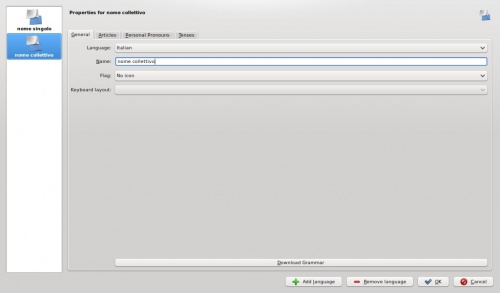
Now the Properties page for nome collettivo is shown:
Like before: choose Italian as language and insert nome collettivo and click on OK.
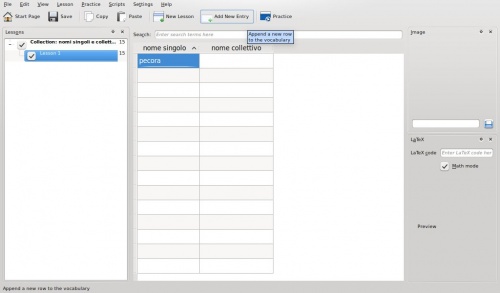
And now you can start to edit:
Just insert the nome singolo (single name) in the first column and the corresponding nome collettivo (collective name) in the second column.
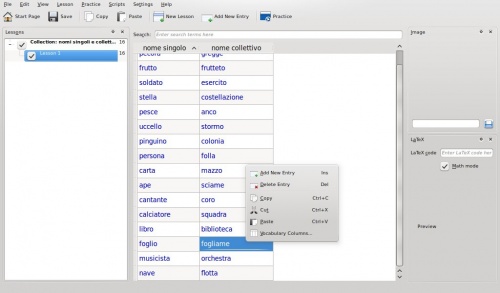
If the number of available fields is not enough, just right-click anywhere on the edit section and choose Add New Entry. Don't forget to save your file every now and then. When you have finished adding all entries you will want to see if Practice mode works fine. Well just click on the Practice button right above the edit section and the page with the practice settings comes up:
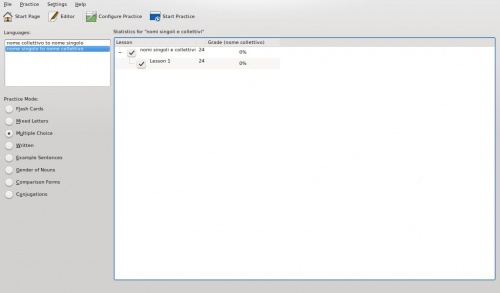
In this case Multiple Choice is a good option, but also Written will do fine. After choosing the Practice Mode just click on Start Practice and have fun.
Getting Additional Collections
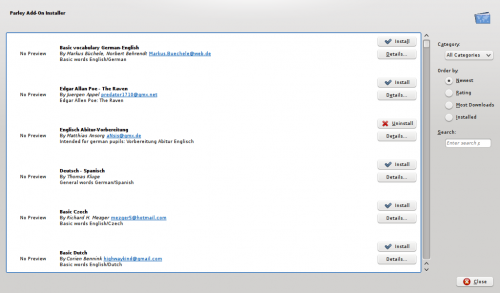
When you are on the Start Page you have the possibility to install Collections directly from the server, provided you are online. Just click on Download New Collections.
A window with many interesting collections opens. Just select what you find most interesting and click on Install. Then open the file to practice or edit.
Configure Parley
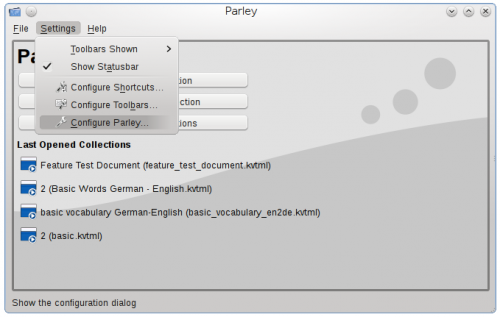
You can configure the appearance of Parley from the Start Page or from within the Edit section. Select Settings from the menu bar and then Configure Parley.
Theme Tab
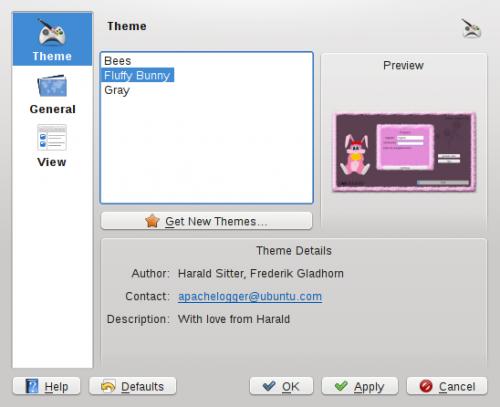
The configuration opens with the Theme section. This is the place where you can choose how Parley should greet you when launching it: an elegant Grey version, the all time busy Bees or the Fluffy Bunny for all those who love pink. Note that it could well be that Fluffy Bunny is not in your version: if you want it, read the following section.
Once you selected your preferred theme, click on OK.
Screenshots of the Bees and Fluffy Bunny themes:
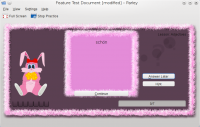
And if these are not enough: you can click on Get New Themes to find more themes. Over time we hope that more and more themes come along. If you know how to create SVG graphics (for example with Inkscape), you can create your own theme and share it with the world.
Additional themes can be found on kde-look.org
General Tab
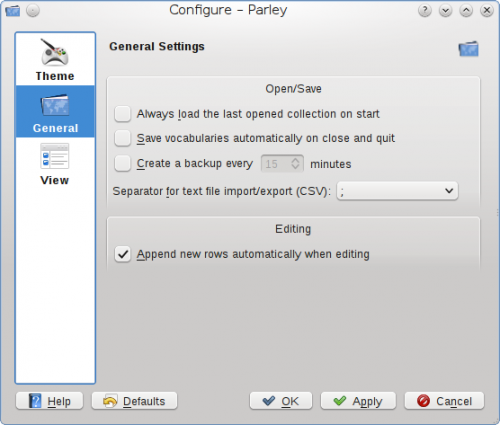
The General tab gives you some options regarding the behavior of Parley.
Open/Save options
Always load the last opened collection on start will immediately take you back to the vocabulary you were learning. Often you will use this together with the second option Save vocabularies automatically on close and quit because it's just handy not to have always answer the same question if changes (including learning results) should be changed or not. The option Create a backup every ... minutes can be very handy to help you save your work frequently. One less thing to think about.
Sometimes the import and/or export of text (CSV) files can be very handy and there you need the proper separator to elaborate data afterwards or to be able to read the data you got from somewhere else. Parley allows you to choose among various separators to make sure you can re-use your data.
Editing option
Here you can determine whether Parley automatically appends new rows while you are editing your vocabulary collection. This can be useful if you want to add many entries, before then splitting them up into various lessons. On the other hand, it can be good to have this option off if you want to work by creating lessons with a set maximum number of entries.
View Tab
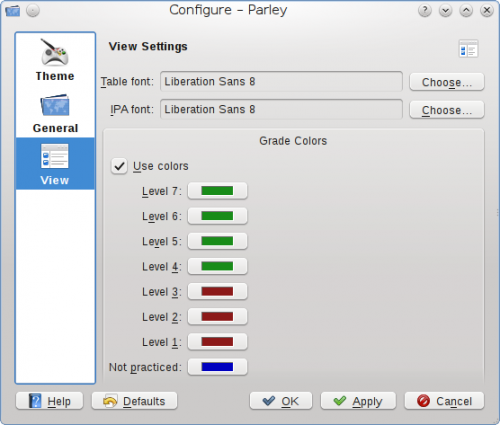
The View Settings allows you to change font and its size, very handy when you work on a netbook for example, and you can choose the Grade Colors you like best.
Parley op Windows
It is possible to install Parley together with other Educational software on Windows systems. For further info please visit this page.
The steps to be followed in short:
Download het installatieprogramma hier.
Then follow the installation procedure like for any other Windows software - screenshots are here.
When you come to the Package selection screen, select the language(s) you wish the software to be available in and the package - in this case kdeedu. If you don't select any language you will automatically get English.
Then finish the installation process by clicking on Next, following the coming screens just like you normally do with other Windows software.
Please note that the Parley team does not deal with the Windows-Installer and therefore we cannot easily answer your questions. Should you have difficulties, please contact the KDE-Windows team directly. You can do so by subscribing to the mailing list here or join them on IRC at irc://freenode.net Channel: #kde-windows.
Notes For Advanced Users
Using Parley for Exam Preparation
- what to bear in mind with long questions / answers?
- how to start with a new Exam
- example 1 with capitals
- example 2 with sentence
You can upload your files and share them with others. Use the upload button from the file menu in the Editor within Parley.
If that does not work, you can also visit kde-files.org. In either case the files will show up in the Download New Collections dialog on the Start Page.
Bestandsformaat
If you are interested in the file formats that Parley can read and stores the vocabulary collections in, visit: Parley File Formats on userbase.kde.org


