Archive:Kdenlive/Manual/Timeline/Right Click Menu/ru: Difference between revisions
Appearance
No edit summary |
Updating to match new version of source page |
||
| (100 intermediate revisions by 3 users not shown) | |||
| Line 1: | Line 1: | ||
<languages/> | <languages/> | ||
=== Клип на | <span id="Clip_in_Timeline_-_Right-Click_Menu"></span> | ||
==== Клип на монтажном столе - Контекстное меню ==== | |||
Это контекстное меню, которое появляется при щелчке правой кнопкой мыши, по клипу на монтажном столе. При щелчке правой кнопкой мыши в пустом месте монтажного стола появится другое меню. | |||
[[File: | [[File:Kdenlive_Right_click_timeline_clip_ru.png]] | ||
<menuchoice> | <div class="mw-translate-fuzzy"> | ||
* <menuchoice>Клип в дереве проекта</menuchoice> приведёт к тому, что выбранный клип будет выделен в дереве проекта. | |||
* <menuchoice>Удалить выбранный элемент</menuchoice> удалит выбранный клип (группу клипов). | |||
</div> | |||
<menuchoice> | * <menuchoice>Paste Effects</menuchoice> will paste only the effects of the last copied clip to the selected clip. See [[Special:myLanguage/Kdenlive/Manual/Edit_Menu/Paste_Effects|Paste Effects]]. | ||
* <menuchoice>Delete Effects</menuchoice> will remove all effects from the selected clip. | |||
* | <div class="mw-translate-fuzzy"> | ||
* Сгрупировать клипы - См. [[Special:myLanguage/Kdenlive/Manual/Timeline/Grouping#Groupin| Группировка]] | |||
</div> | |||
<div class="mw-translate-fuzzy"> | |||
* Разгруппировать клипы - См. [[Special:myLanguage/Kdenlive/Manual/Timeline/Grouping#Groupin| Разгруппировка клипов]] | |||
</div> | |||
* | * <menuchoice>Edit Duration</menuchoice> - will open the Duration Dialog and will allow you to adjust the position of the clip int he timeline, what time point of the source clip to start on the timeline, the duration of the clip, and what time point of the source clip to end on the timeline. Note that Kdenlive will automatically adjust co-related values. | ||
* | [[File:kdenlive_timeline_current_clip_duration02.png]] | ||
* <menuchoice>Restore audio</menuchoice> will add any audio track that is part of the original clip to the timeline | |||
[[File:Kdenlive-restore-audio.gif|center]] | |||
* <menuchoice>Disable clip</menuchoice> will disable the clip so it will not render in the project monitor or in a final video render. | |||
* <menuchoice>Extract clip</menuchoice> will remove the clip from the timeline and the space it occupied. | |||
[[File:Kdenlive-extract clip.gif|thumb|center]] | |||
* <menuchoice>Save timeline zone to bin</menuchoice> will take the selected timeline zone and add markers to your clips in the project bin. | |||
[[File:Kdenlive-timeline-righ-click-markersmenu.png|thumb|center]] | |||
* The markers sub-menu allows you to add, edit and remove markers from your clips that are displayed on the timeline. These markers will move with the clips. See [[Special:myLanguage/Kdenlive/Manual/Clip_Menu/Markers|Markers]]. | |||
* <menuchoice>Создать звуковую привязку</menuchoice> и <menuchoice>Выровнять звук по привязке</menuchoice> используются для выравнивания двух клипов на разных дорожках на монтажном столе на основе звука в дорожках. Это полезно, если две камеры записали одну и ту же сцену одновременно. '''Kdenlive''' может использовать практически идентичную звуковую дорожку для выравнивания двух клипов. | |||
*: Чтобы использовать эту функцию: | |||
*:* Выберите клип, относительно которого вы хотели бы выровнять. | |||
*:* Щёлкните правой кнопкой мыши, выберите <menuchoice>Создать звуковую привязку</menuchoice>. | |||
*:* Выберите все клипы, которые хотели бы выровнять. | |||
*:* Щёлкните правой кнопкой мыши и выберите <menuchoice>Выровнять звук по привязке</menuchoice>. | |||
* <menuchoice>Change speed</menuchoice> will open the change speed dialog that will allow you to increase or decrease the playback speed of a clip, allow you to play the clip in reverse, and will enable / disable pitch compensation for the audio on a speed-adjusted clip. | |||
[[File:Kdenlive-change speed dialog.png|thumb|center]] | |||
* <menuchoice>Clip in project bin</menuchoice> will highlight the selected clip in the project bin. | |||
<div class="mw-translate-fuzzy"> | |||
* <menuchoice>Разрезать клип</menuchoice>. Выбор этого параметра приведёт к тому, что выбранный клип будет разрезан по [[Special:myLanguage/Kdenlive/Manual/Timeline#Timeline_Cursor.2FPosition_Carat | курсору монтажного стола]]. См. Также [[Special:myLanguage/Kdenlive/Manual/Timeline/Editing#Cutting_a_clip| Резка клипа]]. | |||
</div> | |||
<div class="mw-translate-fuzzy"> | |||
* [[Special:myLanguage/Kdenlive/Manual/Transitions|Добавить переход]]. | |||
</div> | |||
<div class="mw-translate-fuzzy"> | |||
* [[Special:myLanguage/Kdenlive/Manual/Effects|Добавить эффект]]. | |||
* Выключить клип - звук и видео в клипе будут выключены. | |||
</div> | |||
<span id="Empty_Space_in_Timeline_-_Right-Click_Menu"></span> | |||
==== Пустое место на монтажном столе - Контекстное меню ==== | |||
Другое меню появляется если щёлкнуть в пустом месте монтажного стола. | |||
[[File:Kdenlive_Right_click_in_timeline_space_ru.png]] | |||
* <menuchoice>Paste</menuchoice> will paste a clip from the clipboard into the timeline | |||
* <menuchoice>Insert Space</menuchoice> will open the Insert Space dialog and will allow you to insert blank space in the timeline in a single track. | |||
* <menuchoice>Remove Space</menuchoice> will remove all space between clips on the track. | |||
* <menuchoice>Remove Space in All Tracks</menuchoice> will remove space between clips on all the tracks. | |||
* <menuchoice>Add/Remove Guide</menuchoice> will add a guide to the timeline. | |||
* <menuchoice>Edit Guide</menuchoice> will allow you to edit the guide label. | |||
* <menuchoice>Go to Guide</menuchoice> will pop-up a sub-menu with a list of your guides and will move the timeline position marker to that guide. | |||
* <menuchoice>Insert composition</menuchoice> will open a sub-menu to allow you to quickly add the [[Special:myLanguage/Kdenlive/Manual/Transitions/CompositeAndTransform|composite and transform]] or the [[Special:myLangauge/Kdenlive/Manual/Transitions/Wipe|Wipe]] composition | |||
{{Prevnext2 | {{Prevnext2 | ||
| prevpage=Special:MyLanguage/Kdenlive/Manual/Timeline/Guides | nextpage=Special:MyLanguage/Kdenlive/Manual/ | | prevpage=Special:MyLanguage/Kdenlive/Manual/Timeline/Guides | nextpage=Special:MyLanguage/Kdenlive/Manual/Effects_And_Transitions | ||
| prevtext= | | prevtext=Направляющие | nexttext=Алфавитный указатель Эффектов и Переходов | ||
| index=Special:MyLanguage/Kdenlive/Manual | indextext= | | index=Special:MyLanguage/Kdenlive/Manual | indextext=Вернуться к оглавлению | ||
}} | }} | ||
[[Category:Kdenlive]] | [[Category:Kdenlive]] | ||
Latest revision as of 13:08, 15 August 2023
Клип на монтажном столе - Контекстное меню
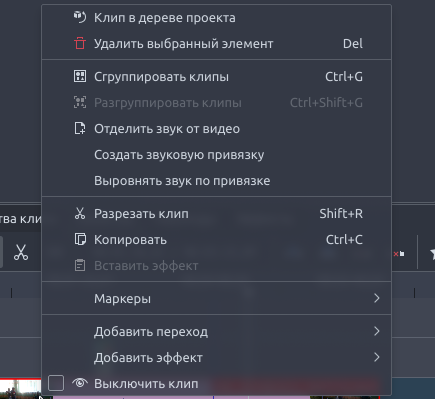
Это контекстное меню, которое появляется при щелчке правой кнопкой мыши, по клипу на монтажном столе. При щелчке правой кнопкой мыши в пустом месте монтажного стола появится другое меню.
- приведёт к тому, что выбранный клип будет выделен в дереве проекта.
- удалит выбранный клип (группу клипов).
- will paste only the effects of the last copied clip to the selected clip. See Paste Effects.
- will remove all effects from the selected clip.
- Сгрупировать клипы - См. Группировка
- Разгруппировать клипы - См. Разгруппировка клипов
- - will open the Duration Dialog and will allow you to adjust the position of the clip int he timeline, what time point of the source clip to start on the timeline, the duration of the clip, and what time point of the source clip to end on the timeline. Note that Kdenlive will automatically adjust co-related values.
- will add any audio track that is part of the original clip to the timeline
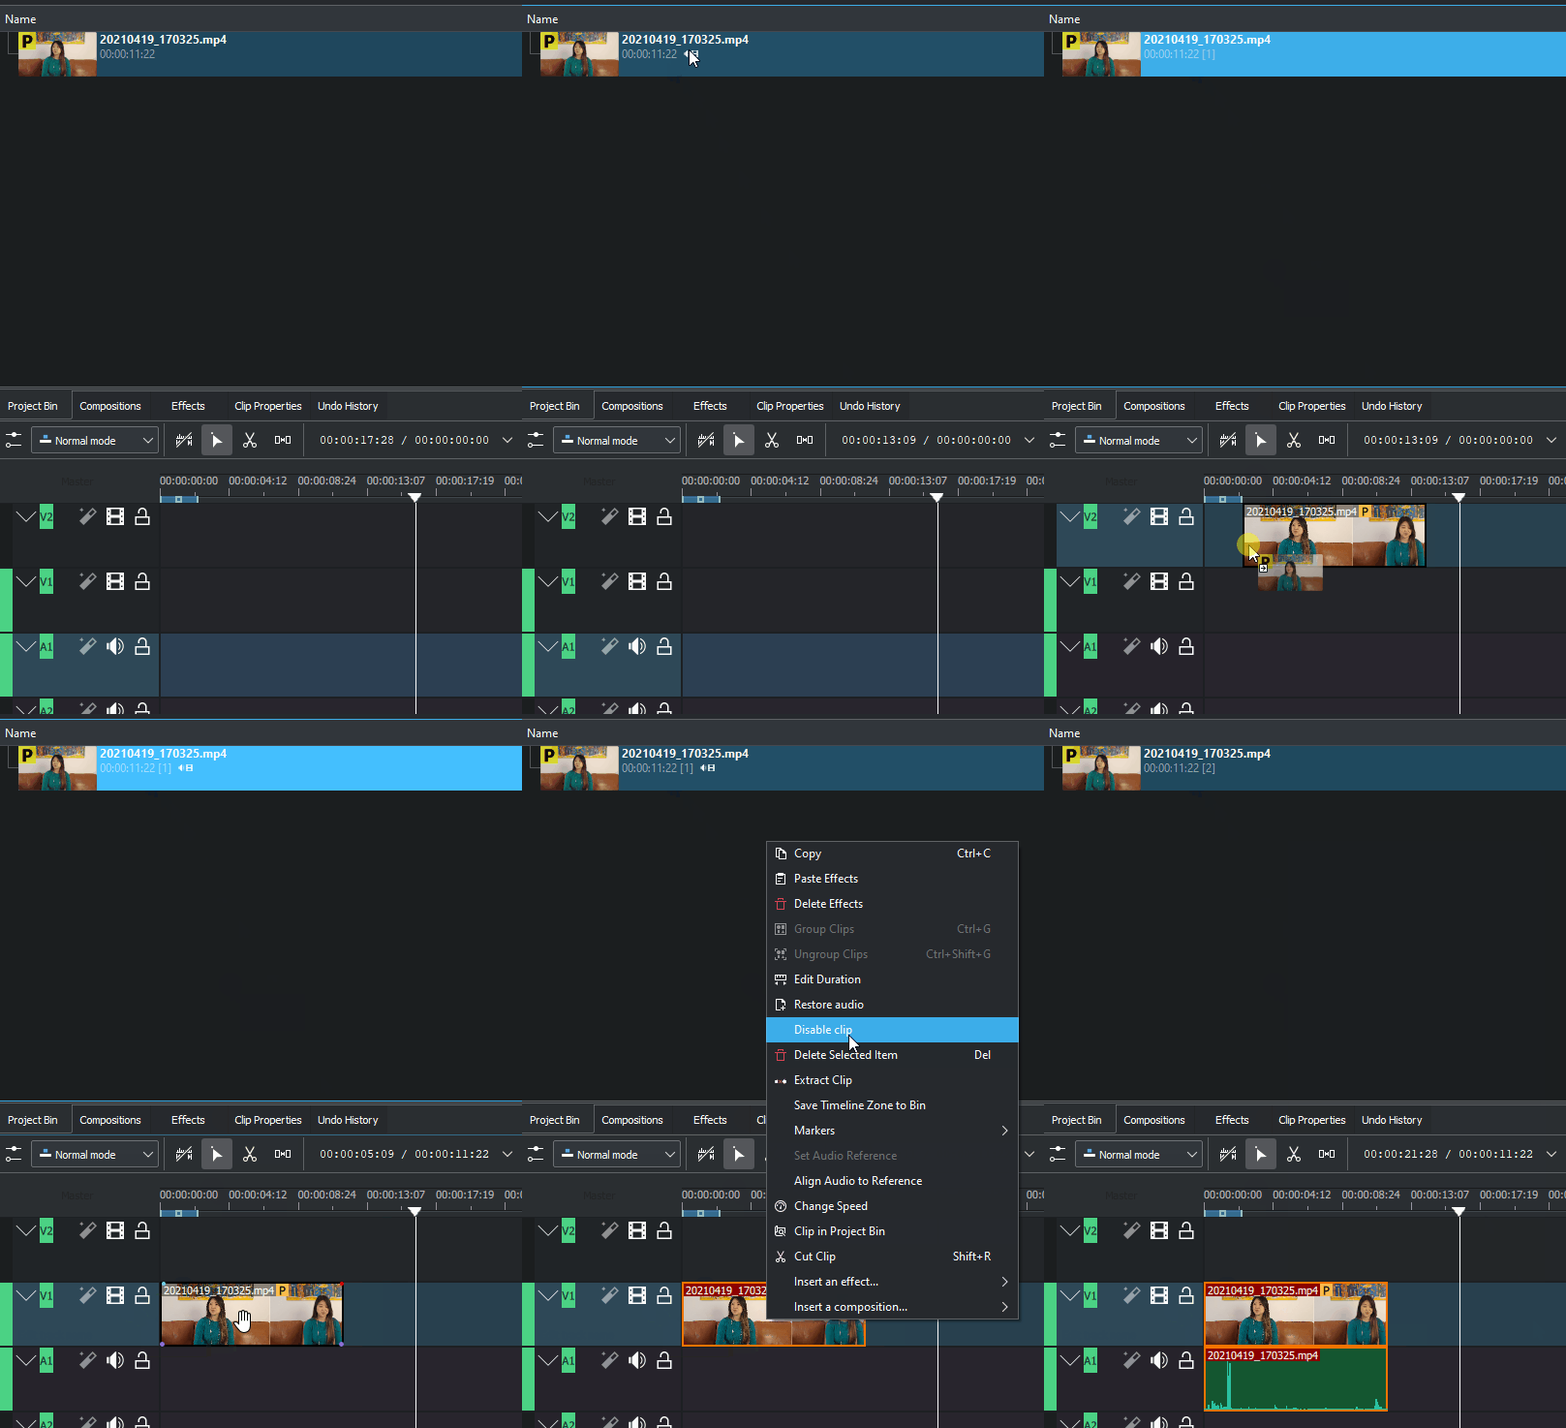
- will disable the clip so it will not render in the project monitor or in a final video render.
- will remove the clip from the timeline and the space it occupied.
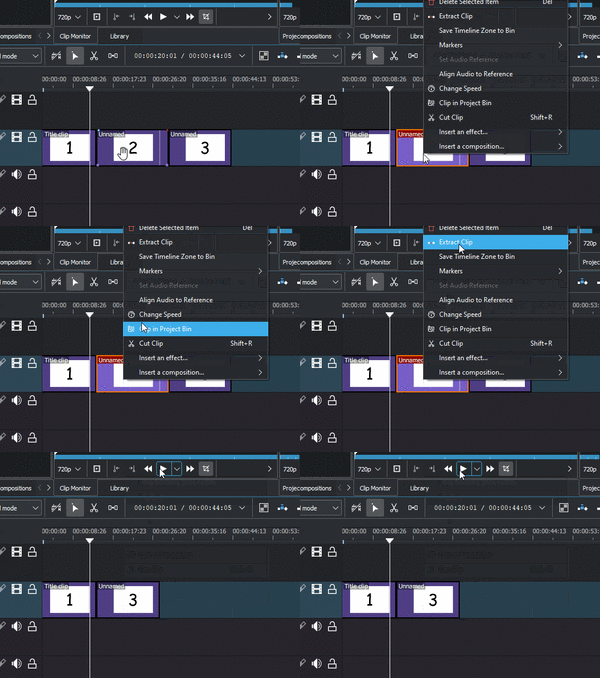
- will take the selected timeline zone and add markers to your clips in the project bin.
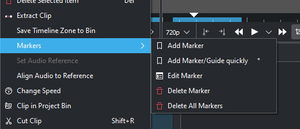
- The markers sub-menu allows you to add, edit and remove markers from your clips that are displayed on the timeline. These markers will move with the clips. See Markers.
- и используются для выравнивания двух клипов на разных дорожках на монтажном столе на основе звука в дорожках. Это полезно, если две камеры записали одну и ту же сцену одновременно. Kdenlive может использовать практически идентичную звуковую дорожку для выравнивания двух клипов.
- Чтобы использовать эту функцию:
- Выберите клип, относительно которого вы хотели бы выровнять.
- Щёлкните правой кнопкой мыши, выберите .
- Выберите все клипы, которые хотели бы выровнять.
- Щёлкните правой кнопкой мыши и выберите .
- Чтобы использовать эту функцию:
- will open the change speed dialog that will allow you to increase or decrease the playback speed of a clip, allow you to play the clip in reverse, and will enable / disable pitch compensation for the audio on a speed-adjusted clip.
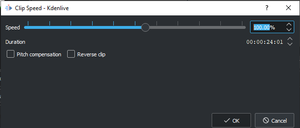
- will highlight the selected clip in the project bin.
- . Выбор этого параметра приведёт к тому, что выбранный клип будет разрезан по курсору монтажного стола. См. Также Резка клипа.
- Добавить эффект.
- Выключить клип - звук и видео в клипе будут выключены.
Пустое место на монтажном столе - Контекстное меню
Другое меню появляется если щёлкнуть в пустом месте монтажного стола.
- will paste a clip from the clipboard into the timeline
- will open the Insert Space dialog and will allow you to insert blank space in the timeline in a single track.
- will remove all space between clips on the track.
- will remove space between clips on all the tracks.
- will add a guide to the timeline.
- will allow you to edit the guide label.
- will pop-up a sub-menu with a list of your guides and will move the timeline position marker to that guide.
- will open a sub-menu to allow you to quickly add the composite and transform or the Wipe composition

