KMail/Import Options: Difference between revisions
m menuchoice tags |
m Ognarb moved page Kmail/Import Options to KMail/Import Options without leaving a redirect: parent page also use KMail instead of Kmail |
||
| (20 intermediate revisions by 4 users not shown) | |||
| Line 1: | Line 1: | ||
<languages /> | <languages /> | ||
<translate> | <translate> | ||
=== | ==Import Wizard== <!--T:3--> | ||
<!--T:50--> | |||
Import Wizard allows to import emails, settings, addressbook and calendar data in your user account from the following mailers: | Import Wizard allows to import emails, settings, addressbook and calendar data in your user account from the following mailers: | ||
<!--T:11--> | |||
*Trojitá | *Trojitá | ||
<!--T:12--> | |||
*Evolution 1.x - 3.x | *Evolution 1.x - 3.x | ||
<!--T:13--> | |||
*OS X Mail | *OS X Mail | ||
<!--T:14--> | |||
*Opera | *Opera | ||
<!--T:15--> | |||
*Sylpheed | *Sylpheed | ||
<!--T:16--> | |||
*Thunderbird/Mozilla | *Thunderbird/Mozilla | ||
<!--T:17--> | |||
*The Bat! | *The Bat! | ||
<!--T:18--> | |||
*Outlook Express | *Outlook Express | ||
<!--T:19--> | |||
*Balsa | *Balsa | ||
<!--T:20--> | |||
*Pegasus-Mail | *Pegasus-Mail | ||
<!--T:21--> | |||
*Claws Mail | *Claws Mail | ||
<!--T:4--> | |||
You can start Import Wizard can either from the application launcher or from '''KMail''' with | You can start Import Wizard can either from the application launcher or from '''KMail''' with | ||
* <menuchoice>Tools → Import Wizard...</menuchoice></ | * <menuchoice>Tools → Import Wizard...</menuchoice> | ||
<!--T:5--> | |||
[[Image:Kmail_importwizard.png|center|thumb|Import Wizard|300px]] | |||
<!--T:6--> | |||
At startup the import wizard will detect all supported email applications, and list them for you in the window. | |||
<!--T:48--> | |||
{{Warning|Close '''KMail''' before importing data. Some plugins will modify '''KMail's''' configuration file.}} | |||
<!--T:41--> | |||
Select the email application you want to import from, and click the <menuchoice>Next</menuchoice> button. | |||
<!--T:42--> | |||
The wizard will then ask if you want to import everything, or give you options to select which types of materials you want to import. | |||
< | <!--T:43--> | ||
Depending on your selections in the materials to import screen, you will see one or more of the following screens: | Depending on your selections in the materials to import screen, you will see one or more of the following screens: | ||
<!--T:22--> | |||
*To Import mail messages, you need to select the folder you want your email messages to import into. Once selected, click the <menuchoice>Import Mails</menuchoice> button. Once the progress bar reaches 100%, click the <menuchoice>Next</menuchoice> button, or the <menuchoice>Finish</menuchoice> button, if this was your last material selection. | |||
*<menuchoice> | <!--T:23--> | ||
*To Import mail filters, click the <menuchoice>Import Filters</menuchoice> button and it will import any filters it found, once finished click the <menuchoice>Next</menuchoice> button, or the <menuchoice>Finish</menuchoice> button, if this was your last material selection. | |||
< | <!--T:24--> | ||
*To Import settings, click the <menuchoice>Import Settings</menuchoice> button. The wizard will ask you some questions e.g. which folder to use for account folders that do not exist. The wizard will also create your identity. Once complete, click the <menuchoice>Next</menuchoice> button, or the <menuchoice>Finish</menuchoice> button, if this was your last material selection. | |||
* | <!--T:25--> | ||
*To Import address books, click the <menuchoice>Import address book</menuchoice> button, and it will import all address books it finds. Once complete, click the <menuchoice>Next</menuchoice> button.<br /> | |||
Click the <menuchoice>Finish</menuchoice> button to complete and exit the wizard. If at any time you wish to end the wizard, you can click the <menuchoice>Cancel</menuchoice> button. | |||
<!--T:53--> | |||
{{Note|By clicking on the <menuchoice>Manual Selection</menuchoice> checkbox, you can access an advanced version of the ImportWizard.}} | |||
== More Information == <!--T:54--> | |||
<!--T:55--> | |||
* [https://docs.kde.org/trunk5/en/pim/importwizard/index.html KDE official documentation] | |||
<!--T:10--> | |||
[[Category:Office]]</translate> | [[Category:Office]]</translate> | ||
Latest revision as of 17:23, 20 January 2019
Import Wizard
Import Wizard allows to import emails, settings, addressbook and calendar data in your user account from the following mailers:
- Trojitá
- Evolution 1.x - 3.x
- OS X Mail
- Opera
- Sylpheed
- Thunderbird/Mozilla
- The Bat!
- Outlook Express
- Balsa
- Pegasus-Mail
- Claws Mail
You can start Import Wizard can either from the application launcher or from KMail with

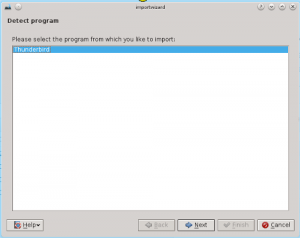
At startup the import wizard will detect all supported email applications, and list them for you in the window.
Select the email application you want to import from, and click the button.
The wizard will then ask if you want to import everything, or give you options to select which types of materials you want to import.
Depending on your selections in the materials to import screen, you will see one or more of the following screens:
- To Import mail messages, you need to select the folder you want your email messages to import into. Once selected, click the button. Once the progress bar reaches 100%, click the button, or the button, if this was your last material selection.
- To Import mail filters, click the button and it will import any filters it found, once finished click the button, or the button, if this was your last material selection.
- To Import settings, click the button. The wizard will ask you some questions e.g. which folder to use for account folders that do not exist. The wizard will also create your identity. Once complete, click the button, or the button, if this was your last material selection.
- To Import address books, click the button, and it will import all address books it finds. Once complete, click the button.
Click the button to complete and exit the wizard. If at any time you wish to end the wizard, you can click the button.


