Toolbox/zh-cn: Difference between revisions
(Created page with "{{Remember/zh-cn|2=Workaround|1=在符号列表中应该避免空行和子列表,如果真的使用了,可以有一个方法将它们分割到多个翻译单元。}}") |
(Updating to match new version of source page) |
||
| (16 intermediate revisions by 2 users not shown) | |||
| Line 15: | Line 15: | ||
===使用标题=== | ===使用标题=== | ||
<div class="mw-translate-fuzzy"> | |||
每个标题独占以行,以两个或更多 '=' 字符开始和结束。页面有多个标题时,会自动创建目录。'=' 字符的个数决定目录中的层级。应该使用 '==标题==', '===次标题===', '====三级标题===='这样的层级。请避免使用单个 '=' ,这个层级作为 wiki 页面的名称使用;例如 "{{PAGENAME}}" 会成为页面的标题。 | 每个标题独占以行,以两个或更多 '=' 字符开始和结束。页面有多个标题时,会自动创建目录。'=' 字符的个数决定目录中的层级。应该使用 '==标题==', '===次标题===', '====三级标题===='这样的层级。请避免使用单个 '=' ,这个层级作为 wiki 页面的名称使用;例如 "{{PAGENAME}}" 会成为页面的标题。 | ||
</div> | |||
===使用'''粗体'''和''斜体''=== | ===使用'''粗体'''和''斜体''=== | ||
| Line 29: | Line 31: | ||
为了正确显示代码段,我们提供了辅助模板。具体使用方式请阅读[[Typographical_Guidelines|排版指导方针]]。 | 为了正确显示代码段,我们提供了辅助模板。具体使用方式请阅读[[Typographical_Guidelines|排版指导方针]]。 | ||
< | <div class="mw-translate-fuzzy"> | ||
===添加代码段=== | ===添加代码段=== | ||
</ | </div> | ||
===添加缩进=== | ===添加缩进=== | ||
| Line 121: | Line 123: | ||
{{Remember/zh-cn|2=Workaround|1=在符号列表中应该避免空行和子列表,如果真的使用了,可以有一个方法将它们分割到多个翻译单元。}} | {{Remember/zh-cn|2=Workaround|1=在符号列表中应该避免空行和子列表,如果真的使用了,可以有一个方法将它们分割到多个翻译单元。}} | ||
要将每个符号列表和子列表放入单独的翻译单元,可以使用下面形式: | |||
{{Input|1=<nowiki>* First bullet </translate > | {{Input|1=<nowiki>* First bullet </translate > | ||
| Line 133: | Line 135: | ||
** And so on</nowiki>}} | ** And so on</nowiki>}} | ||
显示为: | |||
* First bullet | * First bullet | ||
| Line 141: | Line 143: | ||
** And so on | ** And so on | ||
这个方法同样适用于其它列表。 | |||
如果希望同一项中有多个部分,可以用下面方法把每个部分放入单独的翻译单元: | |||
{{Input|1=<nowiki>* First bullet </translate > | {{Input|1=<nowiki>* First bullet </translate > | ||
| Line 152: | Line 154: | ||
* And so on</nowiki>}} | * And so on</nowiki>}} | ||
显示为: | |||
* First bullet | * First bullet | ||
| Line 177: | Line 179: | ||
: They have roots and feed upon ground water and sun. | : They have roots and feed upon ground water and sun. | ||
{{Note|1=As | {{Note|1=As always, please keep each item in a section of its own; it helps translators a lot.}} | ||
===添加链接=== | ===添加链接=== | ||
| Line 188: | Line 190: | ||
[[Special:myLanguage/PageLayout|这个页面]] | [[Special:myLanguage/PageLayout|这个页面]] | ||
Internal links to subsections of a page should look like this {{Input|1=<nowiki>[[Special:myLanguage/Tasks_and_Tools#Working_with_Languages|...]]</nowiki>}}With this kind of link it is very important, that the page you link to | Internal links to subsections of a page use character '#' (hash) and should look like this {{Input|1=<nowiki>[[Special:myLanguage/Tasks_and_Tools#Working_with_Languages|...]]</nowiki>}}With this kind of link it is very important, that the page you link to declares the reference anchor. If the anchor contains space characters, replace them by character '_' (underscore) when calling the reference. If the reference is found, the section will be automatically displayed by your browser (if it manages anchors). If it is not the case, you will have to go down through the page to find the referenced section. | ||
External links are given as the URL and a text separated by a space and delimited by single square brackets as in {{Input|1=<nowiki>[https://en.wikipedia.org/wiki/KDE KDE's Wikipedia page]</nowiki>}} which gives [https://en.wikipedia.org/wiki/KDE KDE's Wikipedia page]. | |||
=== Anchor declaration === | |||
Anchor declaration must be done immediatly BEFORE the referenced section, and followed by a blank line separating the anchor and its headline. In the following example just copy in the ID value, the title of associated section. It should look like this: | |||
{{Input|1=<nowiki></translate><span id="Working with Languages"></span> <translate></nowiki>}} | |||
If the page containing the section that you link to is not yet marked up for translation, you should omit the <nowiki></translate > and <translate ></nowiki> tags. | If the page containing the section that you link to is not yet marked up for translation, you should omit the <nowiki></translate > and <translate ></nowiki> tags. | ||
| Line 233: | Line 242: | ||
===添加单幅图片,居中=== | ===添加单幅图片,居中=== | ||
<div class="mw-translate-fuzzy"> | |||
{{Input|1=<nowiki>[[Image:KMail-kde4.png|250px|center]]</nowiki>}} | {{Input|1=<nowiki>[[Image:KMail-kde4.png|250px|center]]</nowiki>}} | ||
</div> | |||
注意你能修改图片的位置,但默认位置是左侧(left)。图片的大小依赖于具体情况,但对于截图,我推荐时不小于250px以及不大于500px。 | 注意你能修改图片的位置,但默认位置是左侧(left)。图片的大小依赖于具体情况,但对于截图,我推荐时不小于250px以及不大于500px。 | ||
Also note that Image: and File: are synonyms. | Also note that <code>Image:</code> and <code>File:</code> are synonyms. | ||
So that <code><nowiki>[[Image:KMail-kde4.png]]</nowiki></code> is the same as <code><nowiki>[[File:KMail-kde4.png]]</nowiki></code> | So that <code><nowiki>[[Image:KMail-kde4.png]]</nowiki></code> is the same as <code><nowiki>[[File:KMail-kde4.png]]</nowiki></code>. However <code>Image:</code> is deprecated, so prefer <code>File:</code> in new content. | ||
see [http://www.mediawiki.org/wiki/Help:Images mediawiki] for more info. | see [http://www.mediawiki.org/wiki/Help:Images mediawiki] for more info. | ||
< | <div class="mw-translate-fuzzy"> | ||
===使图片可点击,并添加标题=== | ===使图片可点击,并添加标题=== | ||
</ | </div> | ||
在你需要展示更多细节的地方,创建一张适当大小的图片,图可以点击以便查看全尺寸的大图。简单的添加一个参数'|thumb'到图片括号内就行。 | 在你需要展示更多细节的地方,创建一张适当大小的图片,图可以点击以便查看全尺寸的大图。简单的添加一个参数'|thumb'到图片括号内就行。 | ||
| Line 273: | Line 284: | ||
</nowiki>}} | </nowiki>}} | ||
< | <div class="mw-translate-fuzzy"> | ||
===用表格精确的放置多张图片=== | ===用表格精确的放置多张图片=== | ||
</ | </div> | ||
{{Input|1=<nowiki>{|class="tablecenter" style="border: 1px solid grey;" | {{Input|1=<nowiki>{|class="tablecenter" style="border: 1px solid grey;" | ||
| Line 296: | Line 307: | ||
For more details on Table formating see [http://www.mediawiki.org/wiki/Help:Tables mediawiki] | For more details on Table formating see [http://www.mediawiki.org/wiki/Help:Tables mediawiki] | ||
<span id="Embed a Video"></span> | |||
=== Embed a Video === | === Embed a Video === | ||
| Line 364: | Line 375: | ||
| <tt>vimeo</tt> | | <tt>vimeo</tt> | ||
|} | |} | ||
<span id="Add Notes and Warnings"></span> | |||
==添加附注(Notes)和警告(Warnings)== | ==添加附注(Notes)和警告(Warnings)== | ||
| Line 391: | Line 402: | ||
{{Remember|2=Don't Forget This!|1=You can use parameter number 2 to set an individual box heading: | {{Remember|2=Don't Forget This!|1=You can use parameter number 2 to set an individual box heading: | ||
{{Input|1=<nowiki>{{Remember|2=Don't Forget This!|1=You can use...}}</nowiki>}}}} | {{Input|1=<nowiki>{{Remember|2=Don't Forget This!|1=You can use...}}</nowiki>}}}} | ||
==Page Redirection== | |||
You can make a page to redirect to another page automatically by using: | |||
<pre>#REDIRECT [[Pagename]]</pre> | |||
==程序的KDE3和KDE SC 4版本区分== | ==程序的KDE3和KDE SC 4版本区分== | ||
Latest revision as of 15:31, 30 December 2022

添加介绍截图和描述
应用程序的顶层页面尽量以截图和描述开始。具体实现代码是
{|class="tablecenter vertical-centered"
|[[Image:你上传的截图.png|250px|thumb]]
|描述
|}
格式化文本
使用标题
每个标题独占以行,以两个或更多 '=' 字符开始和结束。页面有多个标题时,会自动创建目录。'=' 字符的个数决定目录中的层级。应该使用 '==标题==', '===次标题===', '====三级标题===='这样的层级。请避免使用单个 '=' ,这个层级作为 wiki 页面的名称使用;例如 "Toolbox/zh-cn" 会成为页面的标题。
使用粗体和斜体
用点(Blips)来指定粗体和斜体文字。
用'''粗体文本'''(3个'符号)指定粗体文本以及''斜体文本''(2个'符号)指定斜体文本(中文的话还可以用「文本」来区分文字)。
为了确保我们之后的翻译轻松和准确,请遵守字体排印指导方针。
添加代码段
为了正确显示代码段,我们提供了辅助模板。具体使用方式请阅读排版指导方针。
添加代码段
添加缩进
- 用":"进行缩进,有些老的页面有多层缩进。但是因为多层缩进会导致问题,现在已经不建议使用并会逐步删除。一个 ":" 会缩进四个字符。
格式化日期
不同地区对纯数字的日期格式理解不一样,所以请使用
2015-06-16
这样的完整日期格式,年份要使用四位数字。
符号列表
符号列表用* 标记,**表示第二层次:
* Almonds

* Nuts
** Cashews

* Raisins
显示为:
- Almonds
- Nuts
- Cashews
- Raisins
编号列表
编号列表用同样的方式生成,用'#'。
# Sift
# Mix
## Stir thoroughly
# Bake
显示为:
- Sift
- Mix
- Stir thoroughly
- Bake
详情请阅读 wikimedia 中的列表说明.
混合符号列表和编号列表
可以混合使用符号列表和编号列表,例如:
* Nuts
*# Cashew
*# Crazy
* Other things
显示为:
- Nuts
- Cashew
- Crazy
- Other things
而
# Nuts
#* Cashew
#* Crazy
# Other things
显示为:
- Nuts
- Cashew
- Crazy
- Other things


要将每个符号列表和子列表放入单独的翻译单元,可以使用下面形式:
* First bullet </translate >
<translate >
** First sub bullet </translate >
<translate >
** Another sub bullet<br /><br />This one consists of two paragraphs </translate >
<translate >
* The next main bullet </translate >
<translate >
** And so on
显示为:
- First bullet
- First sub bullet
- Another sub bullet
This one consists of two paragraphs
- The next main bullet
- And so on
这个方法同样适用于其它列表。
如果希望同一项中有多个部分,可以用下面方法把每个部分放入单独的翻译单元:
* First bullet </translate >
<translate >
* Second bullet, first section. </translate><br /><br /> <translate > Second section of the
second bullet. This section has a translation unit of its own </translate >
<translate >
* And so on
显示为:
- First bullet
- Second bullet, first section.
Second section of the second bullet. This section has a translation unit of its own - And so on
Itemizations
Itemizations are produced using ; and : alternatively. They are best for giving short descriptions for a group of related objects.
;Animals
: They move around and devour other creatures.

;Plants
: They have roots and feed upon ground water and sun.
produces
- Animals
- They move around and devour other creatures.
- Plants
- They have roots and feed upon ground water and sun.
添加链接
有三种类型的链接可以学,内部链接,链接到另外一个userbase页面,和外部URL链接。
内部链接的话,你可以用这种格式[[PageLayout]],直接显示页面的名称。但这种方式不太好,尤其是对于译成docbook文档,最好用这种形式[[PageLayout|Page Layout]],避免了翻译者那边的问题。你经常需要在一个句子里包含链接,所以那种情况下你要用
[[Special:myLanguage/PageLayout|这个页面]]
这样的话会显示
Internal links to subsections of a page use character '#' (hash) and should look like this
[[Special:myLanguage/Tasks_and_Tools#Working_with_Languages|...]]
With this kind of link it is very important, that the page you link to declares the reference anchor. If the anchor contains space characters, replace them by character '_' (underscore) when calling the reference. If the reference is found, the section will be automatically displayed by your browser (if it manages anchors). If it is not the case, you will have to go down through the page to find the referenced section. External links are given as the URL and a text separated by a space and delimited by single square brackets as in
[https://en.wikipedia.org/wiki/KDE KDE's Wikipedia page]
which gives KDE's Wikipedia page.
Anchor declaration
Anchor declaration must be done immediatly BEFORE the referenced section, and followed by a blank line separating the anchor and its headline. In the following example just copy in the ID value, the title of associated section. It should look like this:
</translate><span id="Working with Languages"></span> <translate>
If the page containing the section that you link to is not yet marked up for translation, you should omit the </translate > and <translate > tags.
外部链接稍微有些不同,所以
[http://techbase.kde.org/Schedules 我们的路线图]
显示我们的路线图 会带你直达techbase页面。
最后需要注意的一点 - 当你预览你的页面时,链接已经生效可以用了。这对你有两个好处。你可以(悬停鼠标指针到链接上)检查是否你的链接设定的跟你期望的一样,并且你可以用一个红色链接来创建一个新页面。
Make an application list
If you want to make a list of applications like the ones in the subpages of Applications, you should use the AppItem template. Simply enter
{|
{{AppItem|System Settings/Locale|Preferences-desktop-locale.png|
Settings for localized handling of numbers, dates, etc}}A short text.
A few more short lines about the app. This is optional.
|-
{{AppItem|System Settings/Shortcuts and Gestures|Preferences-desktop-keyboard.png|
Shortcuts and Gestures}}Another short text. If you do not type <keycap>Enter</keycap> between the texts
you get one section no matter how long the text is.
|}
This gives the following display:
Settings for localized handling of numbers, dates, etc | |
| A short text.
A few more short lines about the app. This is optional. | |
Shortcuts and Gestures | |
| Another short text. If you do not type Enter between the texts you get one section no matter how long the text is. | |
Note, that you should not prepend "Special:myLanguage" to the page name - the template takes care of that. Also note, that you must give a title, even if the title is the same as the page name.
Footnotes
Footnotes are rarely used in our pages, but if you need them you can place a <ref>text</ref> in the source where the footnote mark should appear. There has to be one <references /> somewhere in the source as well, usually towards the end of the page. This is where the text added by the <ref> tags will appear. For more info see the Wikipedia help page.
附上图片
添加单幅图片,居中
[[Image:KMail-kde4.png|250px|center]]
注意你能修改图片的位置,但默认位置是左侧(left)。图片的大小依赖于具体情况,但对于截图,我推荐时不小于250px以及不大于500px。
Also note that Image: and File: are synonyms.
So that [[Image:KMail-kde4.png]] is the same as [[File:KMail-kde4.png]]. However Image: is deprecated, so prefer File: in new content.
see mediawiki for more info.
使图片可点击,并添加标题
在你需要展示更多细节的地方,创建一张适当大小的图片,图可以点击以便查看全尺寸的大图。简单的添加一个参数'|thumb'到图片括号内就行。
标题也可以作为参数添加进去,但只会在提供'|thumb'的情况下显示。
例如:
[[File:file_name.png|thumb|this will be the caption]]
Add a caption without a thumbnail
Captions also appear on images marked up with the frame syntax.
例如:
[[File:image.png|frame|left|这是标题]]
Prevent text from flowing around image
Sometimes you might not want the text to flow down the sides of your image. You can prevent this by adding a <br clear=all> tag between the file tag and the text in question.
Example:
[[File:image.png]]
<br clear=all>
This text would normally flow down the sides of the image but now it will be found under the image
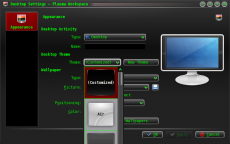
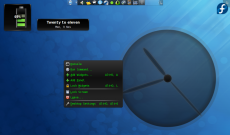
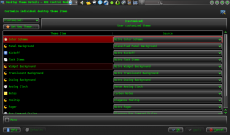
用表格精确的放置多张图片
{|class="tablecenter" style="border: 1px solid grey;"
|[[Image:Desktop-config-customized.png|230px|center]]||[[Image:Desktop-settings-rightclick.png|230px|center]]
|-
|[[Image:Desktop-theme-details-dialog.png|230px|center]]||[[Image:Plasma-multiple-themes.png|230px|center]]
|}
显示
 |
 |
 |
 |
注意显示一张图片的所有参数都要被包含在[[...]]内,而且,多个单元(不同的图片)要用'||'分离。要开始新的一行,插入'|-'
For more details on Table formating see mediawiki
Embed a Video
As of July 2012 the MediaWiki EmbedVideo extension has been installed on userbase.kde. This means you can embed videos from various video hosting sites into the page content and have them display in line.
EmbedVideo parser function expects to be called in any of the following ways:
{{#ev:service|id}}
{{#ev:service|id|width}}
{{#ev:service|id|width|align}}
{{#ev:service|id|width|align|desc}}
{{#evp:service|id|desc}}
{{#evp:service|id|desc|align}}
{{#evp:service|id|desc|align|width}}
Where:
service is the name of a video sharing service (See "service name" in the list below)
id is the id of the video to include
width (optional) is the width in pixels of the viewing area (height will be determined automatically)
align (optional) is an alignment (float) attribute. May be "left" or "right".
desc (optional) is a short description to display beneath the video when it is aligned
For example, to include the famous "evolution of dance" YouTube video, you'd enter:
{{#ev:youtube|dMH0bHeiRNg}}
And if you wanted scaled down to thumbnail size, on the right with a short description, you could use:
{{#ev:youtube|dMH0bHeiRNg|100|right|This is an embedded video!}}
As of version 1.0, EmbedVideo supports embedding video content from the following services:
| Site | Service Name |
|---|---|
| Dailymotion | dailymotion |
| Div Share | divshare |
| Edutopia | edutopia |
| FunnyOrDie | funnyordie |
| Google Video | googlevideo |
| Interia | interia or interiavideo |
| Revver | revver |
| sevenload | sevenload |
| TeacherTube | teachertube |
| YouTube | youtube and youtubehd |
| Vimeo | vimeo |
添加附注(Notes)和警告(Warnings)

在需要添加跟你的文本有关的附注或警告的地方,用表格,像是这样的:
{{Info/zh-cn|常规提示信息}} displays

{{Note/zh-cn|重要的信息}} 显示

{{Tip/zh-cn|需要记住的有用信息}}displays

{{Warning/zh-cn|这样做很危险}} 显示

Where the strongest possible warning is needed, the Remember box can be used, but please use sparingly. {{Remember|1=This is for things that definitely must not be forgotten}}

You can also change the heading:

{{Remember|2=Don't Forget This!|1=You can use...}}
Page Redirection
You can make a page to redirect to another page automatically by using:
#REDIRECT [[Pagename]]
程序的KDE3和KDE SC 4版本区分
默认情况下都是假定是KDE SC 4版本。如果KDE SC 4版本还没完成发布的话,有必要去写KDE3版本。在这种情况下,你应该添加图标{{KDE3}},它会显示
![]() 。要是你在同一个页面里写KDE3版本和KDE SC 4版本,用这个图标 - {{KDE4}},它会显示
。要是你在同一个页面里写KDE3版本和KDE SC 4版本,用这个图标 - {{KDE4}},它会显示
![]()
有用的模板
Inserting GUI Icons
The best way to refer to icons in the GUI is to display it in the text. This can be done with a template like this: {{Icon|list-add}}. This will display the ![]() icon.
icon.
For this to work, the icon image must have been uploaded to the wiki. See Update an Image for an explanation on how to upload images. The .png files can usually be found here: usr/share/icons/oxygen. If possible use the 16x16 icon. The file name should have an Icon- prefix as in Icon-list-add.png — apart from the prefix the filename should exactly match the usual name. Note, that when using the template you should neither write the Icon- prefix nor the .png file type extension.
The ![]() icon can also be written as
icon can also be written as {{Plus}}, and the ![]() icon as
icon as {{Minus}}. You can also use {{Configure}} to get the ![]() icon, and
icon, and {{Exit}} gets you the ![]() icon.
icon.
社区程序
最后关心的一点是那些并不作为核心KDE应用程序发布的程序(译者注:大意应该是其他非KDE的社区开发的程序)。那些需要用图标指明,放置{{Community-app/zh-cn}}
在你句子或一行的末尾,如同你在普通书写中表示一个脚注一样。然后你需要添加{{Community-app-footnote/zh-cn}},它会显示脚注,像是这样子:
对现有页面做重大修改
如果一个页面像是打开要做一段时间的编辑修改,可能会有冲突的危险 - 其他某个人或许同时也在编辑,这时保存你的编辑会取消掉他们的修改,或者反过来也是一样的。避免的方法是做一个临时的词条,直接挂在语言栏下面,使用{{Being_Edited/zh-cn}},它会显示

如本提示存在过久,请通知 irc.freenode.org 的 #kde-www 频道,或至Annew 的讨论页讨论
Note: Pages should not normally be marked for translation while they are being actively worked on
编辑完成后不要忘了移除它!
添加一个新的复杂页面
如果你在某个页面上需要相当长一段时间的工作,比如说,数天,你或许要使用Construction/zh-cn模板 - {{Construction/zh-cn}},显示如下

Links to Pages in the Neighbourhood
You can add links to a preceding or a following page using the following templates as described here:
{{Prevnext2|prevpage=Previous Pagename|nextpage=Following Pagename|prevtext=The page before this page|nexttext=This page you should read later|index=Index page|indextext=Back to Menu}}
All six arguments are optional. For first pages with no preceeding page or last pages with no following page use this:
{{Prevnext2|nextpage=Following Pagename|nexttext=This page you should read later}}
- Toolbox/zh-cn
- This page you should read later →
{{Prevnext2|prevpage=Previous Pagename|prevtext=The page before this page}}
- ← The page before this page
- Toolbox/zh-cn
If you don't specify an indexname the name of the current page will be displayed.
Special:myLanguage with your links; otherwise you create problems for the translators.
Links to bugs
You can link directly to a bug in Bugzilla by using this template:
{{Bug|123456}}
Please do not forget to add the <s> and </s> to strike through a bug that is closed.
添加子页面列表
== {{FULLPAGENAME}} 的子页面==
{{Special:PrefixIndex/{{FULLPAGENAME}}/}}
非常好用以便你想要列出子页面的链接,比如
Toolbox/zh-cn的子页面
It does, however, also list all "other-language" pages, so use with discretion.
