Digikam/Compress/da: Difference between revisions
Importing a new version from external source |
Importing a new version from external source |
||
| Line 6: | Line 6: | ||
Mange folk mener, at man altid bør bruge den højeste JPEG-indstilling, når man tager billeder; det er jeg ikke enig i af mange grunde. | Mange folk mener, at man altid bør bruge den højeste JPEG-indstilling, når man tager billeder; det er jeg ikke enig i af mange grunde. | ||
Når jeg tager billeder af venner og familie og andre almindelige begivenheder, så bruger jeg altid de basale JPEG-indstillinger. I sådanne tilfælde er der flere faktorer, som skal tages i betragtning. Jeg er ingen ekspert i fotografering, så dette er blot min personlige mening. De fleste kameraer har JPEG-indstillingerne FINE, NORMAL og BASIC. JPEG giver ikke tabs-frit komprimering; men den vigtigste forskel imellem JPEG FINE og de andre muligheder er, at komprimeringen eliminerer farver, som ikke er synlige for det menneskelige øje. | |||
If I’m shooting JPEG fine then I can only shoot 2300 pictures into my 16GB memory card, however at the basic setting I can shoot 8200 pictures in the same card. For me storage matters and there is no need to shoot that high quality images when they all look the same on the computer. We only need that quality if we are printing each and every image to a canvas, other than that I see no need. | If I’m shooting JPEG fine then I can only shoot 2300 pictures into my 16GB memory card, however at the basic setting I can shoot 8200 pictures in the same card. For me storage matters and there is no need to shoot that high quality images when they all look the same on the computer. We only need that quality if we are printing each and every image to a canvas, other than that I see no need. | ||
Revision as of 08:24, 24 February 2011
Genkomprimér billeder i digiKam
Fra Mohamed Maliks blog, 19. februar 2011
Mange folk mener, at man altid bør bruge den højeste JPEG-indstilling, når man tager billeder; det er jeg ikke enig i af mange grunde.
Når jeg tager billeder af venner og familie og andre almindelige begivenheder, så bruger jeg altid de basale JPEG-indstillinger. I sådanne tilfælde er der flere faktorer, som skal tages i betragtning. Jeg er ingen ekspert i fotografering, så dette er blot min personlige mening. De fleste kameraer har JPEG-indstillingerne FINE, NORMAL og BASIC. JPEG giver ikke tabs-frit komprimering; men den vigtigste forskel imellem JPEG FINE og de andre muligheder er, at komprimeringen eliminerer farver, som ikke er synlige for det menneskelige øje.
If I’m shooting JPEG fine then I can only shoot 2300 pictures into my 16GB memory card, however at the basic setting I can shoot 8200 pictures in the same card. For me storage matters and there is no need to shoot that high quality images when they all look the same on the computer. We only need that quality if we are printing each and every image to a canvas, other than that I see no need.
Digikam gives you the option to re-compress your images. This is useful if you have many JPEG pictures with JPEG setting fine ( on scale 0-100). Changing the scale from 100 to 85 can significantly reduce the file-size & look the same.
Example : A 3.1 MB file at JPEG setting 100. When this image was re-compressed to a quality of 85 the image size came just 1MB. Meaning hundred similar file will have a total of 310MB, when these hundred pictures are re-compressed to a scale of 85 you will get approximately 100Mb, in the meantime saving 210MB of hard drive space. If you have many images like I do and if you need to convert these images it will saves GB’s of hard-drive space.
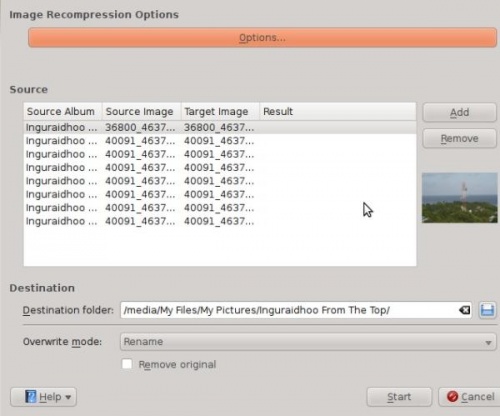
To re-compress your files using digiKam go to and a wizard will pop up.

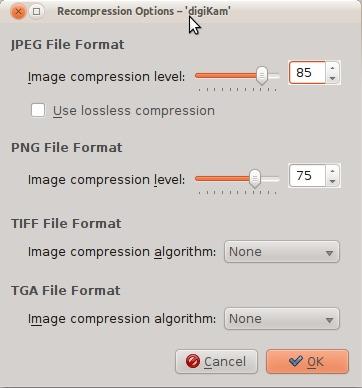
Then click . By default digiKam has a compression level of 75. Change this setting as you wish. Please bear in mind that when you move the scale beyond 75 it will show degrade in image quality. In my personal opinion a value of 75-85 is most adequate.

As well as JPEG files, it can do the same for other file formats such as TIFF and PNG’s as well. Choose either to remove the original or to keep it. If you are doing this for the first time, I advise you to keep your original and later take a look yourself and delete them if you wish. Some data is lost by compression, so it can be useful to have the original for important images.

