Digikam/Facebook/da: Difference between revisions
Importing a new version from external source |
Importing a new version from external source |
||
| Line 24: | Line 24: | ||
== Hvordan du uploader billeder til Facebook fra digiKam == | == Hvordan du uploader billeder til Facebook fra digiKam == | ||
Lad os nu se på, hvordan du uploader billeder til Facebook fra '''digiKam'''. | |||
It is simple. Select the images that you want to upload and <menuchoice>Export -> Export to Facebook</menuchoice> and you will be greeted with a new window where you will be asked to log on to Facebook. Follow the on-screen instructions and you will see this window. | It is simple. Select the images that you want to upload and <menuchoice>Export -> Export to Facebook</menuchoice> and you will be greeted with a new window where you will be asked to log on to Facebook. Follow the on-screen instructions and you will see this window. | ||
Revision as of 06:35, 1 March 2011
Hvordan man downloader Facebook-albums i digiKam
Fra Mohamed Maliks blog, 15. februar 2011
Har du brug for at downloade Facebook-albums a dig eller dine venner men har ikke lyst til at skulle gemme hvert enkelt billede? Så kan digiKam hjælpe dig. Det er nemt og hurtigt. Sådan gør du:
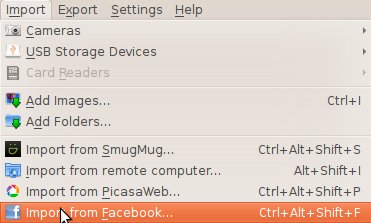
Vælg menuen . Se skærmbilledet herunder.

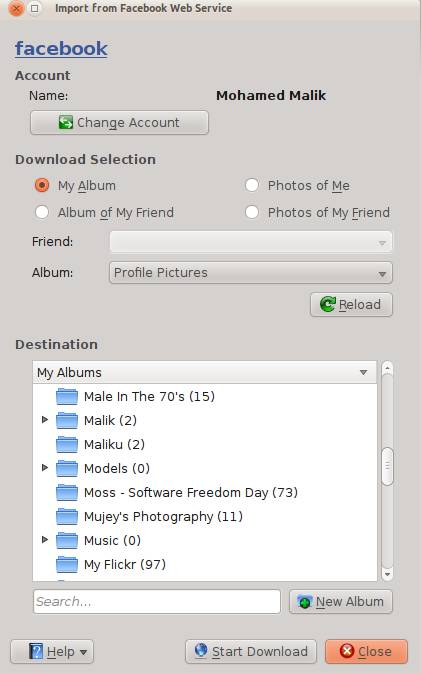
Når du vælger dette punkt vil du blive bedt om at logge ind på din Facebook-konto og eventuelt kæde din Facebook-konto sammen med digiKam. Din webbriwser vil dukke op og give dig tilladelse til forbindelsen. Så bliver du møde med denne dialog.

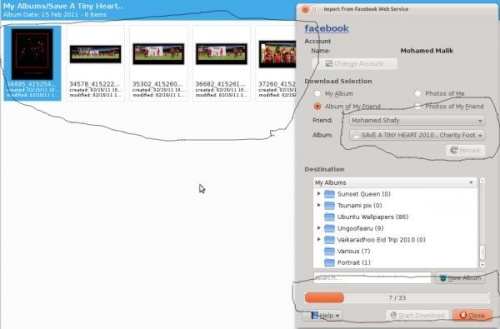
Her kan du vælge at downloade die eget eller en vens album. Hvis du vælger , så ser du alle de albums, som du har uploadet i dropned-listen . Hvis du vælger at downloade en vens album, så vælg din vens navn i dropned-listen og derefter det album, som du vil downloade. Som du kan se af skærmbilledet, så skal du angive, hvor du vil downloade billederne til. Vælg et sted i dine albums, klik på og giv det et navn. Klik så på . Det vil downloade billederne, som du har valgt.

Hvordan du uploader billeder til Facebook fra digiKam
Lad os nu se på, hvordan du uploader billeder til Facebook fra digiKam.
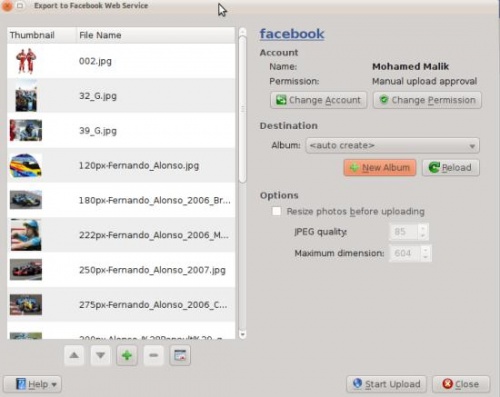
It is simple. Select the images that you want to upload and and you will be greeted with a new window where you will be asked to log on to Facebook. Follow the on-screen instructions and you will see this window.

As you can see the process is very easy and straight forward. You can create a new album give it a name. And choose to resize the pictures into the size that you prefer and can even alter the JPG quality settings. When you are done just press .
