KWin Rules Window Matching/da: Difference between revisions
Appearance
Importing a new version from external source |
Importing a new version from external source |
||
| Line 42: | Line 42: | ||
[[Image:kwin-detect-window.png|350px|center]] | [[Image:kwin-detect-window.png|350px|center]] | ||
Funktionen <menuchoice>Detektér vinduesegenskaber</menuchoice> forenkler processen med at angive matchningskriterier. | |||
# For the application you'd like to create a rule, start the application. | # For the application you'd like to create a rule, start the application. | ||
Revision as of 20:16, 8 March 2012
Vindue-matchning

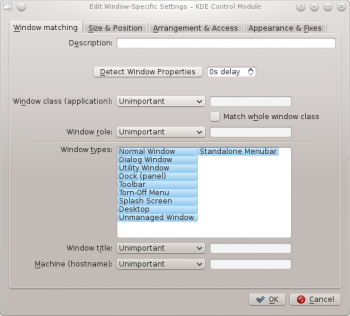
Fanebladet bruges tilat angive de kriterier, som KWin bruger til at bestemme, om reglen skal anvendes på et givet vindue.
Ingen eller flere af de følgende kan angives (hvis ingen angives, så matches ethvert vindue):
- — matcher klassen
- — medtag matvhning af sekundær klasse..
- — begræns matchning til vinduets funktion (fx main window eller chat window)
- — begræns matchning til en vinduestype: Normalt vindue, Dialogvindue osv.
- - begræns matchning til en vinduestitel.
- — begræns matchning til et værtsnavn knyttet til vinduet.
For hvert felt kan følgende operatorer anvendes på feltets værdi:
- %mdash; ignorér feltet.
- — matcher med Qt's regulære udtryk — se pattern matching using regular expressions.
Detektér Vinduesegenskaber

Funktionen forenkler processen med at angive matchningskriterier.
- For the application you'd like to create a rule, start the application.
- Next, in the tab, set the number of seconds of delay before the function starts. The default is zero seconds.
- Click on and
- When the mouse-cursor turns to cross-hairs, place it inside the application window (not the title bar) and left-click.
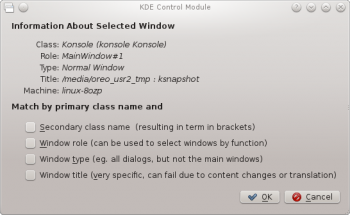
- A new window is presented with information about the selected window. Select the desired fields:
- Secondary class name - some applications have a secondary class name. This value can be used to restrict windows by this value.
- Window role
- Window type
- Window title
Click the button to back-fill the criteria.
By using a combination of the information, a rule can apply to an entire application (by Class) or a to a specific window Type within the Class - say a Toolbar.


