Digikam/ChangeFormat/ca: Difference between revisions
Created page with "Seleccioneu els fitxers RAW i aneu a <menuchoice>Eines -> Convertidor RAW per lots</menuchoice> i apareixerà l'assistent:" |
Created page with "L'assistent us permet escollir entre les següents opcions:" |
||
| Line 13: | Line 13: | ||
L'assistent us permet escollir entre les següents opcions: | |||
===Reconstrucció: 8 bits o 16bits=== | ===Reconstrucció: 8 bits o 16bits=== | ||
Revision as of 14:58, 7 April 2012
Conversió per lots de fitxers RAW utilitzant digiKam
Transcrit des de l'article d'en Mohamed Malik, el 21 de febrer de 2011 i 8 de juliol de 2011
Teniu un munt de fitxers RAW que necessiten ser convertits?
Si ho feu digiKam us ajudarà estalviant-vos molt de temps. Pel que fa a mi, no tinc temps de processar cada imatge per separat. Aquí s'explica com convertir-les totes sense problemes i amb facilitat.
Seleccioneu els fitxers RAW i aneu a i apareixerà l'assistent:
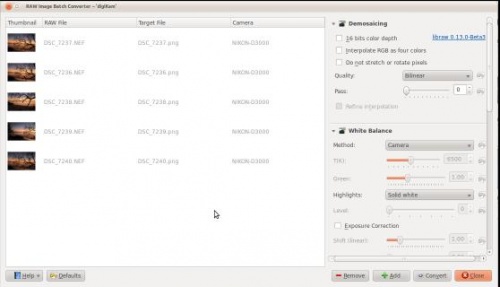
L'assistent us permet escollir entre les següents opcions:
Reconstrucció: 8 bits o 16bits
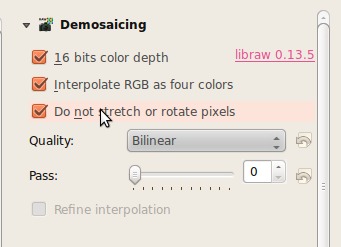
If you choose 16 bit per color depth, then you will only be able to save your files in PNG & TIFF formats. JPEG will only be available in 8 bit color depth.
Balanç de blancs
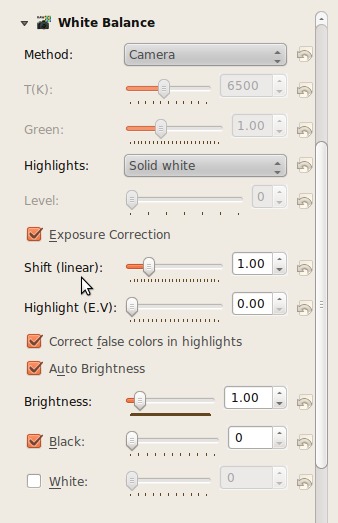
You can choose from the available white balance presets, select exposure correction and tweak a few other setting here.
Fer correccions
- Exposure correction, brightness
- Noise reduction, chromatic aberration correction
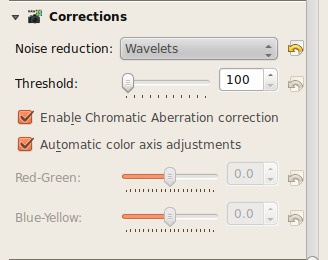
Specify the method of noise reduction and choose whether to apply Chromatic Aberration Correction.
Colour Manage and Save
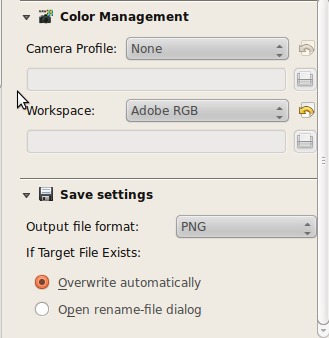
Finally you can choose whether you want to apply color management setting and choose your color space, whether Adobe RGB or sRGB.
Then select the output format and click .
- Select from various output file formats such has PNG, JPEG, TIFF & PPM
Remember you can alter each and every one of those settings. When you are done applying your personal touches to the images just click on the menu and digiKam will do the rest.
