Kdenlive/Manual/Rendering/da: Difference between revisions
(Importing a new version from external source) |
(Importing a new version from external source) |
||
| Line 28: | Line 28: | ||
[[File:Kden-render-howto-11.png|center|500px]] | [[File:Kden-render-howto-11.png|center|500px]] | ||
Skærmbilledet viser de 6 hjælpelinjer jeg har føjet til mit projekt. De opdeler det eksisterende klip som jeg ønsker det til mit projekt (som forhåbentlig bliver den første retro-eksperimentelle hitfilm...). Nu kan vi eksportere scripts som, når de bliver udført vil rendere disse hjælpelinjezoner. | |||
=== Generating Rendering Scripts === | === Generating Rendering Scripts === | ||
Revision as of 20:46, 24 July 2012
Rendering

Fremstil og brug renderingsscripts
- Formål
- Når du producerer videoer kan du nemt komme til at bruge meget tid på at redigere klip, projektet og de optagelser du arbejder på. Hvis du nogen side får brug for at eksportere afsnit af din tidslinje for sig selv, så har Kdenlive er smart måde at gøre det på. Du kan indsætte hjælpelinjer i dit projekt til at etablere zoner. Du kan så generere renderingsscripts til at eksportere disse zoner på et senere tidspunkt mens du sover eller er på jagt efter føde. Lad os se, hvordan man gør.
Udvælg afsnit med hjælpelinjer
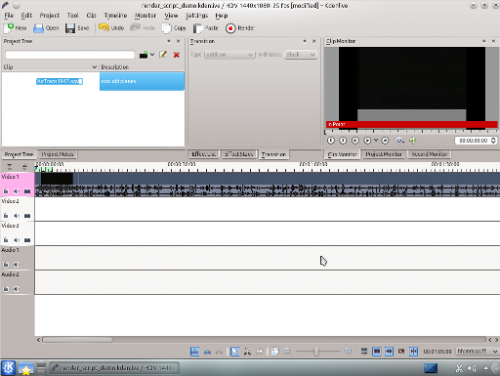
Begynd med at lægge et klip ind i tidslinjen.
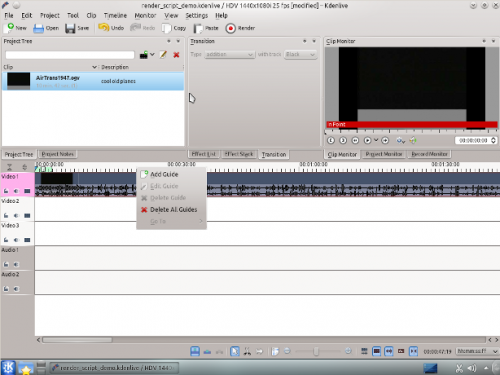
Nu vil vi tilføje en hjælpelinje til et afsnit af klippet i tidslinjen. Du kan tilføje ne hjælpelinje ved at vælge menuen . Du kan også højreklikke øverst i tidslinjen og vælge . Du kan også redigere de hjælpelinjer du allerede har tilføjet ved at højreklikke på tidslinjen.
Efter at have valgt denne menu dukker der et vindue op, hvor du angiver hjælpelinjens position og med et felt til en kommentar. Det kan aldrig skade at give hjælpelinjen et navn, så jeg giver den navnet Section 1. En mørkeblå linje går nu lodret ned igennem sporene på din tidslinje.
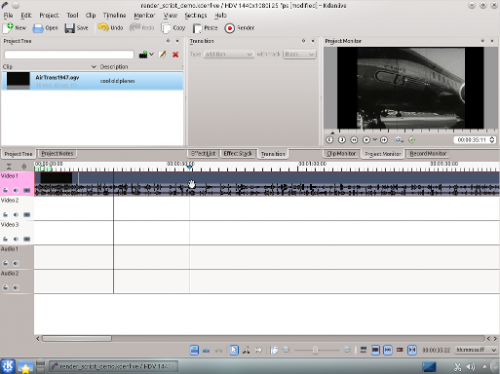
Jeg vil tilføje endnu et par hjælpelinjer og så går vi i gang med at.
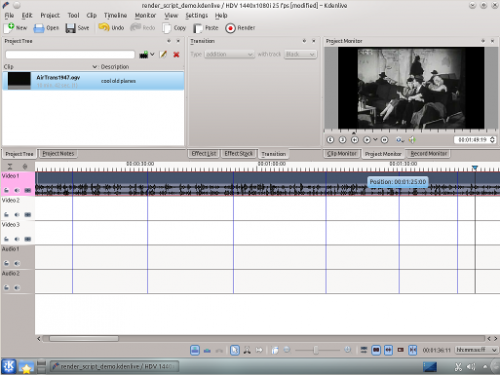
Skærmbilledet viser de 6 hjælpelinjer jeg har føjet til mit projekt. De opdeler det eksisterende klip som jeg ønsker det til mit projekt (som forhåbentlig bliver den første retro-eksperimentelle hitfilm...). Nu kan vi eksportere scripts som, når de bliver udført vil rendere disse hjælpelinjezoner.
Generating Rendering Scripts
Start by clicking on the button in your toolbar, the one with the red circle surrounded by a white and black ring. You can also select this by going to the (Ctrl+Return).
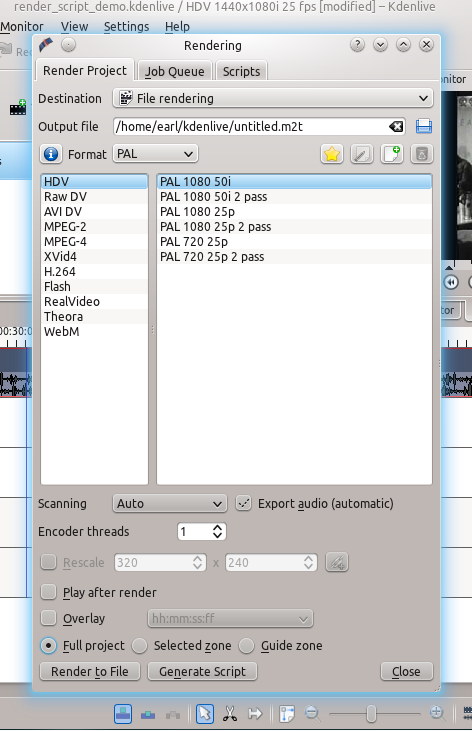
The new window gives us many choices about how to render our video. Look at the bottom of the window. We need to select the button . Selecting this will allow us to render our project using the guides we made earlier. Be sure and name the output file to a unique name for each script we will create. Otherwise the scripts will overwrite the different guide zones and not do what you wanted.
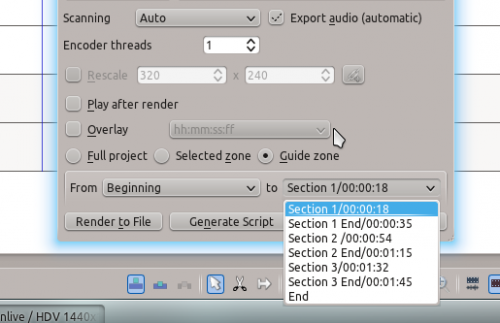
We now can choose which guides will establish the regions of video we want to export using the pull down menus next to From and to. I'll cut out the Beginning and instead use section 1 to Section 1 End, the guide names I defined earlier.
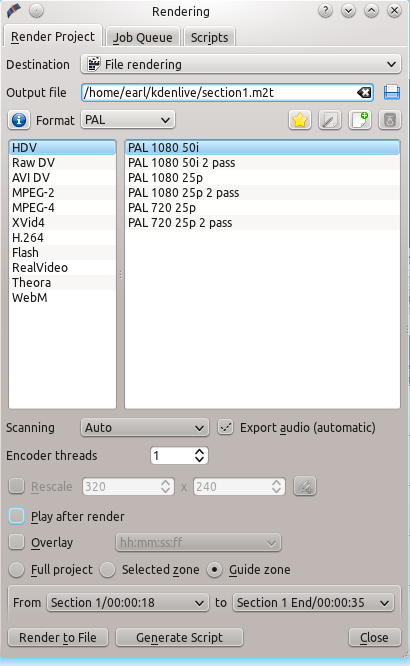
Now I can render this to a file or generate a script that will render this guide zone to a file. Click and a menu appears asking you to name the script. Kdenlive stores the clips in /yourhomedirectory/kdenlive/scripts
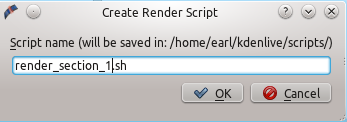
After saving the script, the top tab in the window switches to Scripts. This lists all the scripts you have generated for the current project.
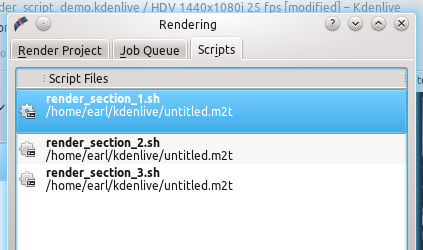
I went ahead and generated 3 scripts based on the guide zones I set up in my timeline. Be sure and keep the .sh extension otherwise the rendering script will not be generated.
Starting Your Rendering Scripts
Once each script is generated, you need to start each one. You should be in the script tab and see your scripts listed. Start the process by selecting the script and clicking the button. Do this for each script.
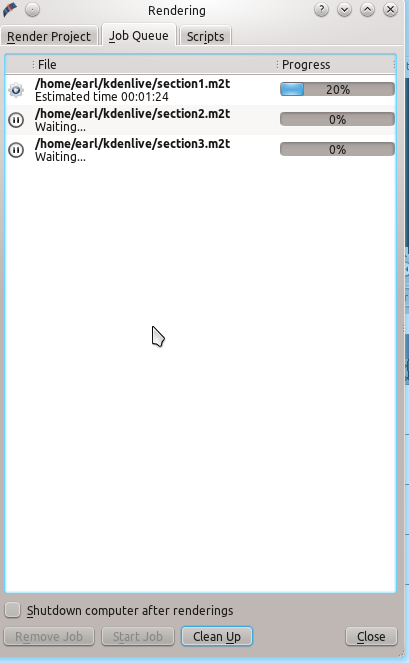
After clicking each script, you are switched to the Job Queue tab. Here you will see what script is being run and how many more are waiting to be run. If you have a large queue, you can take advantage of the nifty checkbox in the bottom left: .
Summary
Creating guides can help organize your project while you work on it and when you share it with the world. You can use guides to keep track of areas or to generate rendering scripts that will do the mundane task for you. This feature makes exporting sections of your project quite easy. There are also other ways to take advantage of rendering sections and guide zones using guides. Have fun. Explore!
