Archive:Kdenlive/Manual/Titles/ru: Difference between revisions
No edit summary |
Created page with "Выберите <menuchoice>Добавить клип титров из шаблона (Add Template Title)</menuchoice> в выпадающем меню <menuchoice>Доба..." |
||
| Line 56: | Line 56: | ||
'''Использование шаблона титров''' | '''Использование шаблона титров''' | ||
<menuchoice> | Выберите <menuchoice>Добавить клип титров из шаблона (Add Template Title)</menuchoice> в выпадающем меню <menuchoice>Добавить клип (Add Clip)</menuchoice> и выберите титр с ''%s'' в названии, который вы только что сохранили. | ||
Right click this clip in the project tree and select <menuchoice>Clip Properties</menuchoice> | Right click this clip in the project tree and select <menuchoice>Clip Properties</menuchoice> | ||
Revision as of 14:32, 31 October 2012
Титры
Титры это текстовые элементы, которые могут быть добавлены на Линию времени и появляться поверх других клипов. Титры создаются в дереве проекта и перетаскиваются на Линию времени подобно остальным видеоклипам.
Для создания титров выберите Добавить клип титров (Add Title Clip) в Меню Проект или правой кнопкой мыши из меню Дерева проекта
Как сохранить титры
Откройте титр в Дереве проекта дважды щелкнув по нему, или выбрав правой кнопкой мыши.

Нажмите кнопку на панели инструментов
или выберите в выпадающем меню , которое открывается кнопкой на панели инструментов - см. рисунок.
Выберите место для сохранения вашего проекта.
Титры сохраняются в виде документа типа .kdenlivetitle.
Как загрузить титры
Выберите в выпадающем меню Добавить клип (Add Clip) (см рис.)
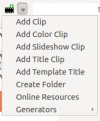
Нажмите кнопку в Панели инструментов редактора титров или выберите из меню и загрузите ранее сохраненные титры.
Как редактировать существующие титры
Щелкните правой кнопкой мыши название клипа в дереве проекта и выберите .
Шаблоны титров - Пользовательские
Шаблон титров позволит вам создать шаблон для других титров проекта. Вы можете создать шаблон с настройками, одинаковыми для всех титров проекта, а затем менять сами титры в шаблоне. Если вы решили изменить внешний вид ваших титров, вам нужно только изменить шаблон титров и титры на основе данного шаблона будут автоматически обновляться, отражая любые изменения оформления, внесенные в шаблон .
Создание шаблона титров
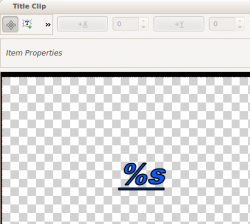
Выберите из выпадающего меню и создайте титр содержащий текст %s , отформатируйте его по своему желанию. Сохраните его как описано выше.
Использование шаблона титров
Выберите в выпадающем меню и выберите титр с %s в названии, который вы только что сохранили.
Right click this clip in the project tree and select
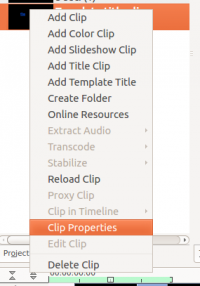
Enter the text that this title should display into the text field in the dialog that appears
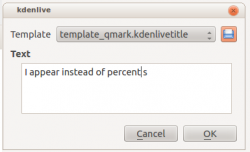
Drag the title to the timeline.
The %s in the template will be replaced with the text that you enter in the .
A known issue with template titles is that text centering of the %s replaced text does not work - see this forum post.
Template Titles - Built In
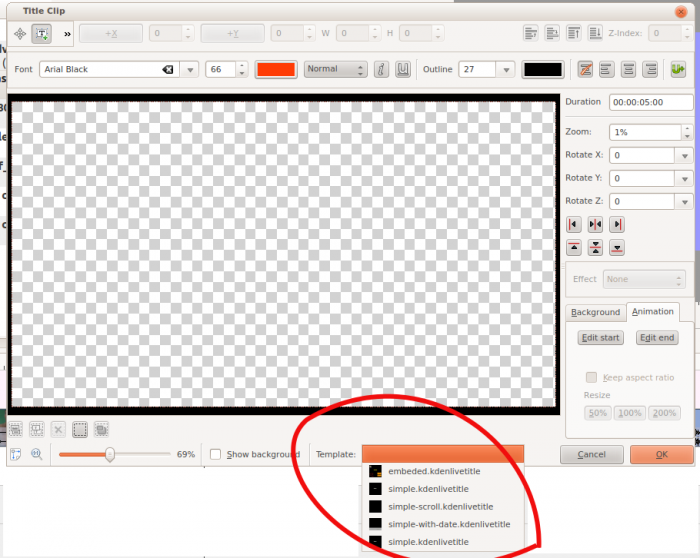
Kdenlive has some built-in title templates that can be accessed from the drop-down list found on the bottom of the Title Clip window - see below.
To install more built in title templates choose Download New Title Templates from the settings menu.
Import an Image into the title
On the Toolbar overflow menu (>>) shown in the picture below the second menu item - labeled only with Alt+I - is the Button. Selecting this brings up a file chooser where you can choose an image to be inserted into your title.
Draw Rectangle Toolbar Item
The 1st menu item shown in the picture above - labeled only with Alt+R is the button. After selecting this - drag the mouse to draw a rectangle. Use the rectangle toolbar (shown below) to change the fill color, border color and border width of the rectangle.
The rectangles can be placed behind text by selecting them and the changing the Z-index (top right corner) to a lower value.
To make the title scroll vertically
Put a long title onto the title window. Zoom out so you can see it all. The text should run off the top (or bottom) of the viewable area.
Select the Animation tab and click . Now drag the start rectangle to above the viewable area.
Select and drag the end rectangle to below the viewable area.
Click and preview the scrolling title.
The above title scrolls so that text scrolls up the screen. It is as if the camera starts on the "start rectangle" and then pans down to the "end rectangle"
To make the title scroll Horizontally
Use the instructions for vertical scrolling - just put the start and stop rectangles off to the sides of the screen rather than the top and bottom
FAQ
Q: How to duplicate a title clip to modify it slightly
A: You can save a copy of the title (see How to Save a Title) and then create a new title based on that saved version as described above, Or you could use the template titles functionality to base the two slightly different titles on the one template.


