Archive:Kdenlive/Manual/Capturing/ru: Difference between revisions
No edit summary |
Updating to match new version of source page |
||
| Line 14: | Line 14: | ||
=== Firewire === | === Firewire === | ||
<span class="mw-translate-fuzzy"> | |||
Это захватывает видео с источников, подключенных через карту и кабель FireWire (также известный как - IEEE 1394 Высокоскоростной Последовательный Порт) . | Это захватывает видео с источников, подключенных через карту и кабель FireWire (также известный как - IEEE 1394 Высокоскоростной Последовательный Порт) . | ||
</span> | |||
To perform a capture: | |||
* | * Plug in your device to the firewire card and turn it on to play mode | ||
* | * Click the ''Connect Button'' [[File:Kdenlive Connect firewire button.png]] | ||
* | * Click the Record Button - note it toggles to grey while you are recording | ||
* | * Click the Record button again to stop capture. Or click the stop button. | ||
* Once capturing is finished click the disconnect button [[File:Kdenlive Disconnect capture.png]] | |||
* In the ''Captured Files'' dialog - click the import button to have the captured files automatically imported into the project tree. | |||
[[File:Kdenlive Captured files dialog.png]] | |||
'''Note''': If your device does not start playing the source device when you click the record button then you may have to start playback on your device manually and then click record. | |||
=== FFmpeg === | === FFmpeg === | ||
Revision as of 17:29, 5 February 2013
Видеозахват
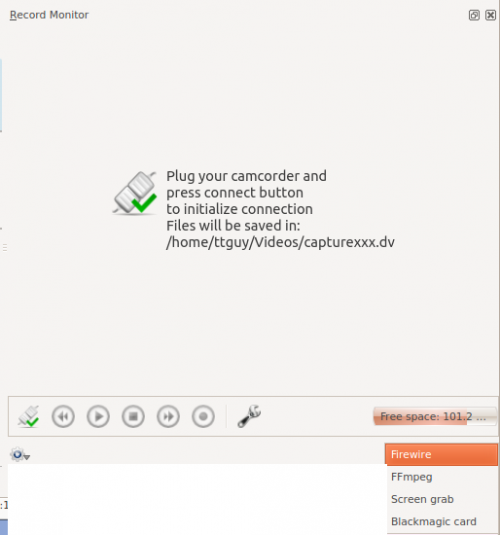
Kdenlive предоставляет функциональные возможности для захвата видео с внешних устройств - Firewire, FFmpeg, Screen Grab and Blackmagic.
Вы настраиваете видеозахват в (подробнее об этом здесь).
Место для сохранения захваченного видео, определяете в (подробнее об этом здесь).
Для выполнения видеозахвата выберите Монитор записи и устройство захвата из раскрывающегося в правом нижнем углу списка.
Firewire
Это захватывает видео с источников, подключенных через карту и кабель FireWire (также известный как - IEEE 1394 Высокоскоростной Последовательный Порт) .
To perform a capture:
- Plug in your device to the firewire card and turn it on to play mode
- Click the Connect Button

- Click the Record Button - note it toggles to grey while you are recording
- Click the Record button again to stop capture. Or click the stop button.
- Once capturing is finished click the disconnect button

- In the Captured Files dialog - click the import button to have the captured files automatically imported into the project tree.
Note: If your device does not start playing the source device when you click the record button then you may have to start playback on your device manually and then click record.
FFmpeg
Я считаю, что это захватывает видео с веб-камеры используя Video4Linux2.
Screen Grab
Это захватывает видео с экрана ПК. В версии 0.9.2 для захвата используется RecordMyDesktop . Существует неустраненный дефект в версии 0.9.2 - См. трекер ошибок ID 2643
In version 0.9.3 the Screen grab is done by the ffmpeg functionality instead. For screen capture to work in ver 0.9.3 the version of ffmpeg installed needs to have been compiled with the --enable-x11grab option. Ubuntu comes with an ffmpeg compiled with this option.
To check on your linux distro type "ffmpeg -version" in a terminal and look for --enable-x11grab in the reported configuration info. [1]
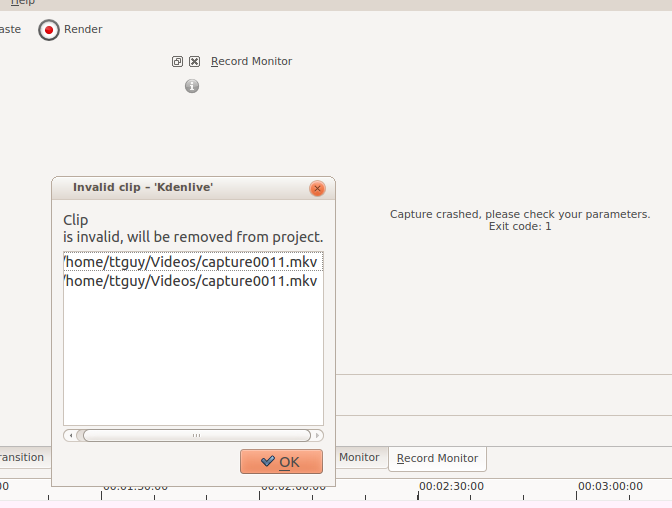
If you are capturing screen and using the X246 with audio settings and you get a crash as shown in the screen shot ...
... then consider creating a profile for audio capture where -acodec pcm_s16le is replaced by -acodec libvorbis -b 320k. See Configure Kdnelive
Blackmagic
Это для захвата с помощью карт видеозахвата Blackmagic -- Decklink . Неизвестно, насколько стабилен этот код на данный момент. См. дефект 2130.
Footnotes
- ↑ There are two branches of ffmpeg now a Libav branch and a ffmpeg.org branch. The ffmpeg version from the later reports the configuration when you run with "ffmpeg -version". The Libav version does not. So this method to check for the --enable-x11grab does not work if you have libav version of ffmpeg.


