KDevelop5/Manual/Customizing KDevelop/da: Difference between revisions
(Importing a new version from external source) |
(Importing a new version from external source) |
||
| Line 21: | Line 21: | ||
=== | === Indstilling af tastaturgenveje === | ||
'''KDevelop''' has an almost boundless list of keyboard shortcuts (some of them are listed in the "Useful keyboard shortcuts sections" of several chapters in this manual) that can be changed to your taste through the menu <menuchoice>Settings -> Configure Shortcuts</menuchoice>. At the top of the dialog you can enter a searchword and it only shows those commands that match; you can then edit which key combination is bound to this command. | '''KDevelop''' has an almost boundless list of keyboard shortcuts (some of them are listed in the "Useful keyboard shortcuts sections" of several chapters in this manual) that can be changed to your taste through the menu <menuchoice>Settings -> Configure Shortcuts</menuchoice>. At the top of the dialog you can enter a searchword and it only shows those commands that match; you can then edit which key combination is bound to this command. | ||
Revision as of 08:24, 1 October 2017
Tilpasning af KDevelop
Til tider kan du ønske at ændre KDevelops udseende eller opførsel, for eksempel hvis du er vant til at bruge andre tastaturgenveje eller fordi dit projekt kræver en anderledes indrykningsstil for kildekode. I de følgende afsnit omtaler vi kort de forskelige måder, hvorpå KDevelop kan tilpasses sådanne behov.
Indstilling af editoren
Der er et antal nyttige ting i og omkring KDevelops indbyggede editor, som man kan indstille. Det er generelt nyttigt at kunne slå linjenummerering til ved brug af menuen ; det gør det lettere at matche compilererns fejlmeddelelser eller fejlsøgerens medddelelser med steder i koden. I den samme undermenu kan du også slå ikonpanelet til — det er en søjle til venstre for din kode, hvor KDevelop vil vise ikone for ting som stoppunkter i den aktuelle linje.
Indstilling af kodeindrykning
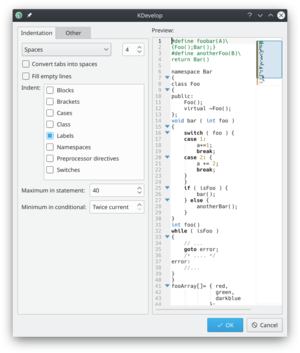
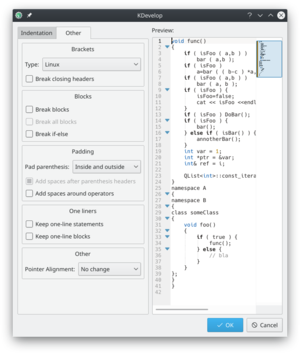
Mange af os foretrækker at formattere vores kode på en bestemt måde. Mange projekter foreskriver også en bestemt indrykningsstil. Måske matcher ingen af disse KDevelops standard-indrykningsstil. Denne kan dog tilpasses: Gå til menuen og klik på til venstre. Du kan vælge en af de foruddefinerede indrykningsstile, som er i almindelig brug eller definere din egen ved at tilføje en ny stil og så redigere den. Måske er det ikke muligt at genskabe det stil, som dit projekts kildekode hidtil er blevet indrykket med, men du kan komme tæt på med indstillingerne for en ny stil; et eksempel er vist i de to billeder herunder.
 |
 |
Indstilling af tastaturgenveje
KDevelop has an almost boundless list of keyboard shortcuts (some of them are listed in the "Useful keyboard shortcuts sections" of several chapters in this manual) that can be changed to your taste through the menu . At the top of the dialog you can enter a searchword and it only shows those commands that match; you can then edit which key combination is bound to this command.
Two that have been found to be very useful to change are to set to the Tab key (many people don't usually enter tabs by hand and rather prefer if the editor chooses the layout of code; with the changed shortcut, hitting Tab makes KDevelop indent/outdent/align the code). The second one is putting on Ctrl + B since this is quite a frequent operation.
Customizing code auto-completion
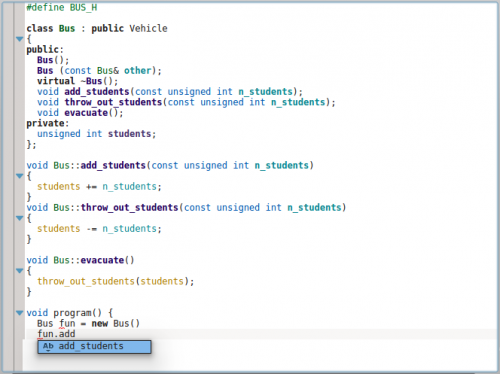
Code completion is discussed in this manual's section on writing source code. In KDevelop, it comes from two sources: the editor, and the parse engine. The editor (Kate) is a component of the larger KDE environment and offers auto-completion based on words it has already seen in other parts of the same document. Such auto-completions can be identified in the tooltip by the icon that precedes it:

The editor's code completion can be customized via . In particular, you can select how many characters you need to type in a word before auto-completion kicks in.
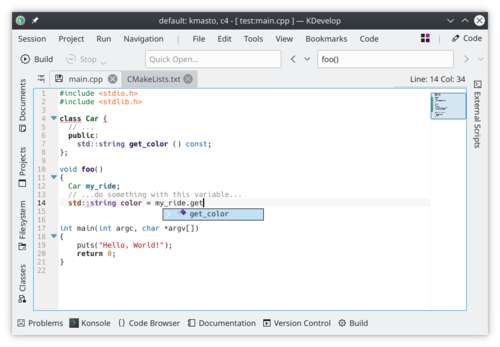
On the other hand, KDevelop's own auto-completion is much more powerful as it takes into account semantic information about the context. For example, it knows which member functions to offer when you type object., etc., as shown here:

This context information comes from various language support plugins, which can be used after a given file has been saved (so it can check the filetype and use the correct language support). KDevelop's completion is set to appear as you type, right away, pretty much everywhere that it could possibly complete something. This is configurable in . If it isn't already set (as it should, by default), make sure is set.
KDevelop has two ways to show a completion: shows just the basic information in completion tooltips (i.e. the namespace, class, function, or variable name). This will look similar to Kate completion (except for the icons). On the other hand, will additionally show the type for each entry, and in the case of functions, also the arguments they take. Also, if you are currently filling in the arguments to a function, full completion will have an additional info-box above the cursor that will show you the current argument you are working on. KDevelop's code completion should also bring-to-top and highlight in green any completion items that match the currently expected type in both minimal and full completion, known as "best-matches".
The three possible choices for the completion level in the configuration dialog are:
- : Never show "Full Completion"
- : Only show "Full Completion" when auto-completion has been triggered manually (i.e., whenever you hit Ctrl+Space)
- : Always show "Full Completion"
