Taking Screenshots: Difference between revisions
Appearance
| Line 1: | Line 1: | ||
== Guidelines == | == Guidelines == | ||
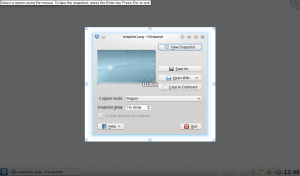
* When taking screenshots of single a application/window, use a white background and include a margin (around 20 pixels) of the white wallpaper (this is to ensure that window shadows don't look cropped) | * When taking screenshots of single a application/window, use a white background and include a margin (around 20 pixels) of the white wallpaper, [[media:Screenshot-ksnapshot.png|see the image below]] (this is to ensure that window shadows don't look cropped) | ||
* Set the language to English unless it's a localized screenshot | * Set the language to English unless it's a localized screenshot | ||
* Save as PNG image | * Save as PNG image | ||
* Preferably, use the default settings (icons, color scheme, style, window decoration, application settings etc.) | * Preferably, use the default settings (icons, color scheme, style, window decoration, application settings etc.) | ||
* Preferably, use compositing ( | * Preferably, use compositing (Desktop Effects module in [[System Settings|System Settings]]) | ||
* Preferably, use Liberation Sans, 9pt as font | * Preferably, use Liberation Sans, 9pt as font | ||
Revision as of 12:28, 9 July 2010
Guidelines
- When taking screenshots of single a application/window, use a white background and include a margin (around 20 pixels) of the white wallpaper, see the image below (this is to ensure that window shadows don't look cropped)
- Set the language to English unless it's a localized screenshot
- Save as PNG image
- Preferably, use the default settings (icons, color scheme, style, window decoration, application settings etc.)
- Preferably, use compositing (Desktop Effects module in System Settings)
- Preferably, use Liberation Sans, 9pt as font
Workflow
In this example KSnapshot is used, but other screen capture applications work as well.

- Open KSnapshot
- Choose a Capture mode
- Full Screen: Everything on the screen is captured, usually used for desktop screenshots
- Region: Only a region defined by the user is captured, usually used for application screenshots
- Click on New Snapshot
- Full Screen: Click anywhere on the screen to take the snapshot
- Region: Use the mouse to draw a rectangle around the region to be captured (for example around a window). Click on Enter or double click in the region to take the snapshot
- Click on Save As...
- Browse to the location you want to save the image, give it a name (name.png) and click on Save
Hints and Tips
- The Snapshot delay option makes KSnapshot wait a given amount of time (given in seconds) before taking the snapshot. This can be useful in many situations, for example when taking screenshots of drop-down menus
- It's often useful to create a separate user for taking screenshots, to ensure a standard look with the default settings
- Use Type: Color in the wallpaper settings to get a white background
