Digikam/fr: Difference between revisions
ChristianW (talk | contribs) (Created page with "== Installeur Windows pour digiKam 2.2.0 == Dans son blog du 22 octobre 2011, Dmitri Popov a écrit :") |
ChristianW (talk | contribs) (Created page with "== Astuces utiles concernant digiKam == Retranscrit du blog de Dmitri Popov daté du 26 septembre 2011") |
||
| Line 83: | Line 83: | ||
{{Tip/fr|1=Cliquez sur la catégorie <menuchoice>Photographie</menuchoice> en bas de cette page pour voir une liste de tous les tutoriels disponibles pour Digikam et Showfoto.}} | {{Tip/fr|1=Cliquez sur la catégorie <menuchoice>Photographie</menuchoice> en bas de cette page pour voir une liste de tous les tutoriels disponibles pour Digikam et Showfoto.}} | ||
== | == Astuces utiles concernant digiKam == | ||
Retranscrit du blog de Dmitri Popov daté du 26 septembre 2011 | |||
# To quickly adjust thumbnail size in the Album view, press and hold the <keycap>Ctrl</keycap> key, then use the mouse scroll wheel to make the thumbnails larger or smaller. | # To quickly adjust thumbnail size in the Album view, press and hold the <keycap>Ctrl</keycap> key, then use the mouse scroll wheel to make the thumbnails larger or smaller. | ||
Revision as of 20:55, 15 April 2018
 |
Voir, gérer, éditer, améliorer, organiser, ajouter un tag et partager les photos |
DigiKam prend en charge l'importation de photos à partir des caméras, la création d'albums, marquage part dates, sujet et autres propriétés et un excellent outil de recherche. Veuillez consulter le manuel pour tous les détails, incluant les formats d'images qui sont pris en charge.
Gérer vos photos
-
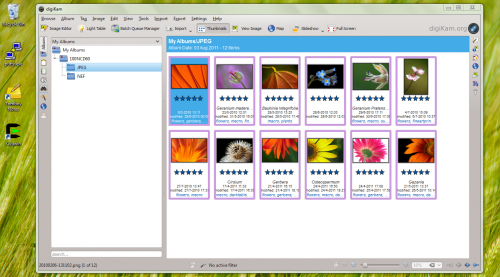
Vue d'album
-
Vue chronologique
-
Informations Exif
-
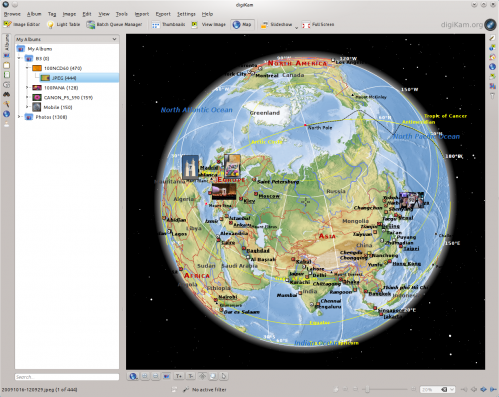
Géolocalisation
-
Vue recherche
-
Recherche détaillée
-
Identifier les photos dupliquées
-
Recherche approximative
L'éditeur d'image
-
Étiqueter
-
Mettre une note
-
Ajuster les niveaux de couleur
-
Ajuster la balance des blancs
-
Convertir en noir et blanc
-
Correction yeux rouges
-
Correction de couleur automatique
-
Correction de lentille automatique
L'interface appareil photo numérique
-
Lecture depuis les médias amovibles
-
ou depuis l'appareil
-
Enregistrer directement vers les albums
-
Ajouter la géolocalisation à des photos individuelles
La table des lumières
-
Comparer à partir d'un ensemble de photos
-
Examiner les détails
-
Notr rend le choix plus facile
-
Regarder la configuration de l'appareil photo numérique
ShowFoto
Pour ceux qui trouvent l'interface DigiKam un peu trop technique, ShowFoto donne accès aux mêmes outils, avec une interface populaire.
-
Navigation
-
Propriétés de l'image
-
Voir les propriétés de l'image
-
Encore la géolocalisation
-
Zooms prédéfinis
-
Histogramme
-
Configuration générale
-
Options d'infobulles
-
Configuration des images Raw
-
Configuration de la gestion des couleurs
-
Options d'enregistrement des fichiers
-
Configurer une présentation
La page d'aide du projet a des liens vers la FAQ et vers les détails d'inscription à la liste de diffusion.
Il y a une courte vidéo d'introduction ici.
La section sur la Gestion des ressources digitales n'est plus sur ces pages, mais dans le manuel, qui peut être présent sur votre installation en tant que digikam-doc, ou vous pouvez télécharger les fichiers pdf digikam.pdf, showfoto.pdf et kipi-plugins.pdf
Le blog Open Source Photo Processing Comes of Age par rm42 met en avant les développements depuis la version KDE3, et offre une visite utile.
Nous avons une collection croissante de tutoriels qui vous aideront à obtenir plus de plaisir et de productivité à partir de digikam. La page de tutoriels Digikam les liste avec un bref commentaire sur le contenu.

Astuces utiles concernant digiKam
Retranscrit du blog de Dmitri Popov daté du 26 septembre 2011
- To quickly adjust thumbnail size in the Album view, press and hold the Ctrl key, then use the mouse scroll wheel to make the thumbnails larger or smaller.
- With the feature enabled, digiKam automatically hides originals and displays the latest modified versions of the photos. For example, if you process a NEF file and save it in the JPEG format, digiKam hides the original RAW file and shows only the JPEG photo. To disable this feature, choose and make sure that the option in the In main view section is enabled. To keep things tidy, you can then group the original and all its versions. To do this, select the photos you want to group, right-click on the selection, and choose .
The trash has reached its maximum size! Cleanup the trash manually
If you receive this error message and emptying the Trash doesn’t help, then the following command may solve the problem:rm ~/.local/share/Trash/metadata
- Need to quickly locate all untagged photos? In digiKam, expand the left sidebar, and press the button. In the window, tick the check box and press to run the search.
- Instead of the conventional thumbnail view, digiKam lets you map your photos on a globe. Choose , and you should see photos from the current album mapped on the 3-D globe. You can then use the mouse to rotate the globe and the mouse wheel to zoom in and out. Obviously, the Map view displays only geotagged photos.

Installeur Windows pour digiKam 2.2.0
Dans son blog du 22 octobre 2011, Dmitri Popov a écrit :
"Good news for those who want to run the latest version of digiKam on Windows. The SourceForge repository now has a Windows installer of the latest digiKam version courtesy of Ananta Palani.

I tested the installer with a Windows 7 machine, it worked like a charm. While the installer makes it supremely easy to deploy digiKam on Windows, the application does have a few quirks. Most notably, the Windows version of digiKam cannot import photos directly from storage media or cameras, so you need to copy them to the hard disk using Windows’ own built-in image transfer tool, and then add the transferred photos to digiKam. The Trash feature doesn’t work either, but you can work around this issue by deleting photos instead of sending them to the trash. To be fair, though, these issues are not caused by digiKam itself, but are due to bugs in the underlying KDE libraries which the application relies on."


