Archive:Kdenlive/Manual/Transitions/ru: Difference between revisions
Smolyaninov (talk | contribs) Created page with "=== Вкладка Свойства (версия >= 15.12)===" |
Smolyaninov (talk | contribs) Created page with "В версии kdenlive 15.12 стек эффектов объединен с вкладкой «Переход» для создания окна/вкладки «Свойс..." |
||
| Line 18: | Line 18: | ||
=== Вкладка Свойства (версия >= 15.12)=== | === Вкладка Свойства (версия >= 15.12)=== | ||
В версии kdenlive 15.12 стек эффектов объединен с вкладкой «Переход» для создания окна/вкладки «Свойства». | |||
The Properties window displays the settings for the effects on the currently selected clip (Figure 1) or the settings for the currently selected transition (Figure 2) depending on whether it is a clip or a transition that is currently selected. | The Properties window displays the settings for the effects on the currently selected clip (Figure 1) or the settings for the currently selected transition (Figure 2) depending on whether it is a clip or a transition that is currently selected. | ||
Revision as of 04:13, 2 March 2019
Переходы
В Kdenlive переходы рассматриваются, как способ соединения клипов расположенных на разных дорожках. Используя переходы Kdenlive вы сможете добавить много разных эффектов перехода и компоновки клипов.
Как добавить переход
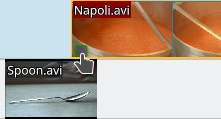
Чтобы добавить переход, расположите клипы на монтажном столе так, чтобы конец одного перекрывал начало другого.
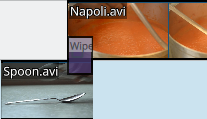
Щёлкните правой кнопкой мыши в точке перекрытия, выберите , затем выберите один из переходов из выпадающего меню.
См. Краткое руководство - добавление перехода
Вкладка Свойства (версия >= 15.12)
В версии kdenlive 15.12 стек эффектов объединен с вкладкой «Переход» для создания окна/вкладки «Свойства».
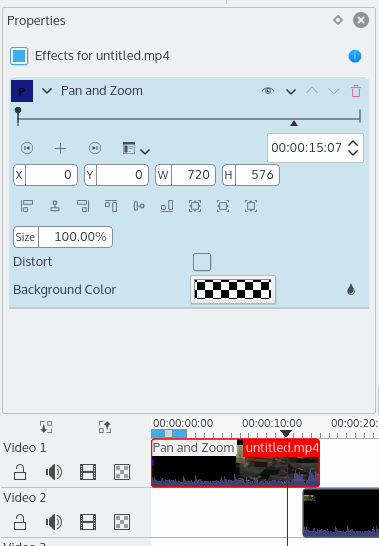
The Properties window displays the settings for the effects on the currently selected clip (Figure 1) or the settings for the currently selected transition (Figure 2) depending on whether it is a clip or a transition that is currently selected.
 |
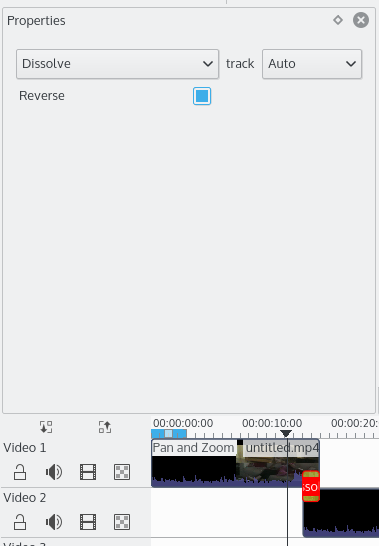 |
If you select the transition in the timeline  its properties will appear in the Properties tab (Figure 2).
You should preview your transition to make sure it is running in the direction you expect. For example, if it is a Dissolve transition and it is running in the correct direction, then the first clip should dissolve into the second clip. But if it is in the wrong direction, the first clip will suddenly disappear (replaced by the second track). It will then fade back in and abruptly jump to second clip. If your transition is in the wrong direction, just select the Reverse check box in the Properties tab.
Transition Tab (pre version 15.12)
If you select the transition in the timeline  its properties will appear in the Transition tab.
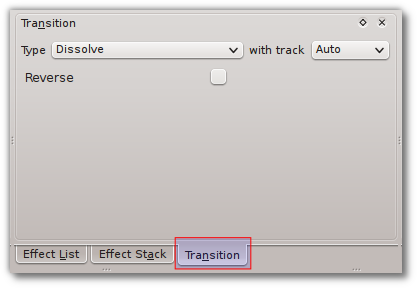
If the Transition dialog is not visible, use to add it.
You should preview your transition to make sure it is running in the direction you expect. For example, if it is a Dissolve transition and it is running in the correct direction, then the first clip should dissolve into the second clip. But if it is in the wrong direction, the first clip will suddenly disappear (replaced by the second track). It will then fade back in and abruptly jump to second clip. If your transition is in the wrong direction, just select the check box in the Transition tab.
Как создать переходы с одного клика
There is a shortcut for creating transitions between two tracks that overlap.
In Version 17.04 you hover the mouse over the lower grey rectangle that appears at the end of the clips on the timeline and a tool tip will appear saying "Click to add Transition". If you click a dissolve transition will be automatically added.
{{#ev:youtube|e1f0Yc8Fh3c}}
Older Versions: If you hover the mouse over the overlapping region on the timeline, a green triangle will appear. Clicking this adds a dissolve transition between the tracks.
{{#ev:youtube|h1k7GbEssqA}}
Автоматические переходы
If a transition is set as an "Automatic Transition" and you adjust the overlap between the two clips involved in the transition, then the length of the transition will automatically adjust to cover the region where the clips overlap.
You can toggle off this feature on a transition by selecting the transition and choosing Automatic Transition from the menu.
Transitions will be created with the Automatic transition property set to true by default if the Automatic Transitions Button is active.
When Automatic Transition is off and you move a clip to change the overlapping region, then the length of the transition does not automatically adjust.
Mixing titles, images and Videos with Transitions
{{#ev:youtube|f6VHlOZutm8|500|left|Image and Title Layers Transparency Tutorial - qubodupl/Open Source Bug}}
Keyframe Animations Using Transitions
{{#ev:youtube|M8hC5FbIzdE|428|center|Keyframe Animation - Linuceum}}
List of Transitions
См. так же алфавитный список Эффекты и переходы (Effects and Transitions) .
See also alpha operation transitions for a comparison of the various alpha operation-type transitions (addition, addition_alpha, alphaatop, alphain, alphaout, alphaover and alphaxor) .
- addition
- addition_alpha
- Affine
- alphaatop
- alphain
- alphaout
- alphaover
- alphaxor
- burn
- Cairo Affine Blend
- Cairo Blend
- color_only
- Composite
- Composite and transform
- darken
- difference
- Dissolve
- dodge
- grain_extract
- hardlight
- Hue
- lighten
- Matte
- multiply
- overlay
- Region
- Saturation
- screen
- Slide
- softlight
- subtract
- UV Map
- value
- Video Quality Measurement
- Wipe
FAQ
Q: Как добавить эффект перекрестное затухание (cross fading) ?
A: Make clips on two tracks overlap in time, then click the green triangle flashing in the bottom corner of the top clip (see Transition).
