Archive:Kdenlive/Manual/Tutorials/Split Screen How To/uk: Difference between revisions
Created page with "У цьому прикладі ми вставимо чотири різних зображення до одного кадру відео." |
Created page with "<br clear=all> Щоб скористатися цим ефектом, вам слід розташувати на монтажному столі 4 відеокліпи. До..." |
||
| Line 9: | Line 9: | ||
{{#ev:youtube|YRs5UDuCVJg|500|left|Приклад — 4 зображення у одному кадрі}} | {{#ev:youtube|YRs5UDuCVJg|500|left|Приклад — 4 зображення у одному кадрі}} | ||
<br clear=all> | <br clear=all> | ||
Щоб скористатися цим ефектом, вам слід розташувати на монтажному столі 4 відеокліпи. Додайте додаткові доріжки на монтажний стіл за допомогою пункту меню [[Special:MyLanguage/Kdenlive/Manual/Project_Menu/Tracks|Проєкт > Доріжки > Вставити доріжку]]. | |||
You create a project/timeline like that shown in Figure 1 and described in detail below. | You create a project/timeline like that shown in Figure 1 and described in detail below. | ||
Revision as of 20:27, 10 December 2019
Як створити ефект розділеного екрана
Іншою назвою цього ефекту є «кадр у кадрі».
У цьому прикладі ми вставимо чотири різних зображення до одного кадру відео.
{{#ev:youtube|YRs5UDuCVJg|500|left|Приклад — 4 зображення у одному кадрі}}
Щоб скористатися цим ефектом, вам слід розташувати на монтажному столі 4 відеокліпи. Додайте додаткові доріжки на монтажний стіл за допомогою пункту меню Проєкт > Доріжки > Вставити доріжку.
You create a project/timeline like that shown in Figure 1 and described in detail below.
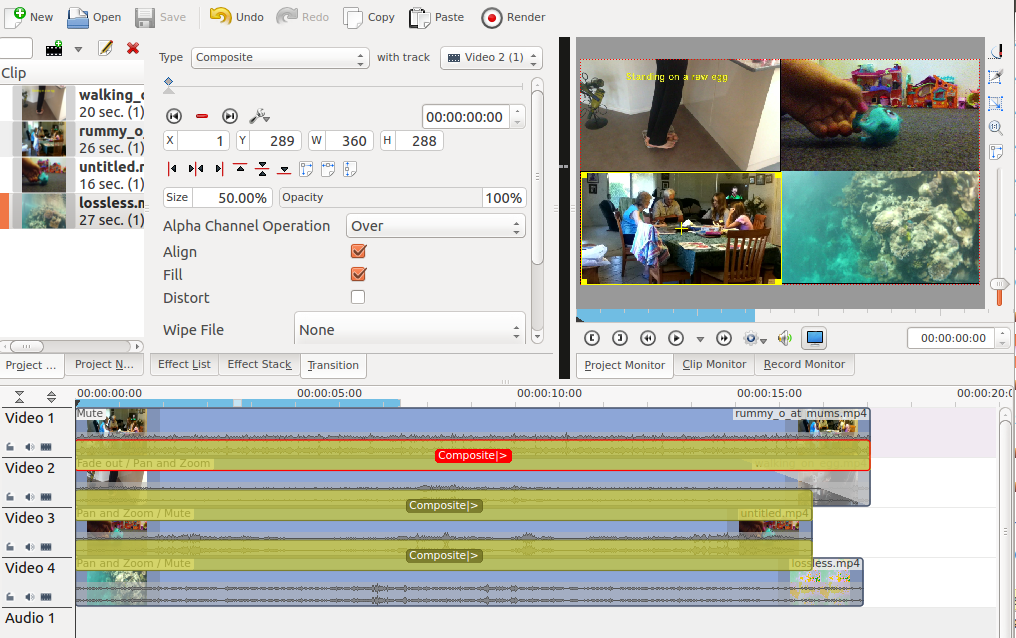
Video 1 (appears in bottom left in the result) has no effects added to it.
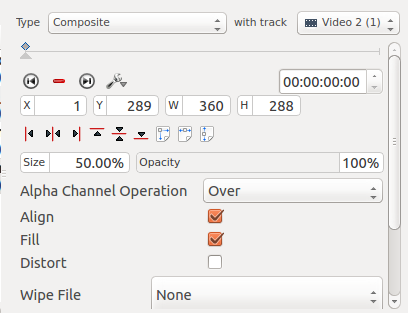
There is a composite transition between Video 1 and Video 2. (See Figure 2). This transition has a sizing and positioning effect as part of it that causes the Video on Video Track 1 to be scaled down 50% and be positioned in the bottom left corner.
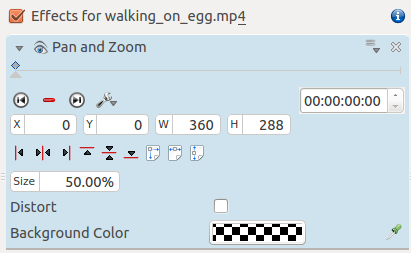
Video 2 (appears top left in result) has a pan and zoom effect added to it (See Figure 3). This effect has a sizing and positioning effect as part of it that causes the Video on Video Track 2 to be scaled down 50% and be positioned in the top left corner.
There is a standard composite transition between Video track 2 and Video track 3 - see Figure 4.
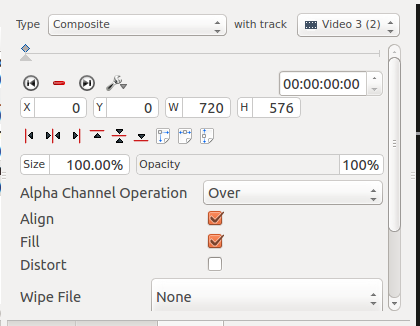
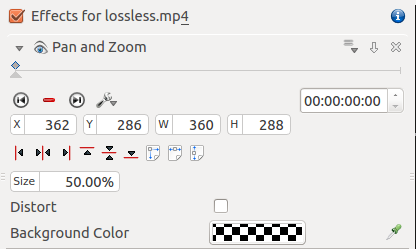
Video 3 (appears top right in result) has a pan and zoom effect added to it (See Figure 5). This effect has a sizing and positioning effect as part of it that causes the Video on Video Track 3 to be scaled down 50% and be positioned in the top right corner.
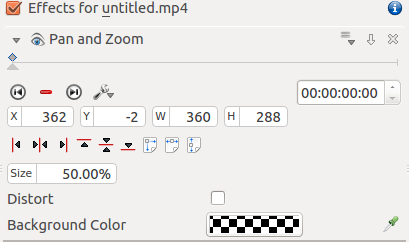
There is a standard composite transition between Video track 3 and Video track 4 - see Figure 6.
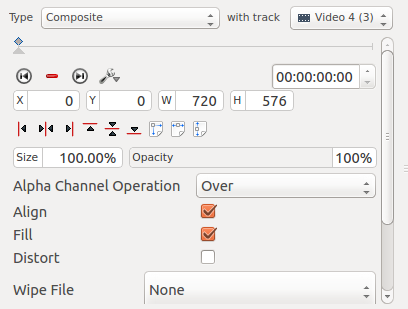
Video 4 (appears bottom right in result) has a pan and zoom effect added to it (See Figure 7). This effect has a sizing and positioning effect as part of it that causes the Video on Video Track 4 to be scaled down 50% and be positioned in the bottom right corner.
