Kubuntu/Installation/ru: Difference between revisions
No edit summary |
No edit summary |
||
| Line 40: | Line 40: | ||
====USB/Флеш-накопитель==== | ====USB/Флеш-накопитель==== | ||
В качестве графического интерфейса (GUI ) | В качестве графического интерфейса (GUI ) предлагаем использовать программу [https://unetbootin.github.io/ UNetBootin]. | ||
Образа диска (ISO файл) можно загрузить автоматически в UNetBootin или скачать вручную с [http://www.kubuntu.org/getkubuntu/ Сайта Kubuntu]. Этот сайт на английском, но дистрибутив '''Kubuntu''' многоязычный. | Образа диска (ISO файл) можно загрузить автоматически в UNetBootin или скачать вручную с [http://www.kubuntu.org/getkubuntu/ Сайта Kubuntu]. Этот сайт на английском, но дистрибутив '''Kubuntu''' многоязычный. | ||
Revision as of 13:48, 26 May 2020
Почему стоит попробовать Kubuntu?
Существуем много веских причин для установки Kubuntu, например:
- Kubuntu делает Ваш компьютер простым в использовании.
- Kubuntu - операционная система, разработанная дружелюбной международной командой программистов-экспертов. Она содержит все программы, которые Вам нужны, включая веб-браузер, офисный пакет, медиа-приложения, чат-клиенты и множество других. Чтобы ознакомиться со списком программ, включенных в систему, посетите страницу Программное обеспечение.
- Kubuntu бесплатная альтернатива Windows и Mac OS X, использующая открытый исходный код.
- Она может быть легко установлена вместо Windows или рядом с ней.
Подготовка установочного носителя
Проверка контрольной суммы MD5
Эта процедура гарантирует, что загрузка ISO-образа завершена, и Вы получили дистрибутив для установки системы без искажений.
С помощью Windows XP / 7 / 8 / 10
Microsoft Windows не содержит встроенного средства проверки контрольной суммы MD5, но предлагает скачать специальный инструмент, подходящий для этого. Журнал How-To-Geek предоставляет информацию о проверке контрольной суммы MD5. Также можно воспользоваться утилитами UNIX, адаптированными для Windows проектом Cygwin.
С помощью Mac OS X
Откройте приложение Терминал. С помощью него перейдите в директорию, где сохранен ISO-файл. Выполните команду с использованием имени своего файла:
md5 -r kubuntu-15.10-desktop-amd64.iso
Затем сравните результат с контрольной суммой на странице загрузки ISO файла.
Каталог контрольных сумм для образов Ubuntu можно найти здесь: https://help.ubuntu.com/community/UbuntuHashes
С помощью Ubuntu Linux
Для начала проверьте, что находитесь в директории, где расположен ISO-файл (Чаще всего, его можно найти в папке Загрузки). Затем используйте команду 'md5sum'. За более подробной инструкцией обратитесь к странице HowToMD5SUM
md5sum kubuntu-15.10-desktop-amd64.iso
Запись с Windows 7 / 8 / 10
USB/Флеш-накопитель
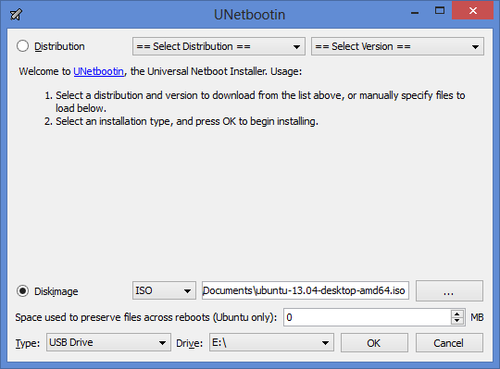
В качестве графического интерфейса (GUI ) предлагаем использовать программу UNetBootin.
Образа диска (ISO файл) можно загрузить автоматически в UNetBootin или скачать вручную с Сайта Kubuntu. Этот сайт на английском, но дистрибутив Kubuntu многоязычный.
If you choose the 'Diskimage' option you use the button to select your downloaded ISO. Then click .
DVD
The recommended tool for you to use is ImgBurn. There is an excellent tutorial written by the Admin on the ImgBurn forums. It can be found here.
Запись с ранее установленной Kubuntu
USB/Флеш-накопитель
For a GUI (Graphic User Interface) we use UNetBootin.
You can use UNetBootin to download the ISO(image file) automatically or it can be downloaded here: Get Kubuntu.
Using the command line we use the 'dd' command.
Insert your USB drive into your computer and find the corresponding drive using:
lsblk
Then format the USB drive with the 'dd' command:
sudo dd if=Downloads/kubuntu-15.04-desktop-amd64.iso of=/dev/sdX
DVD
Для записи DVD мы рекомендуем использовать утилиту KDE под названием k3b, которую можно найти здесь.

Look for , click it and then pick from the list of actions.
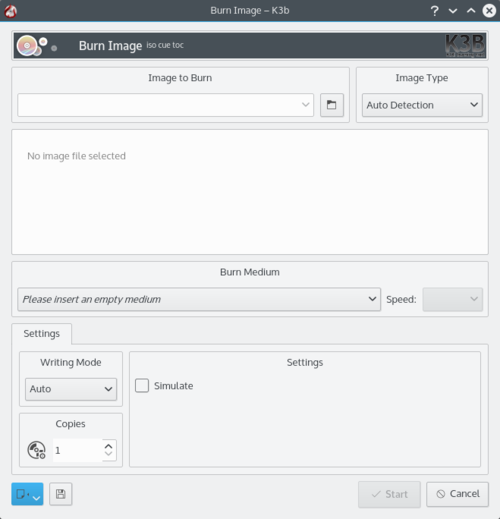
Then you select the image (iso) that you want to burn to the DVD from your computer.
Запись с других дистрибутивов Linux
На основе GNOME
USB/Флеш-накопитель
For a GUI (Graphic User Interface) we use UNetBootin.
You can use UNetBootin to download the ISO(image file) automatically or it can be downloaded through Get Kubuntu.
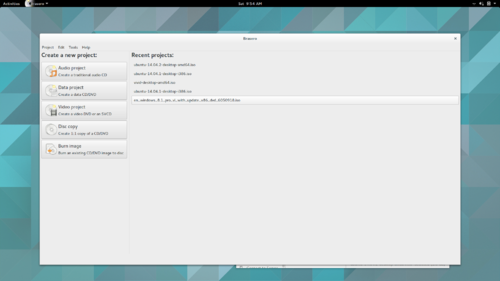
DVD
На основе KDE
If you're using a Linux Distribution that uses KDE you can follow the Kubuntu instructions as K3b is provided in every KDE based distribution.
Процесс установки
First, you will need to download Kubuntu. See Get Kubuntu
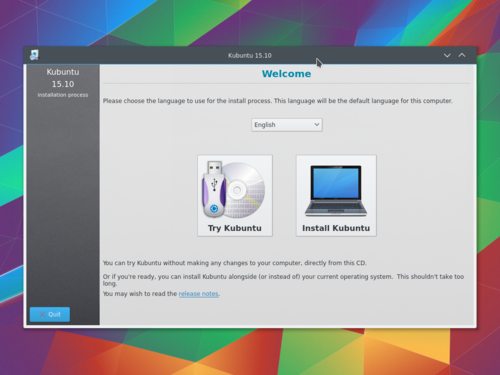
When the installer starts you will see these options:
- Try out Kubuntu without changing anything on your computer.
- Install Kubuntu on your computer.
Подготовка
Для наилучшего результата, удостоверьтесь в том, что:
- На Вашем компьютере достаточно места для Kubuntu и Ваших данных (песен, фотографий, видео и документов).
- Ваш компьютер подключен к интернету, значит Вы сможете загрузить обновления и стороннее программное обеспечение во время установки Kubuntu.
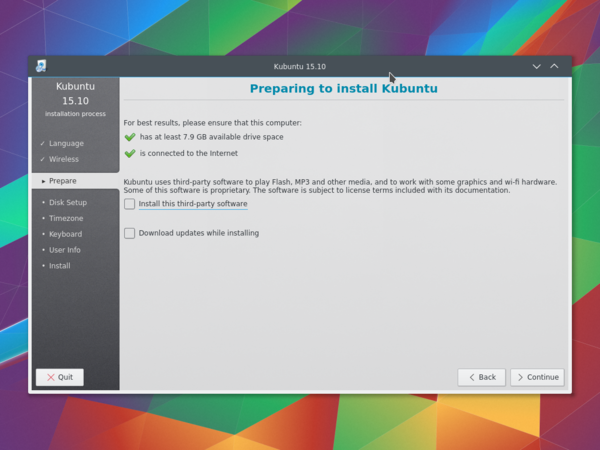
includes software that either does not follow the Open Source model or the Ubuntu Philosophy, but is safe for use on your system.
will ensure that you have the latest bug and security fixes included and applied once the installation is complete.
Разметка диска
This is where you choose how to organize your hard drive. This step is the most complicated and consequential in the entire installation process, so take your time.
The following sections are some possible installation scenarios you might choose. Each of these choices points to a page or series of pages with more details. For each option (except Manual), the installer asks which hard drive to use. After choosing, you will see a before and after layout on that hard drive.
Resize
This will resize the partitions for you and install Kubuntu on the free space. With this option, you can create what is called a dual-boot and choose which OS to boot into at startup.
Use entire disk
Using this option the installer will create two partitions on your hard drive; one for most of the content, including the root and home directories, and one partition for the swap.
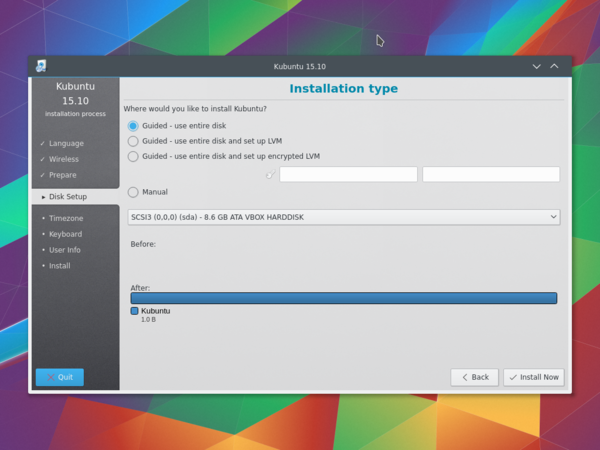
Use entire disk and set up LVM
More about LVM
Use entire disk and set up encrypted LVM
More about encrypted file systems
Manual
When using to set up your system as you would like it, keep these thoughts in mind:
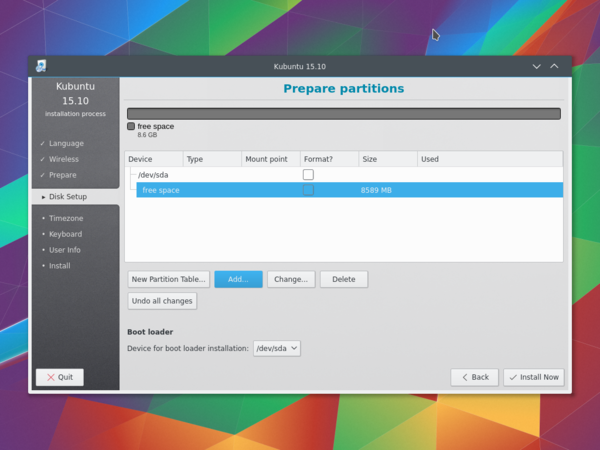
- The root ( / ) directory needs at least 25 GB of space.
- The home ( /home ) directory needs as much space as you will need for your files, music, pictures, and documents. So it is best to use the remaining space for the home partition, unless you are going to have a dual boot.
- Swap space of at least half of the available RAM is recommended. For instance, with 8 GB of RAM, you should make the swap have at least 4 GB.
For more detailed information regarding the Disk Setup of a Linux system you can check the DiskSpace page.
Timezone
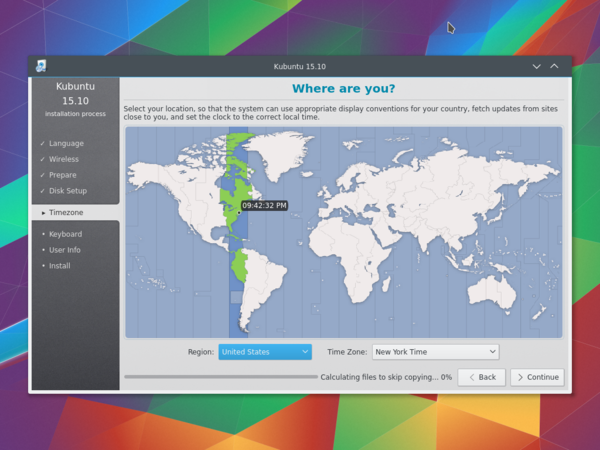
During this step you get to pick the Region where you live and then the Timezone of the location in that Region. An example would be that I live in New York, so my Region is North America and my Timezone is New York (EST).
Keyboard
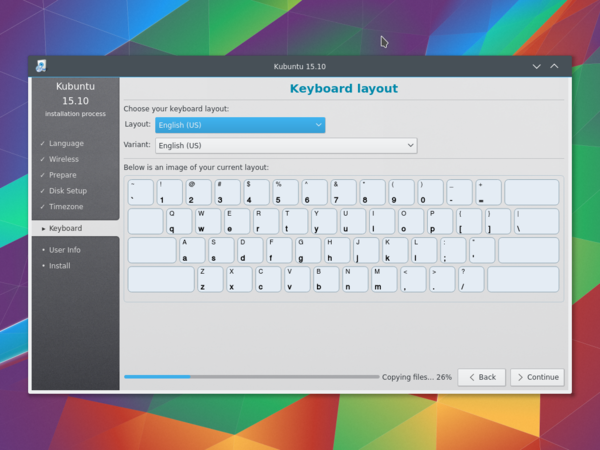
This is the step that will set up your keyboard's language or, if applicable, a different version of the language. For example, there is a Cherokee American English setting as well as different setups with special keys used in certain languages; in Kubuntu we try to make the use of the system easy for everyone!
User Info
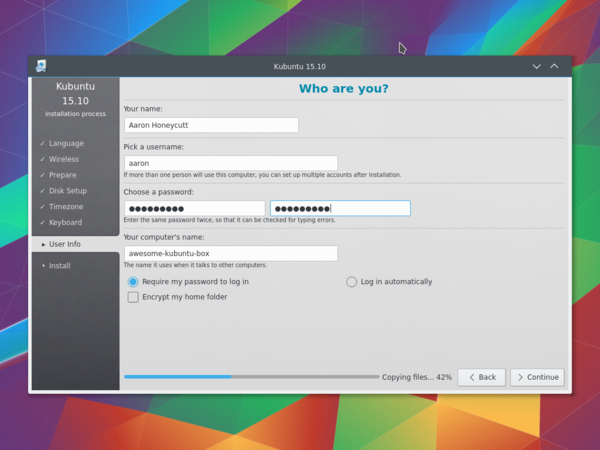
At this step of the installation you will be putting in user information like your name, username, and password. The password will be your key to logging into your new installation as well as installing new software, updating your system, and more, so keep it written down somewhere!
