Digikam/Local Contrast/tr: Difference between revisions
Created page with "==Fotoğraflarrınız digiKam'ın Yerel Karşıtlık Aracı ile İyileştirin==" |
Created page with "Bu yazı aslen [http://scribblesandsnaps.wordpress.com/category/software/open-source/ Scribbles and Snaps]'te bir blog yazısı olarak ortaya çıkmış ve Dmitri Popov'un izniyl..." |
||
| Line 2: | Line 2: | ||
==Fotoğraflarrınız digiKam'ın Yerel Karşıtlık Aracı ile İyileştirin== | ==Fotoğraflarrınız digiKam'ın Yerel Karşıtlık Aracı ile İyileştirin== | ||
Bu yazı aslen [http://scribblesandsnaps.wordpress.com/category/software/open-source/ Scribbles and Snaps]'te bir blog yazısı olarak ortaya çıkmış ve Dmitri Popov'un izniyle kullanılmıştır. | |||
'''digiKam''' offers several features that can improve photos containing under- or overexposed areas. For example, the [[Special:myLanguage/Digikam/Exposure_Blending| Exposure Blending]] tool lets you merge multiple shots with different exposures into one perfectly exposed photo. But what if you have just a single image? In this case, you might want to give the <menuchoice>Local Contrast</menuchoice> feature a try. It’s based on the [http://zynaddsubfx.sourceforge.net/other/tonemapping/ LDR Tonemapping utility] which is designed to improve the dynamic range of the photo by reducing its global contrast and increasing the local contrast. It does so by generating a desaturated and blurred version of the photo. It then combines the RGB channels of the original photo with the desaturated blurred image using either the <menuchoice>Linear</menuchoice> or <menuchoice>Power</menuchoice> function. Sounds complicated? Don’t worry, the <menuchoice>Local Contrast</menuchoice> tool is rather straightforward to use, so you don’t have to understand all its intricacies in order to achieve pleasing results. | '''digiKam''' offers several features that can improve photos containing under- or overexposed areas. For example, the [[Special:myLanguage/Digikam/Exposure_Blending| Exposure Blending]] tool lets you merge multiple shots with different exposures into one perfectly exposed photo. But what if you have just a single image? In this case, you might want to give the <menuchoice>Local Contrast</menuchoice> feature a try. It’s based on the [http://zynaddsubfx.sourceforge.net/other/tonemapping/ LDR Tonemapping utility] which is designed to improve the dynamic range of the photo by reducing its global contrast and increasing the local contrast. It does so by generating a desaturated and blurred version of the photo. It then combines the RGB channels of the original photo with the desaturated blurred image using either the <menuchoice>Linear</menuchoice> or <menuchoice>Power</menuchoice> function. Sounds complicated? Don’t worry, the <menuchoice>Local Contrast</menuchoice> tool is rather straightforward to use, so you don’t have to understand all its intricacies in order to achieve pleasing results. | ||
Revision as of 13:08, 31 December 2010
Fotoğraflarrınız digiKam'ın Yerel Karşıtlık Aracı ile İyileştirin
Bu yazı aslen Scribbles and Snaps'te bir blog yazısı olarak ortaya çıkmış ve Dmitri Popov'un izniyle kullanılmıştır.
digiKam offers several features that can improve photos containing under- or overexposed areas. For example, the Exposure Blending tool lets you merge multiple shots with different exposures into one perfectly exposed photo. But what if you have just a single image? In this case, you might want to give the feature a try. It’s based on the LDR Tonemapping utility which is designed to improve the dynamic range of the photo by reducing its global contrast and increasing the local contrast. It does so by generating a desaturated and blurred version of the photo. It then combines the RGB channels of the original photo with the desaturated blurred image using either the or function. Sounds complicated? Don’t worry, the tool is rather straightforward to use, so you don’t have to understand all its intricacies in order to achieve pleasing results.

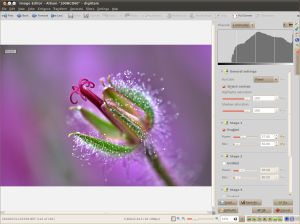
Open the photo you want in the editor and choose -> . The tool lets you apply up to four tonemapping operations called stages. Each stage offers two parameters for you to tweak: and . The former allows you to specify the desaturation level, while the latter lets you adjust the affected areas on the photo. To preview the result, hit the button. Once you are satisfied with the result, press OK to apply the process to the photo.
While the tool may sound like an easy way to fix photos, you should use it with care: sometimes it can do more damage than good, producing unnaturally looking photos.
