Digikam/Facebook/uk: Difference between revisions
Created page with "digiKam/Facebook" |
Created page with "==Звантаження альбомів Facebook за допомогою digiKam==
Створено на основі допису у блозі Мохамеда Маліка ..." |
||
| Line 1: | Line 1: | ||
<languages /> | <languages /> | ||
== | ==Звантаження альбомів Facebook за допомогою digiKam== | ||
Створено на основі допису у блозі Мохамеда Маліка (Mohamed Malik), 15 лютого 2011 року | |||
Need to download Facebook albums of you or your friends? You don't want to save each and every image individually. Well, in that case '''digiKam''' has got you covered. It is easy and fast. Here is how to do it. | Need to download Facebook albums of you or your friends? You don't want to save each and every image individually. Well, in that case '''digiKam''' has got you covered. It is easy and fast. Here is how to do it. | ||
Revision as of 18:44, 28 February 2011
Звантаження альбомів Facebook за допомогою digiKam
Створено на основі допису у блозі Мохамеда Маліка (Mohamed Malik), 15 лютого 2011 року
Need to download Facebook albums of you or your friends? You don't want to save each and every image individually. Well, in that case digiKam has got you covered. It is easy and fast. Here is how to do it.
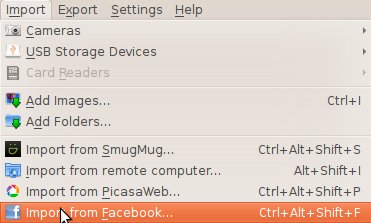
Go to and select . See screen shot below!

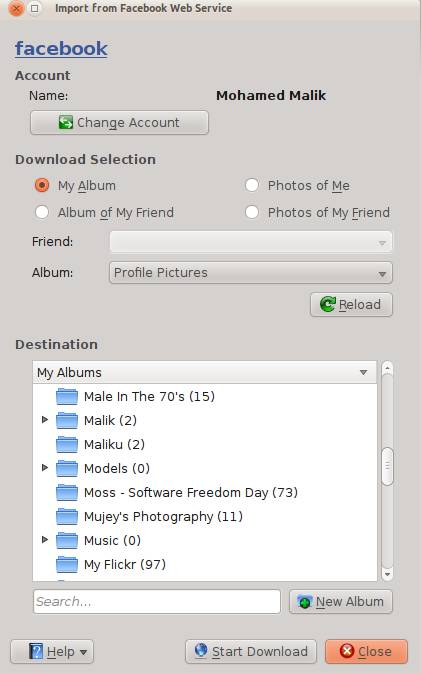
When you press it you will be asked to log in to your Facebook acount or either link your Facebook account with digiKam. Your web browser will pop up and give it permission to connect. Then you will be greeted with this window.

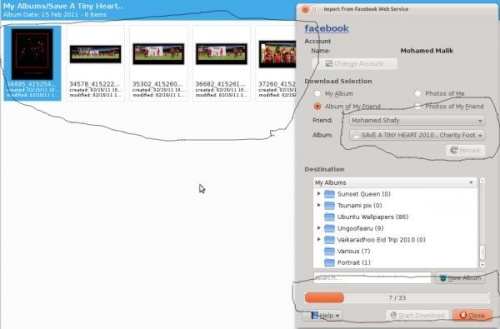
Here you can choose to download your own album or your friend's album. If you choose your album then when you click the menu named you will see all the albums uploaded by you. If you choose to download a friend's album, then choose the name of your friend and then select the album you want to download. As you can see on the screen shot you need to specify where you want to download the photos. Select the location on your albums and and select and give it a name. Then press . It will download the pictures that you have selected.

How to upload pictures to Facebook using digiKam
Now let us learn how to upload pictures to Facebook using digiKam.
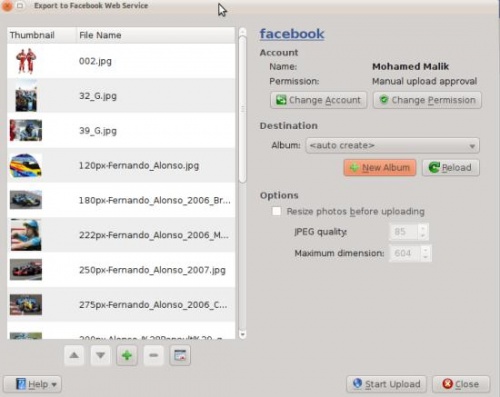
It is simple. Select the images that you want to upload and and you will be greeted with a new window where you will be asked to log on to Facebook. Follow the on-screen instructions and you will see this window.

As you can see the process is very easy and straight forward. You can create a new album give it a name. And choose to resize the pictures into the size that you prefer and can even alter the JPG quality settings. When you are done just press .
