Digikam/Configure the Main Toolbar in digiKam/da: Difference between revisions
Importing a new version from external source |
Importing a new version from external source |
||
| Line 1: | Line 1: | ||
<languages /> | <languages /> | ||
== | == Indstilling af digiKams hovedværktøjslinjen == | ||
Fra [[User:Dmitri Popov|Dmitri Popovs]] blog, 31. maj 2011 | |||
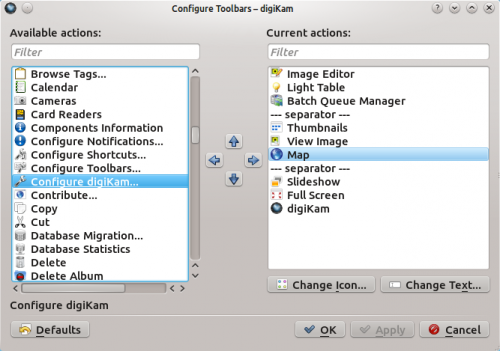
The main toolbar in '''digiKam''' provides quick access to several tools and features, and you can tweak it to fit your particular photographic workflow. To do this, choose the <menuchoice>Settings -> Configure Toolbars</menuchoice> command. This opens the <menuchoice>Configure Toolbars</menuchoice> dialog window where you can add, remove, and tweak toolbar buttons. | The main toolbar in '''digiKam''' provides quick access to several tools and features, and you can tweak it to fit your particular photographic workflow. To do this, choose the <menuchoice>Settings -> Configure Toolbars</menuchoice> command. This opens the <menuchoice>Configure Toolbars</menuchoice> dialog window where you can add, remove, and tweak toolbar buttons. | ||
Revision as of 14:42, 10 June 2011
Indstilling af digiKams hovedværktøjslinjen
Fra Dmitri Popovs blog, 31. maj 2011
The main toolbar in digiKam provides quick access to several tools and features, and you can tweak it to fit your particular photographic workflow. To do this, choose the command. This opens the dialog window where you can add, remove, and tweak toolbar buttons.

To add a new button to the toolbar, simply select the entry you want in the pane and drag it with the mouse to the desired position in the pane (you can also use the Arrow buttons for that). To arrange the available commands into logical groups, you can use the special entry. You don’t fancy the default icon of a specific button? Press the button and assign the button an alternative icon. And using the button, you can modify the default button label. That’s all there is to it.
