Toolbox/lb: Difference between revisions
Created page with "{{Info|Dës Säit weist Beispiller vum Formatéierungs-Code fir geleefeg Aufgaben}}" |
Created page with "== Een aleedende Screenshot an eng Beschreiwung derbäisetzen ==" |
||
| Line 2: | Line 2: | ||
{{Info|Dës Säit weist Beispiller vum Formatéierungs-Code fir geleefeg Aufgaben}} | {{Info|Dës Säit weist Beispiller vum Formatéierungs-Code fir geleefeg Aufgaben}} | ||
== | == Een aleedende Screenshot an eng Beschreiwung derbäisetzen == | ||
Whenever possible we begin an application's top-level page with this. The code to achieve it is | Whenever possible we begin an application's top-level page with this. The code to achieve it is | ||
Revision as of 10:21, 17 July 2011
Een aleedende Screenshot an eng Beschreiwung derbäisetzen
Whenever possible we begin an application's top-level page with this. The code to achieve it is
{|class="tablecenter vertical-centered"
|[[Image:YourScreenshot.png|250px|thumb]]
|Your descriptive text
|}
Format Your Text
Use Headings
Headings automatically form part of your Table of Contents, so need to be structured. Their place in the tree is governed by multiple '=' characters at each end of the heading. Avoid using a single one - that denotes a page heading, and the automatic page heading should be used. Your major headings will use '==text goes here==', the next level, '===more text===' and so on.
Use bold and italic
Blips are used to specify bold and italic words.
Use '''bold text''' to specify bold text and ''italic text'' to specify italic text.
In order to ensure we get easy and accurate translations, please adhere to the typographical guidelines.
Add a Code Snippet
We have templates to assist in correctly displaying code snippets. Examples of use in various situations are available on the typographical guideline page
If you have problems displaying pipe characters in your code snippet, please see the explanation and markup detailed on Typographical Guidelines
Add Indents
- ":" is used for an indent, and was used in multiples in some old pages. This is deprecated, and causes some problems, so the multiples will be removed as they are found. A single ":" indents by four characters.
Format Dates
Dates in a purely numerical format cause confusion, due to differences in expectations of geographical zones. Please format dates as
18 Mar 2011
with the month either spelled out completely or in abbreviated form, and the year in 4-digit format. The day may be single or double-digit.
Bulleted Lists
* is the symbol to use for bulletted lists. ** gives a second level:
* Almonds

* Nuts
** Cashews

* Raisins
produces
- Almonds
- Nuts
- Cashews
- Raisins
Enumerations
Enumerations are produced in the same way, using '#'.
# Sift
# Mix
## Stir thoroughly
# Bake
produces
- Sift
- Mix
- Stir thoroughly
- Bake
Combining Bulleted Lists and Enumerations
You can have an enumerated sublist in a bulleted list and vice versa, like this:
* Nuts
*# Cashew
*# Crazy
* Other things
produces
- Nuts
- Cashew
- Crazy
- Other things
while
# Nuts
#* Cashew
#* Crazy
# Other things
produces
- Nuts
- Cashew
- Crazy
- Other things
Itemizations
Itemizations are produced using ; and : alternatively. They are best for giving short descriptions for a group of related objects.
;Animals
: They move around and devour other creatures.

;Plants
: They have roots and feed upon ground water and sun.
produces
- Animals
- They move around and devour other creatures.
- Plants
- They have roots and feed upon ground water and sun.
Add a Link
There are three kinds of links to learn, internal ones, to another userbase page, internal links to a section of a userbase page, and external URL links.
For an internal link the format [[PageLayout]], where you want to display the name of the page, does work, but it is not ideal, particularly for translation to docbook and for localisation. It is better to use the form [[Special:myLanguage/PageLayout|Page Layout]], because that allows translators to link correctly even though the page name is localised. The result is that it directs to the correctly translated page, if one exists. You often need to include the link in a sentence, so in that case you would use
[[Special:myLanguage/PageLayout|this page]]
which displays
Internal links to subsections of a page should look like this
[[Special:myLanguage/Tasks_and_Tools#Working_with_Languages|...]]
With this kind of link it is very important, that the page you link to has a subpage anchor immediately before the section you link to. It should look like this:
</translate><span id="Working_with_Languages"></span><translate>
(in this example - the id should match the title of the section) and should be place immediately before the section headline with a blank line separating the anchor and the headline.
If the page containing the section that you link to is not yet marked up for translation, you should omit the </translate> and <translate> tags.
External links are slightly different so
[http://techbase.kde.org/Schedules our road map]
displays
our road map, which would take you straight to the techbase page.
One last thing to note - when you preview your page, all links are live. This gives you two benefits. You can check (by hovering) that your links are set up as you expected, and you can use a red link to create a new page.
Illustrate Your Text
Add a single image, centered
[[Image:KMail-kde4.png|250px|center]]
Note that you can change the position of the image, but the default is left. The size of the image depends on the circumstances, but for screenshots I recommend no less than 250px and no more than 500px.
Make the Image Clickable, and Add a Caption
Where you need to show more detail, create a moderately sized image, clickable, so that the full-size can be seen. Simply add the parameter '|thumb' within the image parentheses.
A caption can also be added as a parameter, but will only show if '|thumb' is present.
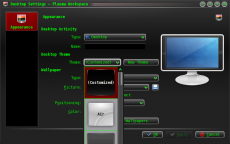
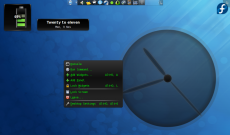
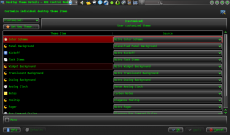
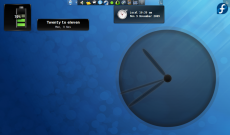
Use Tables to Precisely Place Multiple Images
{|class="tablecenter" style="border: 1px solid grey;"
|[[Image:Desktop-config-customized.png|230px|center]]||[[Image:Desktop-settings-rightclick.png|230px|center]]
|-
|[[Image:Desktop-theme-details-dialog.png|230px|center]]||[[Image:Plasma-multiple-themes.png|230px|center]]
|}
displays
 |
 |
 |
 |
Note that all the parameters for one image are contained within [[...]], and cells are separated by '||'. To start a new line, insert '|-' on an otherwise-empty line, then '|' at the start of the next one.
Add Notes and Warnings
Where a note or warning is relevant within your text, use these templates:
{{Info|This is general information}} displays
{{Note|Some important information at this point}} displays
{{Tip|A helpful piece of advice, something to remember}}displays
{{Warning|Take care - this is a dangerous thing to do}} displays
Where the strongest possible warning is needed, the Remember box can be used, but please use sparingly.
{{Remember|1=This is for things that definitely must not be forgotten}}
You can also change the heading:
KDE3 and KDE SC 4 Versions of Applications
By default, KDE SC 4 is assumed. If the KDE SC 4 version is not yet ready for release, or where only a KDE 3 version exists, it may be necessary to document the KDE3 version. In this case you should add an icon {{KDE3}}
which displays
![]() Should you be writing about a KDE3 version and KDE SC 4 version on the same page, use icons for both - {{KDE4}} which displays
Should you be writing about a KDE3 version and KDE SC 4 version on the same page, use icons for both - {{KDE4}} which displays
![]()
Other Useful Templates
Inserting GUI Icons
The best way to refer to icons in the GUI is to display it in the text. This can be done with a template like this: {{Icon|list-add}}. This will display the ![]() icon.
icon.
For this to work, the icon image must have been uploaded to the wiki. See Update an Image for an explanation on how to upload images. The .png files can usually be found here: usr/share/icons/oxygen. If possible use the 16x16 icon. The file name should have an Icon- prefix as in Icon-list-add.png — apart from the prefix the filename should exactly match the usual name. Note, that when using the template you should neither write the Icon- prefix nor the .png file type extension.
The ![]() icon can also be written as
icon can also be written as {{Plus}}, and the ![]() icon as
icon as {{Minus}}. You can also use {{Configure}} to get the ![]() icon, and
icon, and {{Exit}} gets you the ![]() icon.
icon.
Community Applications
The final consideration concerns those applications which are not distributed as core KDE applications. These need to be indicated by an icon, placing {{Community-app}}
at the end of your sentence or line, just as you would to denote a footnote in general writing. You then need to add {{Community-app-footnote}} which will create a footnote, like this:
![]() Support for this application can be found from the project's home page
Support for this application can be found from the project's home page
Making Major Edits to Existing Pages
If a page is likely to be open for editing for some time there is a danger of conflicts - someone else may edit at the same time, and saving your edit will cancel out theirs, or vice versa. The way to avoid that is to make a temporary entry, directly under the language bar, using {{Being_Edited}} which will display
Don't forget to remove it when you have finished!
Adding a New Complex Page
If you need to be able to work on a page for quite some time, over several days, for instance, you may like to use the Construction template - {{Construction}}, which displays
Links to Pages in the Neighbourhood
You can add links to a preceding or a following page using the following templates as described here:
{{Prevnext|Previous Pagename|Following Pagename|The page before this page|This page you should read later}}
For first pages with no preceeding page or last pages with no following page use this:
{{Next|Following Pagename|This page you should read later}}
- Toolbox/lb
- This page you should read later →
{{Prev|Previous Pagename|The page before this page}}
- ← The page before this page
- Toolbox/lb
Adding a List of Sub-Pages
== Subpages of {{FULLPAGENAME}} ==
{{Special:PrefixIndex/{{FULLPAGENAME}}/}}
is very useful when you want to list subpages with active links, such as
Subpages of Toolbox/lb
It does, however, also list all "other-language" pages, so use with discretion.


