Archive:Kdenlive/Manual/Timeline/Right Click Menu/en: Difference between revisions
Appearance
Updating to match new version of source page |
Updating to match new version of source page |
||
| Line 26: | Line 26: | ||
{{Prevnext2 | {{Prevnext2 | ||
| prevpage=Special:MyLanguage/Kdenlive/Manual/Timeline/Guides | nextpage=Special:MyLanguage/Kdenlive/Manual/ | | prevpage=Special:MyLanguage/Kdenlive/Manual/Timeline/Guides | nextpage=Special:MyLanguage/Kdenlive/Manual/Effects_And_Transitions | ||
| prevtext=Guides | nexttext=Transitions | | prevtext=Guides | nexttext=Alphabetical list of Effects and Transitions | ||
| index=Special:MyLanguage/Kdenlive/Manual | indextext=Back to menu | | index=Special:MyLanguage/Kdenlive/Manual | indextext=Back to menu | ||
}} | }} | ||
[[Category:Kdenlive]] | [[Category:Kdenlive]] | ||
Revision as of 17:49, 1 November 2012
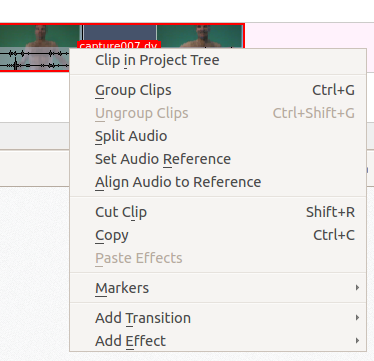
Clip in Timeline - Right Click Menu
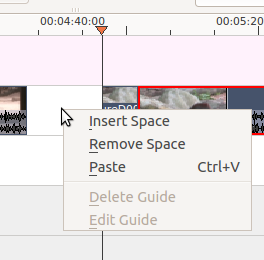
This is the context menu that appears when you right click on a clip in the timeline. A different menu appears if you click in empty space in the timeline.
will cause the selected clip to be highlighted in the project tree.
and are used to align two clips on different tracks in the timeline base on the audio in the tracks. This is useful if two cameras recorded the same scene simultaneously. Kdenlive can use the almost identical audio track to align the two clips.
To use this feature
- Select the clip that you would like to align to.
- Right click, select
- Select all clips you would like aligned
- Right click and select
A different menu appears if you click in empty space in the timeline.


