Digikam/Export via DNLA: Difference between revisions
Created page with "== Export Photos from digiKam via DLNA == Transcribed from Dmitri Popov's blog, 4 March 2013 Need to quickly push photos in '''digiKam''' to a device on the same network? Pro..." |
No edit summary |
||
| Line 1: | Line 1: | ||
<languages /> | |||
<translate> | |||
== Export Photos from digiKam via DLNA == | == Export Photos from digiKam via DLNA == | ||
Transcribed from Dmitri Popov's blog, 4 March 2013 | Transcribed from Dmitri Popov's blog, 4 March 2013 | ||
| Line 11: | Line 14: | ||
Press <menuchoice>Next</menuchoice> again and hit the <menuchoice>Start</menuchoice> button to start the DLNA server. You can then access the shared photos from any device on the network using a dedicated DLNA client, or DLNA-enabled software. | Press <menuchoice>Next</menuchoice> again and hit the <menuchoice>Start</menuchoice> button to start the DLNA server. You can then access the shared photos from any device on the network using a dedicated DLNA client, or DLNA-enabled software. | ||
[[Category:Graphics]] | |||
[[Category:Photography]] | |||
[[Category:Tutorials]] | |||
</translate> | |||
Revision as of 13:57, 7 March 2013
Export Photos from digiKam via DLNA
Transcribed from Dmitri Popov's blog, 4 March 2013
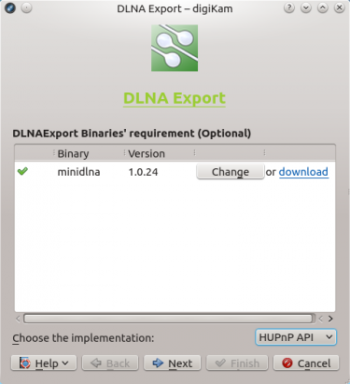
Need to quickly push photos in digiKam to a device on the same network? Provided the device supports DLNA, you can do this using the DLNAExport Kipi plugin. Choose to open the DLNA Export wizard. From the drop-down list, select either or . Both options have their advantages and drawbacks. miniDLNA supports thumbnails and works with all DLNA-compatible devices. But it can’t handle hierarchical folders or virtual albums. Also, miniDLNA relies on the older UPnP 1.0.0 protocol. HUPnP, in turn, uses the latest UPnP protocol and supports hierarchical folders and virtual albums. The drawbacks include the lack of support for Sony devices and thumbnails.
If you choose the option, you have to install the miniDLNA package on your system. To do this on Debian and Ubuntu-based Linux distributions, run the apt-get install minidlna command as root. Once miniDLNA has been installed, press the button in the DLNA Export window and specify the path to the miniDLNA binaries (usually it’s /usr/bin).

Press then the button, and select the collection you want to export. You have three options here: you can pick the desired albums in the section, or select tags under the tab to export photos containing specific tags. If you already have saved searches in digiKam, you can select them in the section to export photos matching specified search criteria. Note that tags and searches cannot be used with miniDLNA, as it doesn’t support virtual albums.
Press again and hit the button to start the DLNA server. You can then access the shared photos from any device on the network using a dedicated DLNA client, or DLNA-enabled software.
