Digikam/Basic RAW Processing/da: Difference between revisions
No edit summary |
Created page with "center|500px|thumb|Anvendelse af linsekorrektion " |
||
| Line 12: | Line 12: | ||
[[Image:Digikam-rawdev-lenscorrection.png|center|500px|thumb| | [[Image:Digikam-rawdev-lenscorrection.png|center|500px|thumb|Anvendelse af linsekorrektion ]] | ||
Revision as of 04:49, 13 June 2013
Simpel RAW-behandling i digiKam
Til dette projekt vil vi bruge et foto af den berømte Sagrada Familia-katedral i Barcelona i Spanien (du kan downloade RAW-filen fra https://www.box.com/s/cq3uknqt54o3usf1jg3r). Fotoet blev taget med et Canon PowerShot S90 kamera og RAW-filen har flere åbenbare brister, herunder synlig tøndeforvrængning, undereksponerede områder og støj. Med andre ord er denne RAW-fil et perfekt eksempel til at illustrere hvordan man justerer fotos i digiKam.
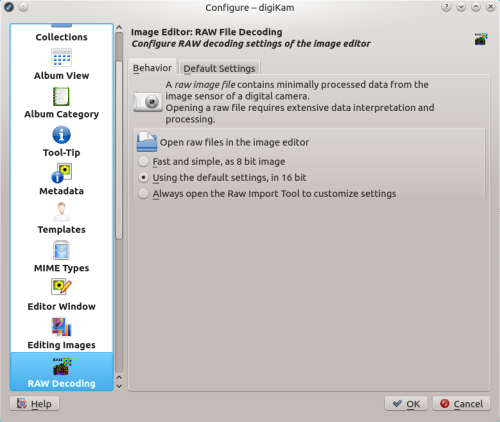
Før du begynder skal du sørge for at digiKam er sat til at åbne RAW-filer i 16-bit-tilstand ved at bruge standardindstillingerne. Dor at gøre dette vælger du og gåt til afsnittet . Aktivér tilvalget ok klik . Åbn så RAW-filen til redigering ved brug af tasten F4 (eller vælg ).
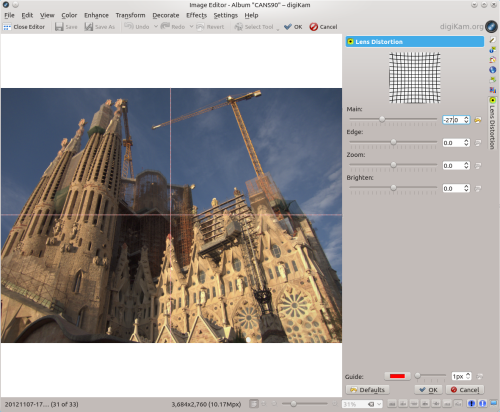
The first order of business is to fix the lens distortion. Since the LenFun library used by digiKam for automatic lens correction doesn’t have a lens profile for Canon PowerShot S90, you have to fix lens distortion manually. Choose , then use the slider to set the correction value. Alternatively, you can enter the exact value in the field next to the slider. For this particular file, the -27 value should do the trick. Check the preview image to make sure that the distortion is properly corrected, and press to apply the correction.
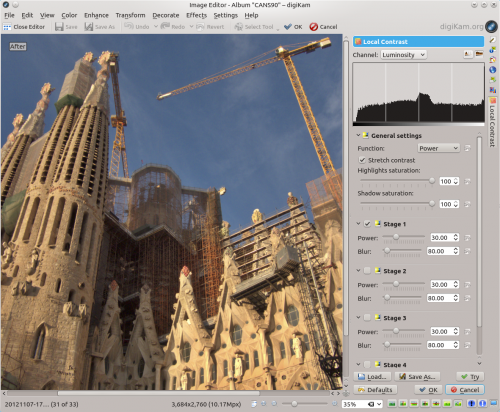
Although the Canon PowerShot S90 did a respectable job of producing a well-exposed image, the photo still has slightly underexposed areas. The easiest way to fix this problem is to use the Local Contrast tool (). The default values should do the trick, but feel free to experiment with different settings. But don’t try to push them too far, as the final result may look unnatural. Also, before you start modifying the default settings, save them as a preset using the button. Later, you can restore the original settings from the preset using the button.
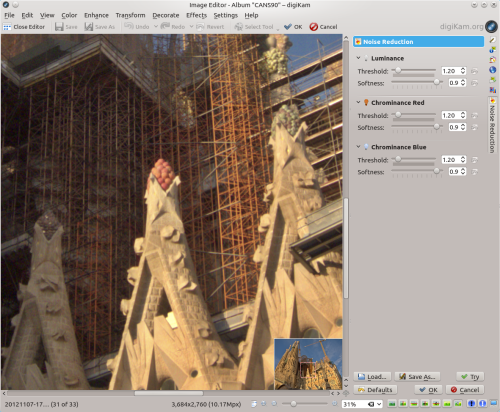
Next stop is the Noise Reduction tool (). While the default noise reduction settings work fine in most situations, you might want to adjust them to achieve even better results. When experimenting with different noise reduction settings, it’s a good idea to switch to the 100% crop, which gives you a much better view of the noise reduction effect. To do this, select from the drop-down list. You can then use the scrollbars to view the desired part of the photo. Alternatively, you can use the button in the lower-right corner of the preview window to display a thumbnail of the photo and pan by dragging the red square to the desired area in the image. To preview the noise reduction result, use the button.
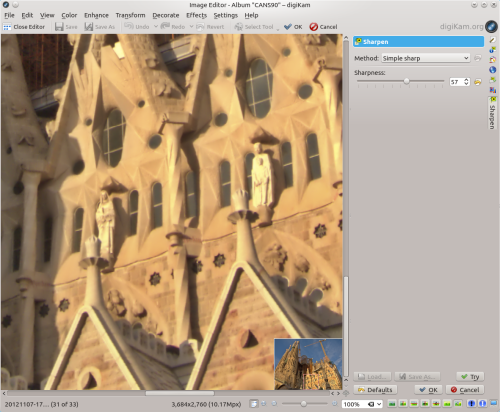
Finally, the photo could use some sharpening, so choose , adjust the sharpness level using the , and press to preview the result. Again, you might want to switch to the 100% crop for a better preview.
