Archive:Kdenlive/Manual/Useful Information/Surround Sound: Difference between revisions
| Line 21: | Line 21: | ||
The clip can be edited and (audio) effects applied to it, and all appears to work just fine - but once rendering the project, it turns out that the audio track in the resulting video file is 2 channels only. | The clip can be edited and (audio) effects applied to it, and all appears to work just fine - but once rendering the project, it turns out that the audio track in the resulting video file is 2 channels only. | ||
The following steps provide a manual workaround for this issue. | |||
===Extract and Split the Audio Track=== | |||
The first step is to extract the audio track from the video clip. This can be done in Kdenlive with <menuchoice>Extract Audio</menuchoice>. This creates WAV audio file in the same folder as where the video clip is located. | |||
The extracted WAV audio file can then be opened in '''Audacity''', it should show all 6 channels: | |||
[[File:Audacity.png]] | |||
The channels are: | |||
*1 - Front Left | |||
*2 - Front Right | |||
*3 - Center | |||
*4 - LFE | |||
*5 - Surround Left | |||
*6 - Surround Right | |||
{{Note|LFE (Low Frequency Effects) is often referred to as "subwoofer channel", which is not quite correct. A surround sound speaker setup is perfectly valid without subwoofer, in this case the surround system will redirect the LFE channel to "large" speakers, usually the front speakers.}} | |||
==Creating New Surround Sound== | ==Creating New Surround Sound== | ||
Revision as of 11:34, 22 August 2013
Editing Surround Sound with Kdenlive
At the time of writing, Kdenlive can only handle stereo (two channel) audio tracks. There is limited support for more than two channels, but in order to edit and create surround sound, some manual steps including external tools are required.
This guide is using a six-channel 5.1 surround sound as example.
External Tools Used Here
Editing Existing Surround Sound
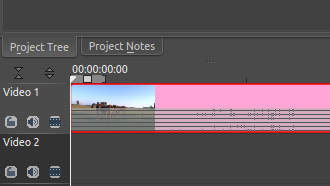
When adding a clip with more than two channels to a project, kdenlive creates an audio thumbnail that correctly shows all audio channels:
The clip can be edited and (audio) effects applied to it, and all appears to work just fine - but once rendering the project, it turns out that the audio track in the resulting video file is 2 channels only.
The following steps provide a manual workaround for this issue.
Extract and Split the Audio Track
The first step is to extract the audio track from the video clip. This can be done in Kdenlive with . This creates WAV audio file in the same folder as where the video clip is located.
The extracted WAV audio file can then be opened in Audacity, it should show all 6 channels:
The channels are:
- 1 - Front Left
- 2 - Front Right
- 3 - Center
- 4 - LFE
- 5 - Surround Left
- 6 - Surround Right


