Archive:Kdenlive/Manual/Capturing/uk: Difference between revisions
Replaced content with "=== Firewire ===" |
Created page with "* З'єднайте ваш пристрій із карткою firewire і переведіть його у режим відтворення." |
||
| Line 21: | Line 21: | ||
Щоб виконати захоплення відео: | Щоб виконати захоплення відео: | ||
* | * З'єднайте ваш пристрій із карткою firewire і переведіть його у режим відтворення. | ||
* Click the ''Connect Button'' [[File:Kdenlive Connect firewire button.png]] | * Click the ''Connect Button'' [[File:Kdenlive Connect firewire button.png]] | ||
Revision as of 13:20, 18 July 2019
Захоплення відео
У Kdenlive передбачено функціональні можливості із захоплення відео із зовнішніх пристроїв; наприклад, Firewire, FFmpeg, захоплення з екрана та Blackmagic.
Налаштувати захоплення можна за допомогою сторінки (докладніше про це можна дізнатися тут).
Визначити теку призначення для захоплених даних можна за допомогою вкладки (докладніше про це тут).
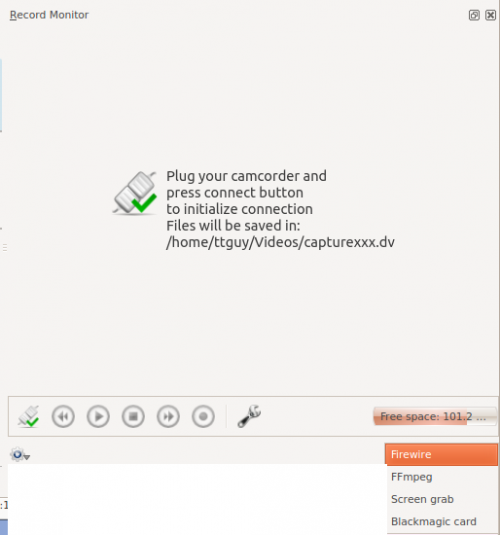
Щоб захопити відео, виберіть монітор запису і виберіть пристрій для захоплення за допомогою спадного списку, розташованого внизу праворуч.
Firewire
This option is not available in recent versions of Kdenlive. Use dvgrab directly in a terminal to capture video from firewire.
Якщо вибрати цей пункт, програма захоплюватиме відео з пристроїв, з'єднаних за допомогою карток і кабелів firewire (також відомого як високошвидкісний послідовий канал IEEE 1394). Програма використовує dvgrab, а параметри роботи програми можна налаштувати після натискання піктограми з трьома рисками або вибору пункту меню . Див. налаштовування захоплення за допомогою Firewire.
Щоб виконати захоплення відео:
- З'єднайте ваш пристрій із карткою firewire і переведіть його у режим відтворення.
- Click the Record Button — note it toggles to grey while you are recording
- Click the Record button again to stop capture. Or click the stop button.
- In the Captured Files dialog, click the import button to have the captured files automatically imported into the project tree.
FFmpeg
I believe this captures video from an installed Web Cam using Video4Linux2.
Захоплення зображення з екрана
This captures video of the PC screen. In version 0.9.2 it uses recordMyDesktop to do the capture. There is an open defect with this functionality in ver 0.9.2 — See bug tracker ID 2643.
In version 0.9.3, the screen grab is done by the ffmpeg functionality instead. For screen capture to work in ver 0.9.3, the version of ffmpeg installed needs to have been compiled with the --enable-x11grab option. Ubuntu comes with an ffmpeg version compiled with this option.
To check on your linux distro, type ffmpeg -version in a terminal and look for --enable-x11grab in the reported configuration info. [1]
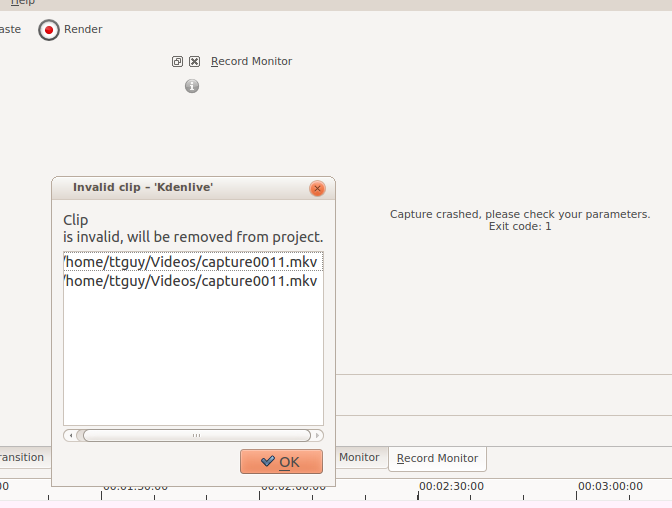
If you are capturing the screen and using the X246 with audio settings and you get a crash as shown in the screen shot ...
... then consider creating a profile for audio capture where -acodec pcm_s16le is replaced by -acodec libvorbis -b 320k. See Configure Kdenlive.
Blackmagic
This is for capturing from Blackmagics decklink video capture cards (AFAIK). Not sure how stable this code is at the moment. See defect 2130.
Примітки
- ↑ There are now two branches of ffmpeg: a Libav branch and an ffmpeg.org branch. The ffmpeg version from the latter branch reports the configuration when you run with
ffmpeg -version. The Libav version does not. So this method to check for the--enable-x11grabdoes not work if you have the Libav version of ffmpeg.


