Archive:Kdenlive/Manual/Tutorials/Split Screen How To/ru: Difference between revisions
Smolyaninov (talk | contribs) Created page with "<br clear=all> Для создания этого эффекта вам понадобятся 4 видеодорожки на монтажном столе. Добавьте..." |
Smolyaninov (talk | contribs) Created page with "Давайте повторим проект изображённый на снимке 1. Ниже приведено подробное описание как это сде..." |
||
| Line 11: | Line 11: | ||
Для создания этого эффекта вам понадобятся 4 видеодорожки на монтажном столе. Добавьте дополнительные дорожки на монтажный стол через меню [[Special:MyLanguage/Kdenlive/Manual/Project_Menu/Tracks|Монтажный стол>Дорожки>Вставить дорожку]]. | Для создания этого эффекта вам понадобятся 4 видеодорожки на монтажном столе. Добавьте дополнительные дорожки на монтажный стол через меню [[Special:MyLanguage/Kdenlive/Manual/Project_Menu/Tracks|Монтажный стол>Дорожки>Вставить дорожку]]. | ||
Давайте повторим проект изображённый на снимке 1. Ниже приведено подробное описание как это сделать. | |||
[[File:Kdenlive 4pip overview.png| | [[File:Kdenlive 4pip overview.png|thumb|left|800px|Figure 1. - Time Line Setup]] | ||
<br clear=all> | <br clear=all> | ||
| Line 42: | Line 42: | ||
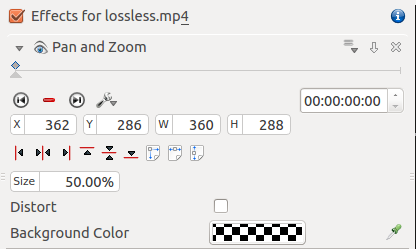
[[File:Kdenlive 4pip vid4 pan and zoom.png|frame|200|left|Figure 7 - Effect on Video 4]] | [[File:Kdenlive 4pip vid4 pan and zoom.png|frame|200|left|Figure 7 - Effect on Video 4]] | ||
<br clear=all> | |||
{{Prevnext2 | |||
| prevpage=Special:MyLanguage/Kdenlive/Manual/Tutorials | |||
| prevtext=Tutorials | |||
| index=Special:MyLanguage/Kdenlive/Manual | indextext=Back to menu | |||
}} | |||
[[Category:Kdenlive]] | |||
[[Category:Multimedia]] | |||
[[Category:Tutorials]] | |||
Revision as of 12:08, 2 March 2020
Как сделать эффект разделения экрана
Этот эффект также известен как эффект "Картинка в картинке".
В этом примере мы видим проигрывание четырёх видеороликов на одном экране.
{{#ev:youtube|YRs5UDuCVJg|500|left|Четыре видеоролика на одном экране}}
Для создания этого эффекта вам понадобятся 4 видеодорожки на монтажном столе. Добавьте дополнительные дорожки на монтажный стол через меню Монтажный стол>Дорожки>Вставить дорожку.
Давайте повторим проект изображённый на снимке 1. Ниже приведено подробное описание как это сделать.
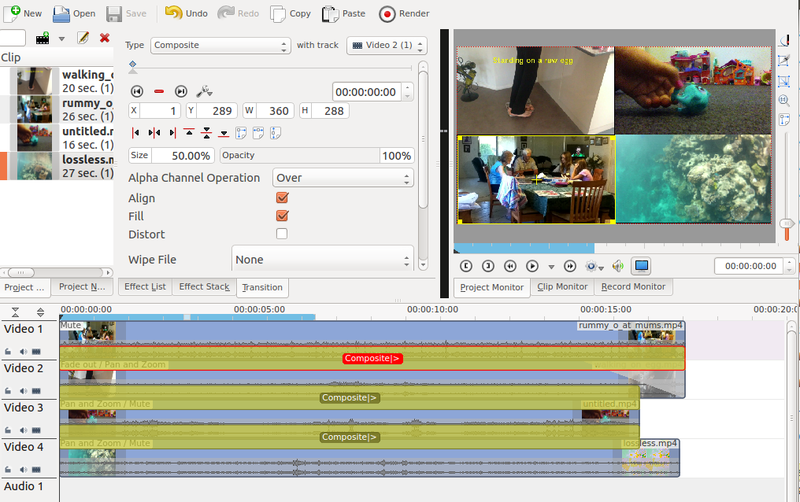
Video 1 (appears in bottom left in the result) has no effects added to it.
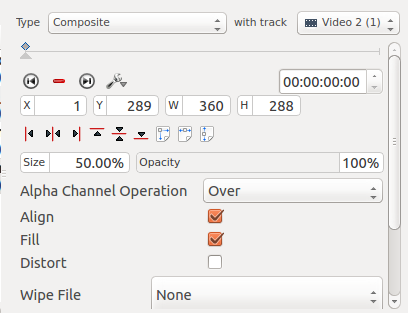
There is a composite transition between Video 1 and Video 2. (See Figure 2). This transition has a sizing and positioning effect as part of it that causes the Video on Video Track 1 to be scaled down 50% and be positioned in the bottom left corner.
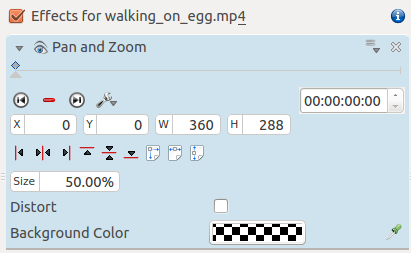
Video 2 (appears top left in result) has a pan and zoom effect added to it (See Figure 3). This effect has a sizing and positioning effect as part of it that causes the Video on Video Track 2 to be scaled down 50% and be positioned in the top left corner.
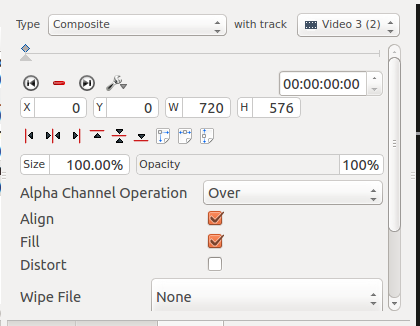
There is a standard composite transition between Video track 2 and Video track 3 - see Figure 4.
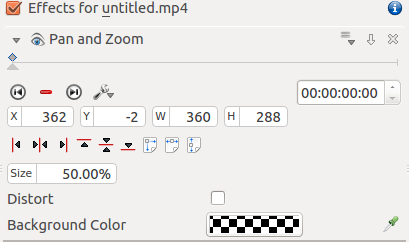
Video 3 (appears top right in result) has a pan and zoom effect added to it (See Figure 5). This effect has a sizing and positioning effect as part of it that causes the Video on Video Track 3 to be scaled down 50% and be positioned in the top right corner.
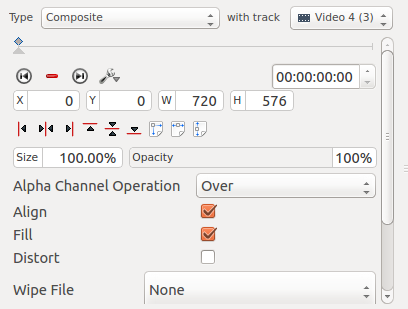
There is a standard composite transition between Video track 3 and Video track 4 - see Figure 6.
Video 4 (appears bottom right in result) has a pan and zoom effect added to it (See Figure 7). This effect has a sizing and positioning effect as part of it that causes the Video on Video Track 4 to be scaled down 50% and be positioned in the bottom right corner.
