Showcase: Difference between revisions
Appearance
Markup edit |
Marked this version for translation |
||
| Line 2: | Line 2: | ||
{|class="tablecenter vertical-centered" | {|class="tablecenter vertical-centered" | ||
|[[Image:Kpresenter_main.png|300px]]||<translate>'''Presentations for screening or printing, Open Document Format, of course'''</translate> | |[[Image:Kpresenter_main.png|300px]]||<translate><!--T:1--> | ||
'''Presentations for screening or printing, Open Document Format, of course'''</translate> | |||
|} | |} | ||
<translate> | <translate> | ||
<!--T:2--> | |||
* Use <menuchoice>rich text</menuchoice>, with bullet points, indentation, spacing, colors, fonts, etc. | * Use <menuchoice>rich text</menuchoice>, with bullet points, indentation, spacing, colors, fonts, etc. | ||
* Set your background with <menuchoice>color</menuchoice>, gradients, pictures, clip-art, etc. | * Set your background with <menuchoice>color</menuchoice>, gradients, pictures, clip-art, etc. | ||
| Line 12: | Line 14: | ||
<!--T:3--> | |||
[[Image:Kpresenter_multiMasters.png|300px|center|thumb|Use multiple master slides]] | [[Image:Kpresenter_multiMasters.png|300px|center|thumb|Use multiple master slides]] | ||
<!--T:4--> | |||
* Use <menuchoice>multiple master slides</menuchoice> and switch between them during the presentation | * Use <menuchoice>multiple master slides</menuchoice> and switch between them during the presentation | ||
* Advanced <menuchoice>undo/redo</menuchoice>; | * Advanced <menuchoice>undo/redo</menuchoice>; | ||
| Line 21: | Line 25: | ||
<!--T:5--> | |||
[[Image:Kpresenter_embed.png|300px|center|thumb|Creating a slide with image]] | [[Image:Kpresenter_embed.png|300px|center|thumb|Creating a slide with image]] | ||
<!--T:6--> | |||
* Organise your presentation with the <menuchoice>Slides Overview</menuchoice> facility | * Organise your presentation with the <menuchoice>Slides Overview</menuchoice> facility | ||
<!--T:7--> | |||
[[Image:Kpresenter_overview.png|300px|center|thumb|The Slides Overview page]] | [[Image:Kpresenter_overview.png|300px|center|thumb|The Slides Overview page]] | ||
<!--T:8--> | |||
* <menuchoice>Play</menuchoice> your presentation with effects | * <menuchoice>Play</menuchoice> your presentation with effects | ||
<!--T:9--> | |||
[[Image:Kpresenter_addTransitions.png|250px|center|thumb|Adding Transitions]] | [[Image:Kpresenter_addTransitions.png|250px|center|thumb|Adding Transitions]] | ||
<!--T:10--> | |||
* <menuchoice>Print to Postscript</menuchoice> | * <menuchoice>Print to Postscript</menuchoice> | ||
<!--T:11--> | |||
* Many more features. [http://www.koffice.org/kpresenter/ [Read more]] | * Many more features. [http://www.koffice.org/kpresenter/ [Read more]] | ||
== Hints, Tips and Tutorials == | == Hints, Tips and Tutorials == <!--T:12--> | ||
<!--T:13--> | |||
* [[KOffice/Tutorials/Artistic Text Shape|Using the Artistic Text Shape]] is a tutorial that shows how to get started with the artistic text shape that all '''KOffice''' applications provide. | * [[KOffice/Tutorials/Artistic Text Shape|Using the Artistic Text Shape]] is a tutorial that shows how to get started with the artistic text shape that all '''KOffice''' applications provide. | ||
<!--T:14--> | |||
[[Category:Office]] | [[Category:Office]] | ||
</translate> | </translate> | ||
Revision as of 11:05, 22 September 2010
 |
Presentations for screening or printing, Open Document Format, of course |
- Use , with bullet points, indentation, spacing, colors, fonts, etc.
- Set your background with , gradients, pictures, clip-art, etc.
- Set many such as background, gradients, pen, shadow, rotation, object specific settings, etc.
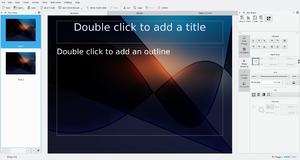
- Use and switch between them during the presentation
- Advanced ;
- Assign effects for and define effects for
- images and clip-art
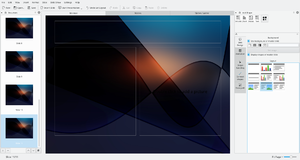
- Organise your presentation with the facility
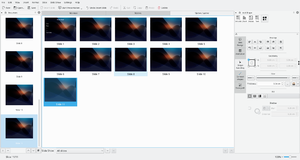
- your presentation with effects
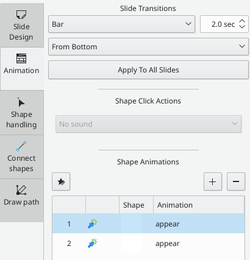
- Many more features. [Read more]
Hints, Tips and Tutorials
- Using the Artistic Text Shape is a tutorial that shows how to get started with the artistic text shape that all KOffice applications provide.
