Kaffeine: Difference between revisions
No edit summary |
Markup edit |
||
| Line 1: | Line 1: | ||
<languages /> | |||
{| | {|class="tablecenter vertical-centered" | ||
|[[Image:KaffeineStart.png| | |[[Image:KaffeineStart.png|300px|thumb|The Kaffeine Start-up Screen]]|| <translate>'''Kaffeine - a full featured media player that can fulfil all the basic multimedia tasks'''.</translate> | ||
|} | |} | ||
<translate> | |||
{{Info|All images are clickable, in order to show full size images. Use the back button to return here.}} | |||
=== Capabilities === | === Capabilities === | ||
With Kaffeine you can: | With Kaffeine you can: | ||
* Play: | |||
** Audio files | |||
** Video files | |||
** VCDs | |||
** DVDs | |||
* Watch Digital TV | |||
[[Image:Kaffeine_dvd.png| 300px | thumb | center]] | [[Image:Kaffeine_dvd.png| 300px | thumb | center]] | ||
| Line 24: | Line 27: | ||
a new configure option on top "Television". | a new configure option on top "Television". | ||
{| | |||
{|class="tablecenter" | |||
|[[Image:Kaffeine2.png|300px|thumb|A new device is added]]||[[Image:Kaffeinedvbt.png|300px|thumb|Configuring the device]] | |[[Image:Kaffeine2.png|300px|thumb|A new device is added]]||[[Image:Kaffeinedvbt.png|300px|thumb|Configuring the device]] | ||
|} | |} | ||
{| | All you have to do, after you select your source, "hessen-de" in my | ||
case, is to click the <menuchoice>start scan</menuchoice> button. | |||
{|class="tablecenter" | |||
|[[Image:Kaffeine1.png|300px|thumb|The Channel Scan Screen]] | |[[Image:Kaffeine1.png|300px|thumb|The Channel Scan Screen]] | ||
|} | |} | ||
Add then the found/selected channels to the left (as in the screenshot | Add then the found/selected channels to the left (as in the screenshot | ||
| Line 40: | Line 47: | ||
The next screenshot shows the video and channel select window: | The next screenshot shows the video and channel select window: | ||
{| | |||
{|class="tablecenter" | |||
|[[Image:Kaffeine3.png|300px|thumb|Selecting the channel]] | |[[Image:Kaffeine3.png|300px|thumb|Selecting the channel]] | ||
|} | |} | ||
Recording is as simple as well: | Recording is as simple as well: | ||
{| | |||
{|class="tablecenter" | |||
|[[Image:Kaffeine4.png|300px|thumb|Setting the recording time]] | |[[Image:Kaffeine4.png|300px|thumb|Setting the recording time]] | ||
|} | |} | ||
There's even a program guide: | There's even a program guide: | ||
{| | |||
{|class="tablecenter" | |||
|[[Image:Kaffeine5.png|300px|thumb|The programming guide]] | |[[Image:Kaffeine5.png|300px|thumb|The programming guide]] | ||
|} | |} | ||
| Line 60: | Line 72: | ||
===Features=== | ===Features=== | ||
* File browsing with Drag&drop support | |||
* Full subtitle support: automatic and manual subtitle loading | |||
You will find the Project website | You will find the Project website [http://kaffeine.kde.org/ here] and you can ask questions on the IRC #kaffeine channel on irc.freenode.net | ||
[[Category:Multimedia]] | [[Category:Multimedia]] | ||
</translate> | |||
Revision as of 14:01, 5 October 2010
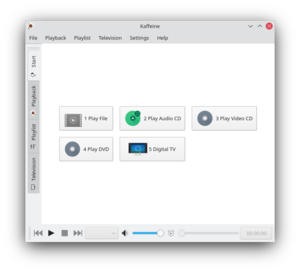 |
Kaffeine - a full featured media player that can fulfil all the basic multimedia tasks. |
Capabilities
With Kaffeine you can:
- Play:
- Audio files
- Video files
- VCDs
- DVDs
- Watch Digital TV
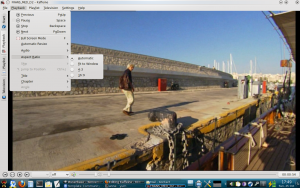
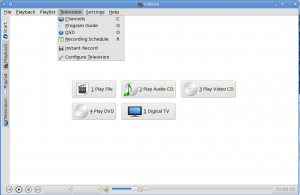
If you have a working dvb-t card in your systerm, kaffeine knows about it and shows a button on the start tab "Digital TV". It shows as well a new configure option on top "Television".
 |
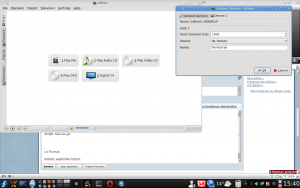 |
All you have to do, after you select your source, "hessen-de" in my
case, is to click the button.
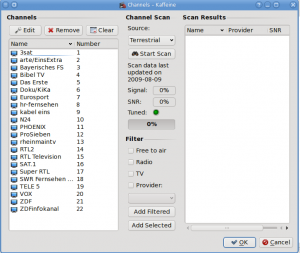 |
Add then the found/selected channels to the left (as in the screenshot
already done and you're ready to watch TV.
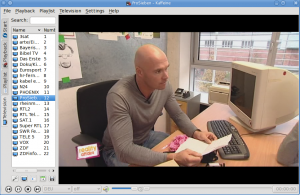
The next screenshot shows the video and channel select window:
 |
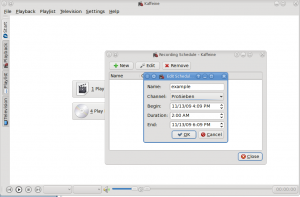
Recording is as simple as well:
 |
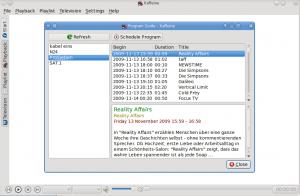
There's even a program guide:
 |
This helpful tutorial gives another view of how to set up and use Kaffeine to watch digital TV.
Features
- File browsing with Drag&drop support
- Full subtitle support: automatic and manual subtitle loading
You will find the Project website here and you can ask questions on the IRC #kaffeine channel on irc.freenode.net

