Amarok/Manual/Samling/Ekstern database
Scanning af samling
Amarok 2.2 og senere understøtter en ekstern MySQL-database som motor.
Konfigurering af server
Installation af MySQL-server
Først skal du installere en MySQL-server. På en Debian-baseret distribution som Ubuntu kan du køre
sudo apt-get install mysql-server mysql-client
i en konsol for at installere den. Du vil blive bedt om at angive et password til databasens root-kontoen. Pakken mysql-client skal bruges til at udføre nogle af kommandoerne i dette dokument, men den er ikke nødvendig for at bruge Amarok.
Konfiguration af database
Forbind til den lokale database med
mysql -u root -p
Du vil blive bedt om passwordet for MySQL's root-bruger. Du vil få promptet
mysql>
Lav en ny bruger, amarokuser med passwordet amarokpass ved at skrive kommandoen
CREATE USER 'amarokuser'@'localhost' IDENTIFIED BY 'amarokpass';
Amarok skal bruge sin egen database, som laves med
CREATE DATABASE amarokdb;
Giv den nye bruger adgang til databasen ved kommandoen
GRANT ALL ON amarokdb.* TO 'amarokuser'@'%' IDENTIFIED BY 'amarokpass';
hvor % er et jokertegn, som lader alle værter forbinde til databasen. Brug nu erklæringen
FLUSH PRIVILEGES;
til at genindlæse diverse interne mellemlagre, som bruges af MySQL. Endelig afsluttes MySQL-promptet med
exit
Som standard kan serveren kun tilgås fra den lokale vært. For at ændre dette skal du redigere filen /etc/mysql/my.cnf og tilpasse adressen nær bind-address til den, som din server lytter til på netværket. 0.0.0.0 lytter på alle grænseflader. Efter dette skal du genstarte serveren med
sudo service mysql restart
Configure Client
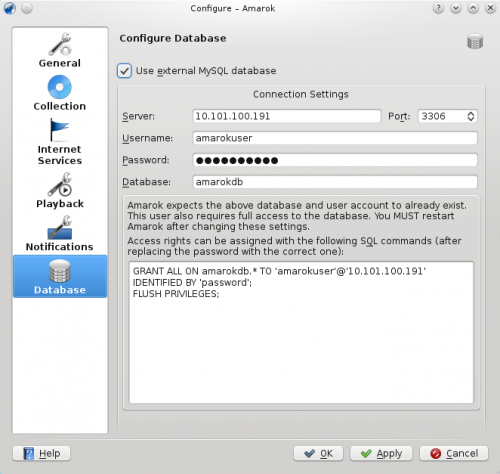
Open the configuration dialog by clicking . Enable the checkbox and enter the user data.

You need to restart Amarok so that the changes take effect.
Migrating from MySQL Embedded to MySQL Server
If you want to maintain the statistics, etc. that you have in the embedded MySQL database from before Amarok 2.2, you can do the following: First, start Amarok 2.2+ at least once to give the database a chance to update to the latest schema version.
Next, kill the running MySQL service
sudo /etc/init.d/mysql stop
and start a MySQL daemon from your ~/.kde4/share/apps/amarok directory (--defaults-file MUST be the first option!):
/usr/sbin/mysqld --defaults-file=`pwd`/my.cnf --default-storage-engine=MyISAM --datadir=`pwd`/mysqle --socket=`pwd`/sock --skip-grant-tables
The skip-grant-tables means you can use any password or username to connect to it. 'localhost' will not work, the MySQL client will try to use a Unix socket. Using 127.0.0.1 as the host makes it work. Some systems may restrict this access through apparmor or SELinux. They can be temporarily disabled with
sudo /etc/init.d/apparmor stop
Now, run mysqldump, passing in the -S option to specify the local socket. This will dump your old embedded DB out to a SQL file.
mysqldump -S sock amarok > amarok.mysql
You can then restart your MySQL service and load this SQL file into your MySQL server. You'll have needed to already run the GRANT statement above and create an Amarok database ("CREATE DATABASE amarok;"):
sudo /etc/init.d/mysql stop
mysql -u amarokuser -p amarok < amarok.mysql
