Digikam/Blanc i negre
Convertir les fotos a blanc i negre amb digiKam
Transcrit des de l'article d'en Dmitri Popov, l'11 de febrer de 2011
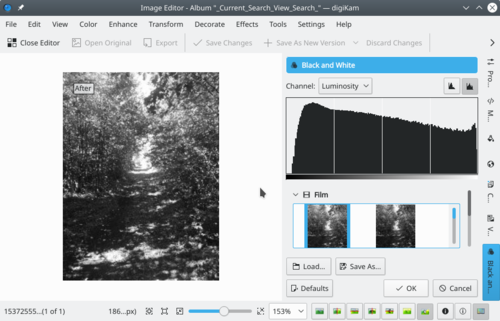
Si us agrada la fotografia en blanc i negre, us encantarà saber que digiKam compta amb una eina força potent per convertir fotografies a blanc i negre. La conversió d'una fotografia que s'està editant a digiKam es fa en . Però en la majoria dels casos, serà necessari un ajust addicional, i l'aplicació ofereix unes enginyoses eines per fer-ho.

La secció ofereix un grapat de filtres que emulen diferents tipus de pel·lícula com Agfa Pan, Kodak Tmax, Kodak TriX, i Ilford SPX. Aquests filtres són una forma ràpida i senzilla per retocar la fotografia en blanc i negre. Quin filtre funciona millor dependrà de la foto actualment editada, així doncs potser voldreu provar diversos filtres per obtenir el millor resultat. Seleccioneu el filtre que més us agradi i veureu immediatament el resultat en el plafó de vista prèvia.
As the name suggests, the section contains several color filters, including orange, green, yellow, and red. While you can experiment by applying different filters to the photo, the easiest way to find out which filter is best suited for the specific photo is to use the context help. Press Shift + F1 and click on any filter to get a brief description of it. Once you’ve applied the desired filter, you can specify its intensity by using the slider.
Besides the straight black and white conversion, digiKam lets you turn your photos into duotone images. And the section offers several tone filters such as sepia, platinum, and green.
Finally, the section lets you manually adjust the curve and the contrast. This feature can come in handy if you want to fix under- or overexposed areas and improve the overall contrast of the photo.
