Kdenlive/Підручник/Проекти і файли/Кліпи
Clips (Video, Audio and Images)
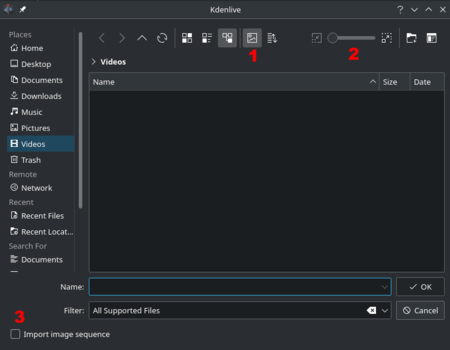
The Button ![]() brings up the where you can choose video, audio or still image clips to add to the project tree.
brings up the where you can choose video, audio or still image clips to add to the project tree.
Button labeled 1 toggles File Preview on and off. Slider labeled 2 adjusts the size of the preview icons. Checkbox labeled 3 enables the import of a series of images that can be used to make a stop motion animation. Checkbox labeled 4 - is for ???
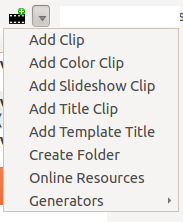
You can add other types of clips by choosing a clip type from the menu brought up from the Drop down button.
Colour clips
Colour clips are images of a single colour that can be added to the project tree. These are ca be useful to provide a background on which to place titles.
Add colour clips by choosing from the Drop down button.
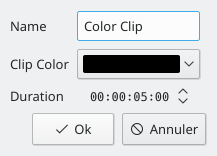
This brings up the Color clip dialog from which you can choose a colour and a duration.
Clicking OK adds the clip to the project tree. The clip can then be dragged to the time line. The duration of the colour clip can be adjusted on the timeline.
Title clips
See Titles
Slideshow clips
Slideshow clips are clips created from a series of still images. The feature can be used to make an animation from a collection of still images or to create a slideshow of still images. To create the former - use a short frame duration and to create the latter use a long frame duration.
To create a slide show clip choose from the Drop down
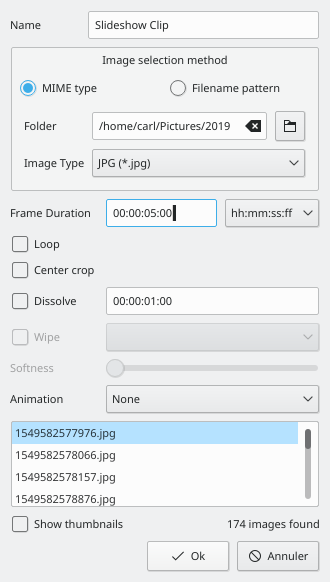
From the Create Slide Show clip dialog choose File Name patern as Image Selection method. Browse to the location of the images that go to make up your slide show and select the first image that will make up the slide show. The subsequent images that are to be used in the slide show will be selected based on some sort of filename algorithm that predicts what the next image file name should be.
For example if the first image is 100_1697.jpg then the next will be 100_1698.jpg, etc.
Select an approriate frame duration - this defines how long each image will apear for.
Then hit OK. A video file made up of all the images in the folder from where you selected the first frame file from will be added to the project tree.
You can then drag this video to the timeline.
Stop Motion
Проміжні кліпи

Проміжні кліпи один з найкорисніших винаходів для редагування, якщо ви працюєте за не дуже потужним комп’ютером. Програма замінює початкові версії кліпів на кліпи з меншою роздільною здатністю та простішим для обробки кодеком. Декодування відео, наприклад декодування кліпів у форматі H.264, потребує значних обчислювальних потужностей для обробки ефектів у режимі реального часу. Якщо потужностей не вистачатиме, відтворення «затинатиметься». Для обробки проміжних кліпів обчислювальні потужності майже непотрібні, тобто відтворення відбувається абсолютно плавно.
Увімкнути або вимкнути створення проміжних кліпів для поточного проекту можна у параметрах проекту ().
Щоб типово увімкнути проміжні кліпи для нових проектів, скористайтеся пунктом . Див. також опис сторінки Параметри проектую

Після вмикання проміжних кліпів їх можна створити для певних кліпів у проекті за допомогою віджета дерева проекту: скористайтеся пунктом контекстного меню . За поступом можна спостерігати за допомогою невеличкої панелі поступу, яку буде показано під пунктом кліпу на панелі дерева проекту. Повторне натискання пункту вимкне створення проміжного кліпу.

Після створення проміжного кліпу його пункт у дереві проекту буде позначено піктограмою з літерою «P».
Під час остаточної обробки ви також можете скористатися проміжними кліпами. Типово використання проміжних кліпів вимкнено, але для прискорення обробки проекту для попереднього перегляду проміжні кліпи можуть бути дуже корисними.
Властивості кліпу
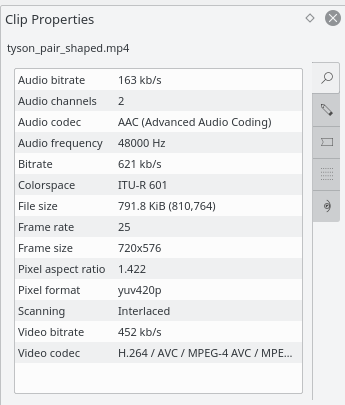
You can display and edit clip properties by selecting a clip in the project tree and choosing from the Project Menu or from the Right Click Menu
Video Properties
Advanced Properties
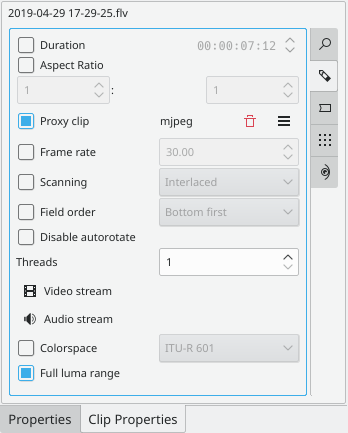
The advanced properties tab displays... well ... the advanced properties of the clip. You can edit the advanced properties here. For example you can use Force aspect ratio to tell a clip that seems to have forgotten it was 16:9 ratio that it really is 16:9 ratio.
Markers
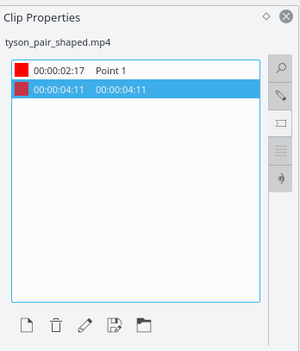
You can use the Markers tab to add markers for certain points in the source file that are important.
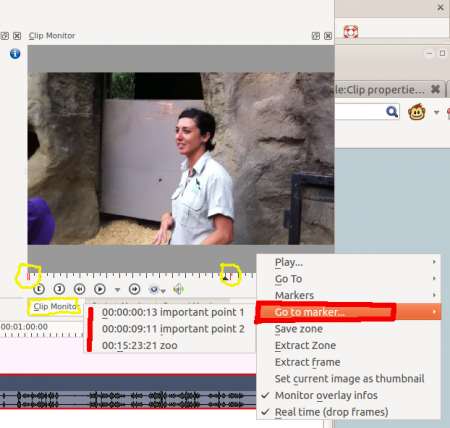
Once markers are put in your clip you can access them in the clip monitor under right click > Go To Marker. (See picture). Also note how the markers appear as red vertical lines in the clip monitor (see yellow highligted regions in the picture)


