Showfoto/Brillantor
Guia d'aprenentatge de fotos al KDE 1-4: Brillantor/Contrast/Gamma + To/Saturació/Lluminositat
Unai Garro (uga): estiu de 2008
Vaig començar aquesta sèrie de guies d'aprenentatge ja fa un temps, i totes aborden qüestions sobre la llum. Utilitzem eines com nivells, corves o ajust del balanç de blancs.
Aquesta vegada desitjo apropar-me a un altre tipus de problemes, però crec que els problemes de la llum serien molt incomplets si no ens ocupem del contrast, brillantor i colors. Possiblement ja hi estareu una mica familiaritzat, però crec que val la pena cobrir-ho.
Així doncs començarem. Arreglant els colors! ![]()
Introducció:
Més que unes poques de vegades, prenem una fotografia d'un paisatge preciós, i somiarem amb un gran resultat una vegada som a casa. Avui dia les càmeres digitals ens ajuden a previsualitzar el resultat a la pantalla LCD, però en general no són massa fiables, de manera que veurem els resultats reals quan som a casa.
De manera que arribem a casa amb la nostra gran fotografia, i ens trobem, disgustats, doncs no té els colors que esperàvem. Què fer? Utilitzarem de nou Showfoto o Krita, es clar!
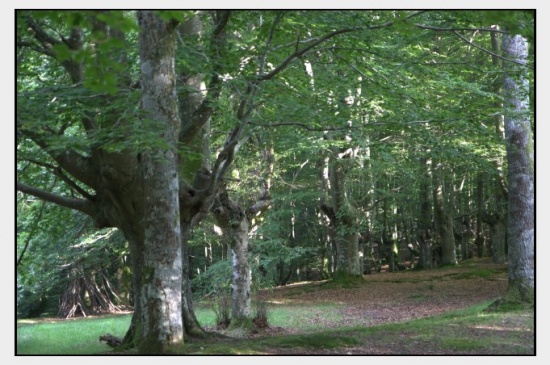
Permet veure la següent fotografia com a mostra:
|
Quan vaig prendre aquesta fotografia, veia amb els ulls tot tipus de colors forts en verd i fulles vermelloses a terra. Però d'alguna manera la càmera no captura tot el que contrasta per a mi. Però que és el contrast? És les diferències de color trobades a l'interior d'una imatge, la diferència entre un píxel/regió i els seus voltants. Com més contrastat conté la imatge, més clara és a la vista.
Aquesta imatge en canvi, és blanquinosa, és plana, no té contrast. Per què? Ja que l'histograma no ho cobreix.
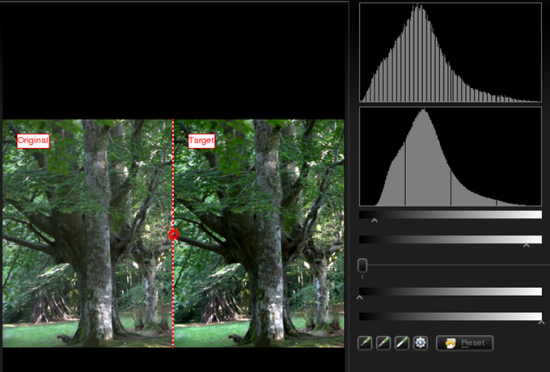
"Ahhhhhh..." direu ara.... "Això ja ho sé! Puc arreglar-ho utilitzant ! Ho vaig aprendre a la primera guia d'aprenentatge!". Sí, i això és el que tractarem en primer lloc. Obriu la imatge al Showfoto, i ajustarem els nivells:
|
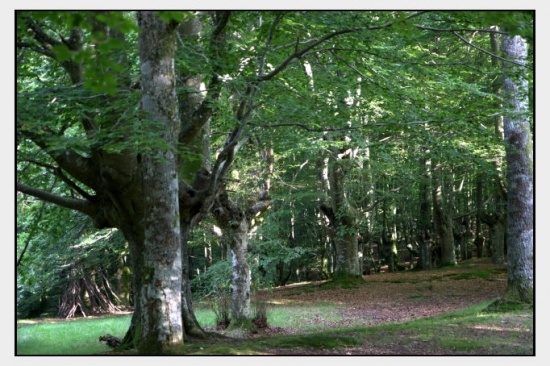
El resultat és la següent imatge:
|
No està malament, oi? Però tot i això, jo pensava en una fotografia diferent. Les fulles són verdes, hi havia més contrast (com ombres fosques), i les fulles del terra són més vermelloses. Podem solucionar aquest problema? Sí, per exemple podem utilitzar les per a millorar les ombres. Però us mostraré algunes eines noves que poden aconseguir resultats similars en aquest cas:
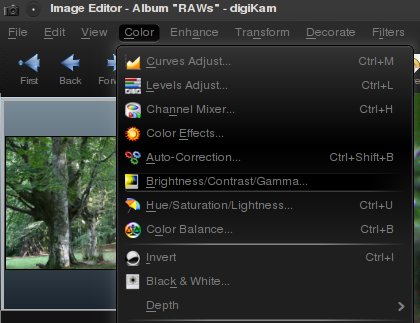
Al Showfoto, aneu al menú :
|
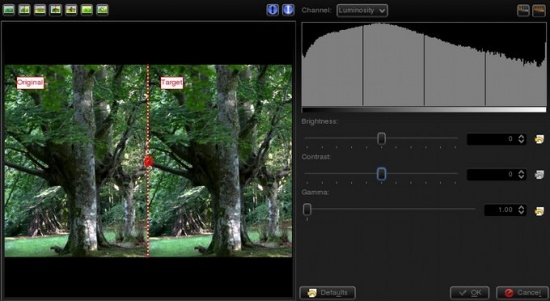
Obtindreu un diàleg molt fàcil d'utilitzar amb els següents controls:
|
The first slider controls the brightness/darkness of the image. The second slider increases or reduces , and uhm... what's ? Look at the following image:
|
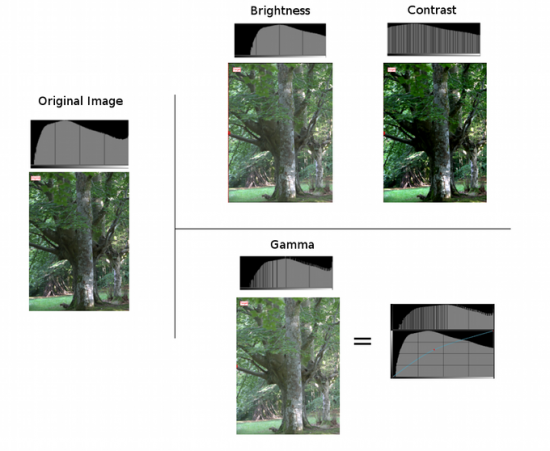
The photo and histogram on the left are those of the original image. In the right hand, the three photos show the result of increasing brightness, contrast, and gamma respectively. As you can see, when using the brightness control, it moves the whole histogram to the right. Shadows will disappear and become light grays. The result isn't very pleasing, as it is less contrasty. This could be fixed by adjusting contrast. In the output, you can see that the histogram has been expanded. This means that each color has been separated further from each other, and thus increase color difference (contrast). The output is much more pleasing than the original image in this case. The image is no more flat, it's much more contrasty, and shadows are clear dark contrasted.
At this point you should have noticed something important. Both contrast and brightness controls can clip the histogram and cause information loss! Now look at the gamma adjustment. I pushed even further than the first tool, and still, the image wasn't clipped. What did the gamma tool do?
The control is like adjusting the curves tool upwards in the middle (see the figure). It affects mostly to the middle gray levels. Blacks will remain black and whites will remain white. (unlike control where blacks become gray). It compresses the histogram in the right part by compressing highlights, but shadows are expanded and thus causes to extend contrast there.
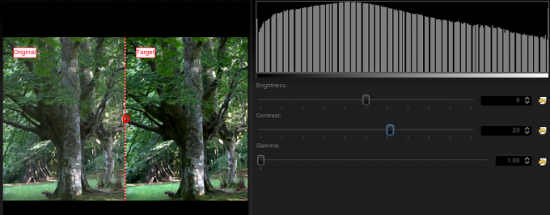
Given that this tool can clip the histogram, to avoid it as much as I can, I will change the order. Instead of doing then , I will do then . It's usually best adjusting levels after all other light adjustments have been done. So I did the following adjustment to the image:
|
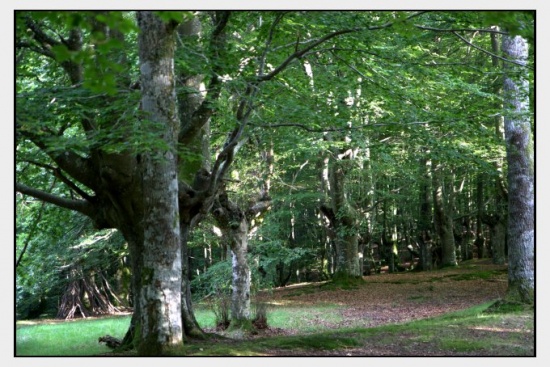
I could have pushed contrast even further, but I prefer natural looking photos. Then, afterwards, even if it wasn't much needed due to the clipping, I adjusted levels a bit. This is what I got:
|
The result is similar to the previous one, but a bit more contrasty. Still, I'm missing colors here, something is missing? Of course, lets open the option from the menu:
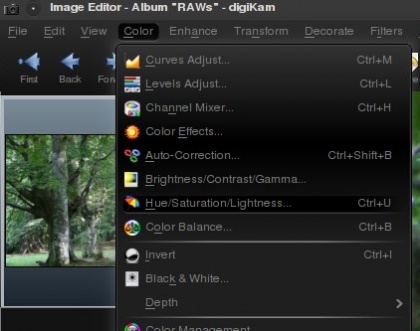
|
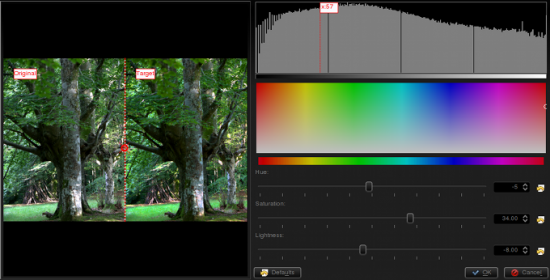
|
It will open a dialog where Showfoto permits adjusting the colors of the image. The control can make colors stronger or weaker. The control permits altering colors towards another one (brighter colors to darker green, or even to yellow...), and finally, can make colors brighter or darker. When the image is lightened up, it causes moving the histogram's dark part upwards and compressing the whole of it on the right, thus blacks dissappear and contrast can be reduced easily thanks to the compression.
In my adjustment, I pushed saturation up to 34, reduced lightness a bit, and retouched the greens by altering the hue slightly. This is what I got finally:
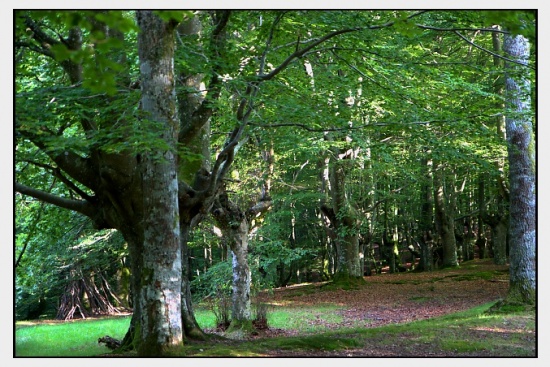
|
Now yes, I'm happy with the result. That's what my eyes saw!!!!!
Thanks for reading this tutorial and I hope you found it useful. Cya on the next tutorial!
Notes:

