Kmail/Kontoguide
Appearance
< KMail
Kontoguide

Første gang du kører KMail bliver du mødt af kontoguiden.
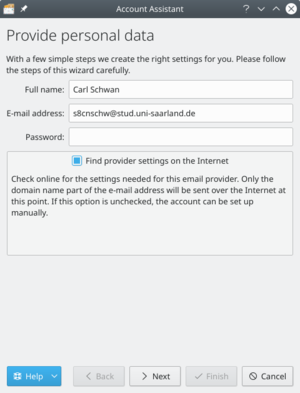
Denne guide vil hjælpe dig igennem processen med at oprette dine e-mail-konti. Din skærm vil variere afhængigt af, hvor meget guiden selv kan finde ud af. Herunder ser du et overblik over de skærme, du kan støde på under brug af guiden.
- Oplys personlige data er guidens første skærm. Den spørger dig om de basale kontoinformationer: , og . Som standard er tilvalget slået til og guiden vil prøve at hente den nødvendige information fra serveren. Slå dette tilvalg fra hvis du er en avanceret bruger og har brug for at opsætte en speciel konfiguration. Klik på knappen når du er klar.
- Select Account Type screen will be next if the wizard cannot determine your account type. Select your account type from the list (if you do not know, you will need to contact your email provider). If your account type is not listed, click the button. Once your account type has been selected, click the button, and you will be presented with the Personal Settings screen.
- Provide personal data screen will show again with the server details it found if the wizard was successful at determining the account type. Click the button, and it will set up the account. Click the to complete the wizard and close the window.
- Personal Settings screen will show if you had to enter your account type. Verify that your information is correct on this page. Select if you want your messages available when you do not have an Internet connection (IMAP only). Click the button once finished.
Your account will then be set up, and you can click the button to complete the wizard and close the window.

