Kopete/Jabber/Nyttige tips til konfigurering
Disse tips har alle at gøre med Kopetes hovedkonfigurationsvindue, som findes under . Husk at klikke på knappen eller , hvis du vil gemme dine ændringer.
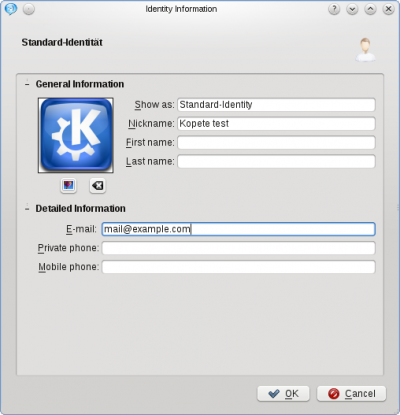
Alle tilpasninger, som har betydning for opsætningen af din konto og konfiguration af flere konti i 'Kopete (Jabber/XMPP såvel som ICQ, MSN og mange andre messaging-protokoller) findes i gruppen . Hvis du vil angive personlig information eller ønsker at bruge et kontaktfoto, så klik på for at tilføje informationen. Et foto kan uploades ved at klikke på det lille ikon forneden til venstre i billedområdet.
Den næste gruppe i den lodrette liste i venstre side er . Disse indstillinger er stort set selvforklarende, og det nok nyttigt at aktivere . De tre andre faneblade (, og ) indeholder ret specielle indstillinger, som du måske vil finindstille efter at have brugt Kopete i et par uger.
Konfigurationerne i lader dig sætte din standard status besked når du er online, borte, usynlig osv.
Et klik på åbner et ret detaljeret sæt indstillinger. De mest interessante muligheder, som findes i fanebladet er og . Den første af dem bestemmer, om indkommende meddelelser fra dine kontakter åbnes øjeblikkeligt i et nyt vindue eller om de sættes i kø, indtil du selv åbner Kopete. Den anden fortæller Kopete, om den skal gå online, når du starter programmet. Hvis du sætter den til , så er du tilgængelig for dine kontakter, lige så snart du har startet Kopete. Faneblade lader dig bestemme, i hvilke situationer Kopete skal give dig besked via din computers bekendtgørelsessystem (i de fleste tilfælde KNotify). Hvis du ønsker, at Kopete automatisk skal sætte din status til "borte", så åbn fanebladet og aktiver den første valgboks. Du kan indstille, hvor lang tid der skal gå efter din sidste handling (indtastning eller musebevægelse), før Kopete sætter din status til "borte". Standardværdien er 10 minutter. Valgmulighederne i er igen selvforklarende og er allerede sat til brugbare værdier.
Den næste gruppe i den lodrette række til venstre er . Det første faneblad her, , kan bruges til at ændre programmets udseende. Du kan installere dine egne stile eller downloade ny fra internettet ved at klikke på . Når du skriver en smiley i en meddelelse, så konverterer Kopete den som standard til et grafisk emoticon. Du kan fravælge denne funktion eller vælge et andet sæt emotikoner i . Det sidste faneblad, er igen selvforklarende og indstiller disse aspekter af dit chatvindue.
Kopete unbderstøtter Webcams, men i øjeblikket (november 2010) er der stadig nogle problemer med videochat, så indstillinger i er på eget ansvar; det er muligt, at de ikke virker korrekt. KDE's forumer kan være til hjælp med at håndtere problemer med webcam.
Plugins
A very powerful feature of Kopete is the capability of using plugins. There is a set of plugins pre-installed (new ones can be installed for example with your Linux distro's package manager) and they can be enabled and configured under . You can enable them by setting the tick into the respective checkbox. Most of them are again self-explanatory, but the most useful ones will be explained here anyway. A very helpful plugin is the . With this option enabled, Kopete will log all your chats and write it onto your hard disk. You can read it in your chat window, when you select the icon or you open it with .
OTR
One of the most important plugins considering privacy issues is OTR. This piece of software encrypts your entire conversation from one end to the other and makes it impossible for third persons to read your conversation. After you enabled the plugin, you have to open its settings (click on the wrench icon) and a key.
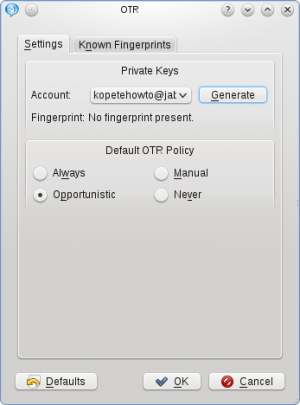
This may take a while and you have to wait until Kopete finished. After that close the OTR window with and the changes. You eventually will have to restart Kopete after this. Then open a chat window of the contact you want to safely communicate with. Go to or use the icon . Kopete will start the session if your contact is capable of OTR, otherwise you'll recieve an error message.
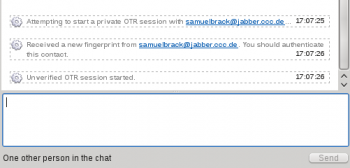
To ensure your added contact is really the one he or she is pretending, it's necessary to authenticate him or her one time. You can do this by calling . You may choose between three options:
- The first one is to ask your chat partner a question whose answer can only be known by him or her and you.
- The next possibility is a secret passphrase your partner has to know (you may consider giving the secret to him or her via another secure communication channel, e.g. telephone).
- Thirdly, there's the option of manually checking the OTR fingerprint. This is the most secure option, but it's not very handy and if you can choose one of the others it may be more comfortable and faster. When checking the fingerprint, you have to ask your partner for his or her OTR fingerprint over a secure connection (e.g. telephone or encrypted E-Mail) so that the fingerprint can be checked.
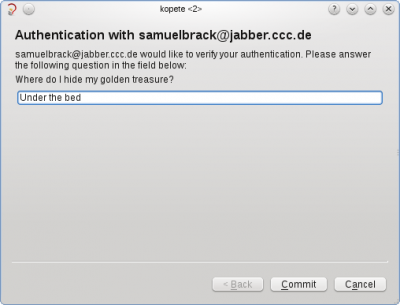
Let's assume we choose option one and ask our partner a question. Type it into the field and define the expected answer your partner has to give, so that he or she can be authenticated.
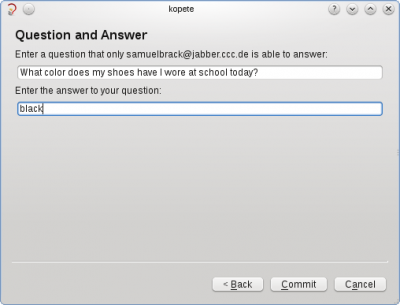
When we continue, your partner will see the question and if the answer is correct, OTR is set up ready now.
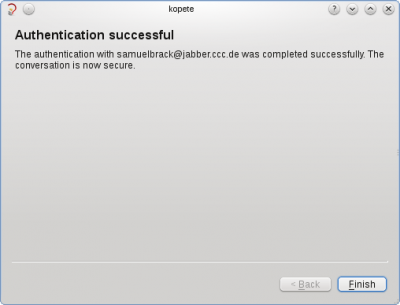
Your partner may do the same thing in return, so when you see a window asking you for authentification just answer the question and you are an authentificated user in your friend's contact list, too.
Every time you communicate safely, you'll see the green armored keylock icon at the top of your chat window. To finish the secure connection, you can either close your chat window or click on .
- ← Return to index
- Kopete/Jabber/Useful configuration hints/da
- Page 8 - More info on Kopete →
