Digikam/Windows
Instal·lar digiKam sobre Windows
Transcrit des de l'article d'en Dmitri Popov, el 21 de novembre de 2010
Si instal·leu el digiKam a Windows, teniu dues opcions: o podeu compilar l'aplicació des del codi font o podeu utilitzar l'instal·lador de Windows del KDE. Aquest últim mètode és el més fàcil, però hi ha un inconvenient: l'instal·lador usualment inclou una versió antiga del digiKam. Si podeu viure amb això, i no teniu ganes d'embrutar-vos les mans amb la compilació del digiKam des de les fonts, llabors l'instal·lador del KDE és el camí a seguir.
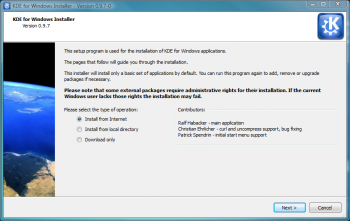
En primer lloc, creeu un nou directori KDE al disc dur, llavors descarregueu-hi l'instal·lador del KDE des del lloc web del projecte KDE on Windows. Llanzeu l'instal·lador, seleccioneu l'opció , i premeu .

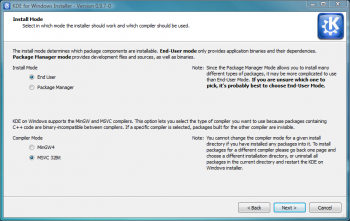
En el camp , introduïu la ruta al directori KDE, i premeu . Seleccioneu l'opció en la secció , i des de la secció .

Keep the settings in the next several screens at their defaults. When you reach the screen, choose the www.winkde.org server, since it offers the newest as well as older versions of the KDE bundle. Press and find the version of KDE that contains the digiKam and kipi-plugins packages. Select then both packages, and press . Hit the button once again, and the installer does the rest. Wait till the installer has finished downloading and installing the software, press the button, and you are done. Now you can launch and use digiKam as any other Windows application.
