KWord/1.5/Manual/UsingFrames
Tutorial: Selecting a frame and entering text into that frame
To begin entering text (or adding any sort of data for that matter) into a document, its important to let KWord know which frame to put the data in.
- In order to keep both editing and formatting of your document efficient and simple, the command executed with a mouse click changes depending on where in the KWord window the pointer is located.
- When the pointer is located over toolbars, scrollbars, menu buttons or other areas outside the document, the pointer is an arrow. You should already be familiar with this type of pointer when using other KDE programs.
- When inside the document, there are two separate pointers which alternate automatically based on how close to a frame edge the pointer is currently located.
- When the mouse pointer is near the edge of a frame, the pointer will change into two intersecting lines with arrows on all four points. Clicking the left mouse button now will select the nearest frame.
- As you move the pointer away from the edge of the frame, the pointer will change into the text entry pointer. Clicking the left mouse button at this time will tell KWord to insert text into this frame.
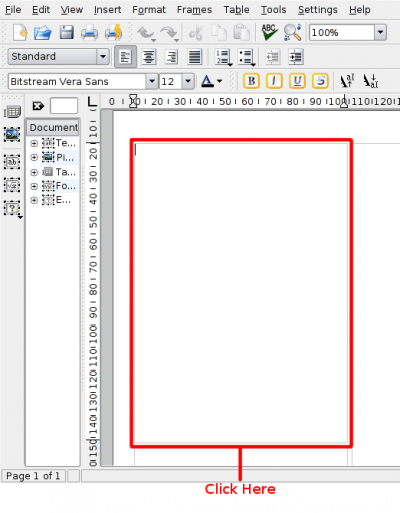
Step 4: Place the mouse pointer over the upper-left frame. Make sure you do not see the frame select pointer
Step 5: Click once with the left mouse button.

This tells KWord to insert text into this frame. Click in the upper left corner of the frame to position the cursor in the upper left corner of the frame.
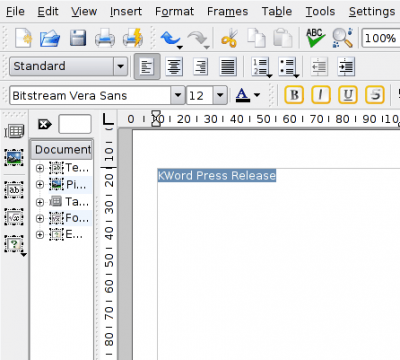
Step 6: Enter the following text using the keyboard: KWord Press Release.
This is some sample text for our newsletter.
Step 7: Select KWord Press Release by placing the mouse cursor on the right end of the text. Click once with the left mouse button and drag the mouse cursor to the left. Selected text will be white text on a colored background. When all the text has been selected, release the left mouse button.

This defines what text is going to be altered with Step 8.
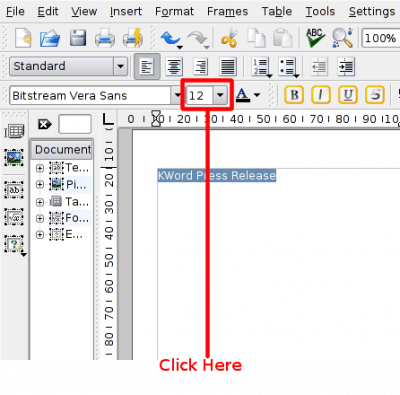
Step 8: Click inside the Text Size combo box. Change this number to 26.

This changes the size of the selected text to one more appropriate for a title.
| Prev | Contents | Next |
| Selecting a frame and entering text into that frame | Changing the size of a frame |
