Boîte à outils

Ajouter une capture d'écran introductive et une description
Chaque fois que cela est possible nous commençons une page importante d'une application avec cela. Le code pour le faire est celui-ci
{|class="tablecenter vertical-centered"
|[[Image:YourScreenshot.png|250px|thumb]]
|Votre texte de description
|}
Formater votre texte
Uiliser des titres
Chaque titre démarre sa propre ligne et la termine avec deux ou plus caractères '='. S'ils sont plus d'un sur une page, ils créent automatiquement une Table des matières, aussi utilisez-les. Le nombre de caractères '=' détermine leur niveau dans la Table des matières, ainsi les titres peuvent être '==Nom de la principale section=', '===Nom de la sous-section===', '====ici nom de la sous-sous-section====', et ainsi de suite. Évitez d'utiliser un seul '=', comme cela indique un titre de page et chaque page de wiki a déjà un nom fabriqué à partir de du sien ; par exemple, ce titre de page "Toolbox/fr" apparaît come son titre de page
Utiliser le gras et l' italique
Les guillemets sont utilisés pour spécifier les mots en gras et en italique.
Utilisez '''Texte en gras''' pour spécifier Texte en gras' et ''texte en italique'' pour spécifier texte en italique.
Pour être certain que nous obtiendrons des treaductions faciles et fiables, veuillez adhérer àux règles typographiques.
Ajouter un fragment de code
Nous avons des modèles pour aider à afficher correctement les fragments de code. Des exemples d'utilisation dans différentes situations sont disponibles à la page des règles typographiques
Si vous rencontrez des problèmes pour afficher les caractères pipe dans votre fragment de code, veuillez consulter l'explication et le détail des balises dans Règles typographiques
Ajouter des indentations
- ":" est utilisé pour une indentation, et était utilisé dans certaines pages anciennes. Cela est déprécié et cause certains problèmes, aussi les multiples doivent etre supprimés lorsqu'ils sont trouvés. Un simple ":" indentera quatre caractères.
Formater les dates
Les dates dans un format purement numérique provoquent une confusion, dûe aux différences dan sles zones géographiques. Veuillez formater les dates ainsi
18 mars 2011
avec le mois soit écrit en entier sous forme abrégée, et l'année sur 4 chiffres. Le jour peut avoir un ou deux chiffres.
Listes à puces
* est le symbole à utiliser pour les listes à puces. ** produit un second niveau :
* Amandes

* Noisettes
** Noix de cajou

* Raisins
produit
- Amandes
- Noisettes
- Noix de cajou
- Raisins
Énumérations
Les énumérations sont produites de la même façon, en utilisant '#'.
# Tamiser
# Mélanger
## Remuer soigneusement
# Cuire
produit
- Tamiser
- Mélanger
- Remuer soigneusement
- Cuire
Pour plus de détails sur les listes, voir wikimedia.
Combining Bulleted Lists and Enumerations
You can have an enumerated sublist in a bulleted list and vice versa, like this:
* Nuts
*# Cashew
*# Crazy
* Other things
produit
- Nuts
- Cashew
- Crazy
- Other things
while
# Nuts
#* Cashew
#* Crazy
# Other things
produces
- Nuts
- Cashew
- Crazy
- Other things

To get each bullet and each sub bullet in its own translation unit you can enter something like this:
* First bullet</translate>
<translate>
** First sub bullet</translate>
<translate>
** Another sub bullet<br /><br />This one consists of two paragraphs</translate>
<translate>
* The next main bullet</translate>
<translate>
** And so on
This displays like this:
- Première puce
- First sub bullet
- Another sub bullet
This one consists of two paragraphs
- The next main bullet
- And so on
The same method should apply to the other kinds of lists.
If on the other hand you need to have more sections in the same item, you can do something like this to have each section in a translation unit of its own:
* First bullet</translate>
<translate>
* Second bullet, first section.</translate><br /><br /><translate>Second section of the
second bullet. This section has a translation unit of its own</translate>
<translate>
* And so on
This displays like this:
- First bullet
- Second bullet, first section.
Second section of the second bullet. This section has a translation unit of its own - And so on
Itemizations
Itemizations are produced using ; and : alternatively. They are best for giving short descriptions for a group of related objects.
;Animals
: They move around and devour other creatures.

;Plants
: They have roots and feed upon ground water and sun.
produces
- Animals
- They move around and devour other creatures.
- Plants
- They have roots and feed upon ground water and sun.
Ajouter un lien
There are three kinds of links to learn, internal ones, to another userbase page, internal links to a section of a userbase page, and external URL links.
For an internal link the format [[PageLayout]], where you want to display the name of the page, does work, but it is not ideal, particularly for translation to docbook and for localisation. It is better to use the form [[Special:myLanguage/PageLayout|Page Layout]], because that allows translators to link correctly even though the page name is localised. The result is that it directs to the correctly translated page, if one exists. You often need to include the link in a sentence, so in that case you would use
[[Special:myLanguage/PageLayout|this page]]
which displays
Internal links to subsections of a page should look like this
[[Special:myLanguage/Tasks_and_Tools#Working_with_Languages|...]]
With this kind of link it is very important, that the page you link to has a subpage anchor immediately before the section you link to. It should look like this:
</translate><span id="Working_with_Languages"></span><translate>
(in this example - the id should match the title of the section) and should be place immediately before the section headline with a blank line separating the anchor and the headline.
If the page containing the section that you link to is not yet marked up for translation, you should omit the </translate> and <translate> tags.
External links are slightly different so
[http://techbase.kde.org/Schedules our road map]
displays
our road map, which would take you straight to the techbase page.
One last thing to note - when you preview your page, all links are live. This gives you two benefits. You can check (by hovering) that your links are set up as you expected, and you can use a red link to create a new page.
Make an application list
If you want to make a list of applications like the ones in the subpages of Applications, you should use the AppItem template. Simply enter
{|
{{AppItem|System Settings/Locale|Preferences-desktop-locale.png|
Settings for localized handling of numbers, dates, etc}}A short text.
A few more short lines about the app. This is optional.
|-
{{AppItem|System Settings/Shortcuts and Gestures|Preferences-desktop-keyboard.png|
Shortcuts and Gestures}}Another short text. If you do not type <keycap>Enter</keycap> between the texts
you get one section no matter how long the text is.
|}
This gives the following display:
Settings for localized handling of numbers, dates, etc | |
| A short text.
A few more short lines about the app. This is optional. | |
Shortcuts and Gestures | |
| Another short text. If you do not type Enter between the texts you get one section no matter how long the text is. | |
Note, that you should not prepend "Special:myLanguage" to the page name - the template takes care of that. Also note, that you must give a title, even if the title is the same as the page name.
Footnotes
Footnotes are rarely used in our pages, but if you need them you can place a <ref>text</ref> in the source where the footnote mark should appear. There has to be one <references /> somewhere in the source as well, usually towards the end of the page. This is where the text added by the <ref> tags will appear. For more info see the Wikipedia help page.
Illustrer votre texte
Add a single image, centered
[[Image:KMail-kde4.png|250px|center]]
Note that you can change the position of the image, but the default is left. The size of the image depends on the circumstances, but for screenshots I recommend no less than 250px and no more than 500px.
see mediawiki for more info.
Make the Image Clickable, and Add a Caption
Where you need to show more detail, create a moderately sized image, clickable, so that the full-size can be seen. Simply add the parameter '|thumb' within the image parentheses.
A caption can also be added as a parameter, but will only show if '|thumb' is present.
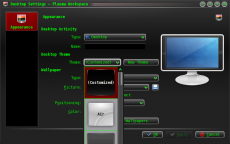
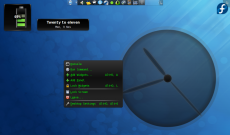
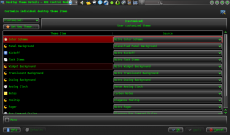
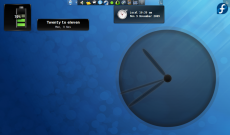
Use Tables to Precisely Place Multiple Images
{|class="tablecenter" style="border: 1px solid grey;"
|[[Image:Desktop-config-customized.png|230px|center]]||[[Image:Desktop-settings-rightclick.png|230px|center]]
|-
|[[Image:Desktop-theme-details-dialog.png|230px|center]]||[[Image:Plasma-multiple-themes.png|230px|center]]
|}
affichages
 |
 |
 |
 |
Note that all the parameters for one image are contained within [[...]], and cells are separated by '||'. To start a new line, insert '|-' on an otherwise-empty line, then '|' at the start of the next one.
Embarquer une vidéo
As of July 2012 the MediaWiki EmbedVideo extension has been installed on userbase.kde. This means you can embed videos from various video hosting sites into the page content and have them display in line.
EmbedVideo parser function expects to be called in any of the following ways:
{{#ev:service|id}}
{{#ev:service|id|width}}
{{#ev:service|id|width|align}}
{{#ev:service|id|width|align|desc}}
{{#evp:service|id|desc}}
{{#evp:service|id|desc|align}}
{{#evp:service|id|desc|align|width}}
Where:
service is the name of a video sharing service (See "service name" in the list below)
id is the id of the video to include
width (optional) is the width in pixels of the viewing area (height will be determined automatically)
align (optional) is an alignment (float) attribute. May be "left" or "right".
desc (optional) is a short description to display beneath the video when it is aligned
For example, to include the famous "evolution of dance" YouTube video, you'd enter:
{{#ev:youtube|dMH0bHeiRNg}}
And if you wanted scaled down to thumbnail size, on the right with a short description, you could use:
{{#ev:youtube|dMH0bHeiRNg|100|right|This is an embedded video!}}
As of version 1.0, EmbedVideo supports embedding video content from the following services:
| Site | Service Name |
|---|---|
| Dailymotion | dailymotion |
| Div Share | divshare |
| Edutopia | edutopia |
| FunnyOrDie | funnyordie |
| Google Video | googlevideo |
| Interia | interia or interiavideo |
| Revver | revver |
| sevenload | sevenload |
| TeacherTube | teachertube |
| YouTube | youtube and youtubehd |
| Vimeo | vimeo |
Ajouter des notes et des avertissements

Where a note or warning is relevant within your text, use these templates:
{{Info|This is general information}} displays

{{Note|Some important information at this point}} displays
{{Tip|A helpful piece of advice, something to remember}}displays

{{Warning|Take care - this is a dangerous thing to do}} displays

Where the strongest possible warning is needed, the Remember box can be used, but please use sparingly.
{{Remember|1=This is for things that definitely must not be forgotten}}

You can also change the heading:

{{Remember|2=Don't Forget This!|1=You can use...}}
KDE3 and KDE SC 4 Versions of Applications
By default, KDE SC 4 is assumed. If the KDE SC 4 version is not yet ready for release, or where only a KDE 3 version exists, it may be necessary to document the KDE3 version. In this case you should add the template {{KDE3}}
which displays
![]() Should you be writing about a KDE3 version and KDE SC 4 version on the same page, use icons for both — {{KDE4}} which displays
Should you be writing about a KDE3 version and KDE SC 4 version on the same page, use icons for both — {{KDE4}} which displays
![]()
Autres modèles utiles
Inserting GUI Icons
The best way to refer to icons in the GUI is to display it in the text. This can be done with a template like this: {{Icon|list-add}}. This will display the ![]() icon.
icon.
For this to work, the icon image must have been uploaded to the wiki. See Update an Image for an explanation on how to upload images. The .png files can usually be found here: usr/share/icons/oxygen. If possible use the 16x16 icon. The file name should have an Icon- prefix as in Icon-list-add.png — apart from the prefix the filename should exactly match the usual name. Note, that when using the template you should neither write the Icon- prefix nor the .png file type extension.
The ![]() icon can also be written as
icon can also be written as {{Plus}}, and the ![]() icon as
icon as {{Minus}}. You can also use {{Configure}} to get the ![]() icon, and
icon, and {{Exit}} gets you the ![]() icon.
icon.
Community Applications
The final consideration concerns those applications which are not distributed as core KDE applications. These need to be indicated by an icon, placing {{Community-app}}
at the end of your sentence or line, just as you would to denote a footnote in general writing. You then need to add {{Community-app-footnote}} which will create a footnote, like this:
![]() Support for this application can be found from the project's home page
Support for this application can be found from the project's home page
Making Major Edits to Existing Pages
If a page is likely to be open for editing for some time there is a danger of conflicts - someone else may edit at the same time, and saving your edit will cancel out theirs, or vice versa. The way to avoid that is to make a temporary entry, directly under the language bar, using {{Being_Edited}} which will display

If this notice persists for an unreasonable time, please either notify irc.freenode.org #kde-www or report on Annew's Talk page
Note: Pages should not normally be marked for translation while they are being actively worked on
Don't forget to remove it when you have finished!
Adding a New Complex Page
If you need to be able to work on a page for quite some time, over several days, for instance, you may like to use the Construction template - {{Construction}}, which displays

Links to Pages in the Neighbourhood
You can add links to a preceding or a following page using the following templates as described here:
{{Prevnext2|prevpage=Previous Pagename|nextpage=Following Pagename|prevtext=The page before this page|nexttext=This page you should read later|index=Index page|indextext=Back to Menu}}
All six arguments are optional. For first pages with no preceeding page or last pages with no following page use this:
{{Prevnext2|nextpage=Following Pagename|nexttext=This page you should read later}}
- Toolbox/fr
- This page you should read later →
{{Prevnext2|prevpage=Previous Pagename|prevtext=The page before this page}}
- ← The page before this page
- Toolbox/fr
If you don't specify an indexname the name of the current page will be displayed.
Special:myLanguage with your links; otherwise you create problems for the translators.
Adding a List of Sub-Pages
== Subpages of {{FULLPAGENAME}} ==
{{Special:PrefixIndex/{{FULLPAGENAME}}/}}
is very useful when you want to list subpages with active links, such as
Subpages of Toolbox/fr
It does, however, also list all "other-language" pages, so use with discretion.
