Kdenlive/Manual/Project Menu/Render

- How to choose the correct output format and bit rate?
- What to do for rendering lossless, for an iPhone, or whatever? (Dropdown containing targets like lossless/HQ/player)
Rendering
Rendering is the process where the edited clips are saved into a single complete video clip. During the rendering process the video can be compressed and converted to a number of different video formats (AKA codecs).
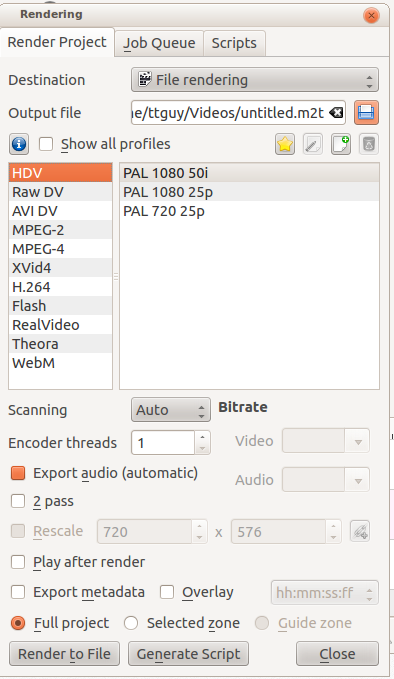
The rendering dialog is brought up from the render button ![]() , from selecting in the Project Menu or by the Ctrl + Enter shortcut.
, from selecting in the Project Menu or by the Ctrl + Enter shortcut.
Rendering Profile Categories
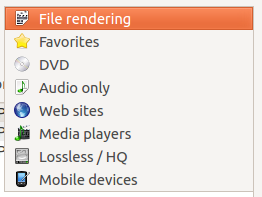
Kdenlive offers many different preset rendering profiles to choose from. The rendering profiles are grouped into categories. See picture below.
File Rendering
DVD Rendering
DVD Rendering produces files that are compatible with DVD authoring software. MPEG2 files created from file rendering profiles are less likely to be compatible with DVD software.
Note that this option does not create a DVD file system. It merely creates DVD compatible MPEG2 files that can be used by DVD authoring software. If you check the check box then the DVD Wizard will open and you can use this to create a DVD file system (in .ISO format). The DVD Wizard is also available from the File Menu.
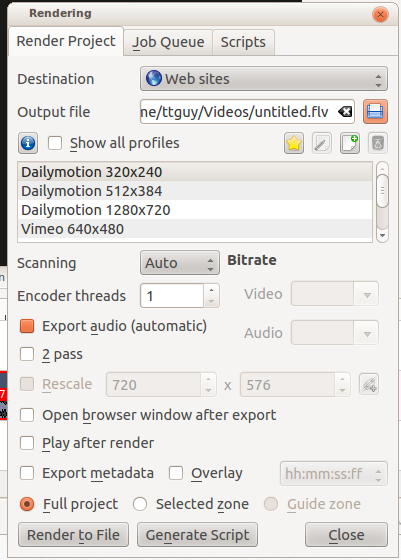
Websites
Mobile Devices
Create Custom Render Profiles
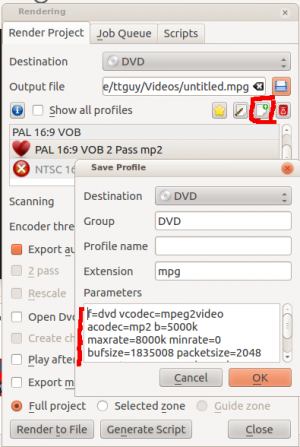
You can create your own custom render profiles by clicking the button highlighted in the screen shot below
This will open the Save Profile dialog and the section will be filled in with the render parameters of the profile that you had selected when you clicked the ![]() button. You can edit values in the parameters and save your own custom render profile.
button. You can edit values in the parameters and save your own custom render profile.
The parameters in the rendering profile are ffmpeg parameters. For an explanation of there meaning check the ffmpeg man(ual) page or type ffmpeg -h in a command prompt.
See also Render Profile Parameters - How to read them
Rendering In Batch mode
If you have a lot of rendering jobs to do you can use Kdenlive to create rendering scripts which you can accumulate and then execute in a batch mode overnight. See Rendering Using Rendering Scripts.
Alternatively, once you have submitted a rendering job on a project and it is up and running in the Job Queue you can drag the render window out of the way and edit the project some more or load a new project and render that one too. The second submitted render job will go into the Job Queue. Editing the project after a render job is submitted will not change the settings on that job.
Rendering Using the Guide Zone Option
This makes use of Guides to define a region of the project that is to be rendered. See Rendering Using Rendering Scripts.
Rendering Using the Selected Zone Option
If you select the radio button from the bottom of the render dialog then Kdenlive will only render that bit of the project that has a selected zone created for it. See Creating Zones in Project Monitor
Render Overlay
This option overlays a time code or frame count over the rendered video. This will put the overlay over the entire rendered project. Alternatively you can use the Dynamic Text effect to place overlay over selected regions of the video.
Export Metadata
Check this to have the metadata setup under project settings > Metadata be placed into the metadata of the rendered file.
This image shows meta data settings for a project
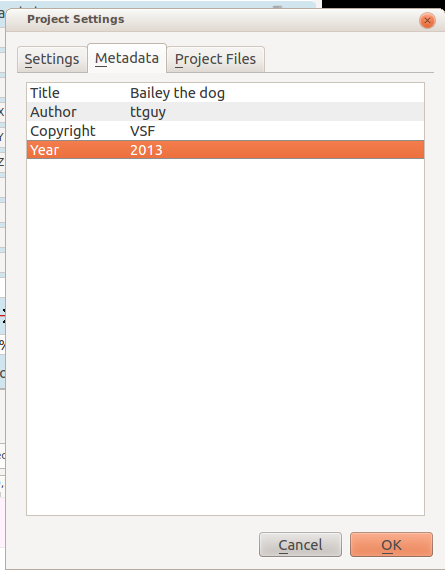
and this is the metadata on the resulting clip (rendered with Export Metadata checked)

$ ffprobe dog_rotated_meta_data.mp4
Metadata:
    major_brand     : isom
    minor_version   : 512
    compatible_brands: isomiso2avc1mp41
    title           : Bailey
    encoder         : Lavf53.21.1
    copyright       : VSF
This appears to reveal a bug in ver 0.9.4 - the full title is not placed in the meta data - it is truncated at the first space.
Export Audio Checkbox
This toggles between three modes. Unchecked, Checked and Checked Automatic.
Uncheck this to make the video render without an audio track.
Checked - Automatic means - detect if an audio track is present and write the audio track if found
Checked means write an audio track in the rendered file even if there is no audio track to write.
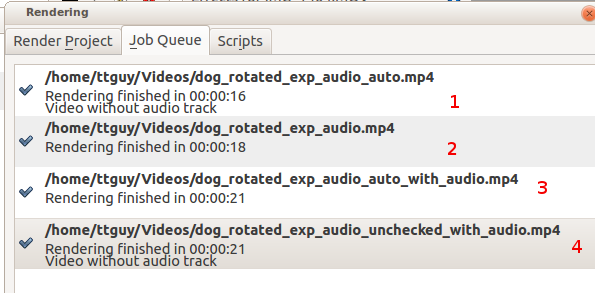
The difference in behaviour between Checked and Checked Automatic is to do with the situation where you have a Video on the time line but there is no audio track on the time line and the video in the video track also does not have an audio track. An example of such a situation is shown in the screen shot below.
Under this situation if you render with Checked Automatic then the rendered file will not have an audio track (Result 1 on screen shot below). But if you render with Export Audio just Checked then the rendered file will contain an audio track - the track will however be empty (Result 2 on screen shot below).
FFprobe on file generated from an audio-less track using Export Audio - Checked Automatic. Note only one stream - Stream #0.0 - a video stream. Kdenlive automatically detected there was not an audio track and so it did not write one.
$ ffprobe dog_rotated_exp_audio_auto.mp4
Metadata:
    major_brand     : isom
    minor_version   : 512
    compatible_brands: isomiso2avc1mp41
    encoder         : Lavf53.21.1
Duration: 00:00:03.62, start: 0.000000, bitrate: 12592 kb/s
Stream #0.0(und): Video: h264 (High), yuv420p, 1280x720 [PAR 1:1 DAR 16:9], 12587 kb/s, 27.83 fps, 27.83 tbr, 30k tbn, 55.66 tbc
FFprobe on file generated from an audio-less track using Export Audio - Checked. Note two streams - Stream #0.0 and Stream #0.1 the latter being an aac audio track. We forced Kdenlive to write an audio track even though there was not any source audio to write.
$ ffprobe dog_rotated_exp_audio.mp4
Metadata:
    major_brand     : isom
    minor_version   : 512
    compatible_brands: isomiso2avc1mp41
    encoder         : Lavf53.21.1
  Duration: 00:00:03.62, start: 0.000000, bitrate: 12598 kb/s

Stream #0.0(und): Video: h264 (High), yuv420p, 1280x720 [PAR 1:1 DAR 16:9], 12587 kb/s, 27.83 fps, 27.83 tbr, 30k tbn, 55.66 tbc
Stream #0.1(und): Audio: aac, 48000 Hz, stereo, s16, 2 kb/s
In cases where there is an audio track ...

Rendering with Export Audio - Unchecked will produce a file with no audio track - result 4 in the screen shot above. Rendering with Export Audio - Checked - Automatic (result 3 in the screen shot above) or with Export Audio - Checked will produce files with Audio tracks.
Encoder Threads
Scanning Dropdown
This option controls the frame scanning setting the rendered file will have. Options are Force Progressive, Force Interlaced and Auto. (What does auto do?)

