KMail/Generelt om brug af KMail
Hovedvinduet
Hovedvinduet er det vindue, som dukker op når KMAil startes. Det er som standard inddelt i tre felter:
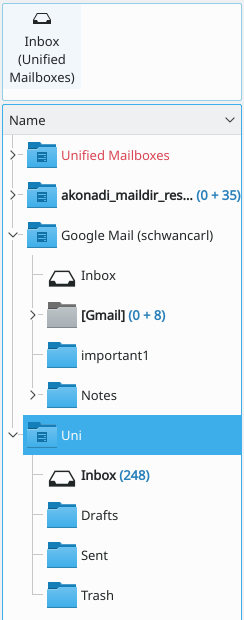
Folder list (on the left)

This pane contains the list of your message folders (other email programs may call them mailboxes). To select a folder, simply click on it. The messages contained in the folder will now appear in the Headers pane. The folder list can be displayed in both a short view, which takes up only a small portion of the left side of the screen, and a long view, which takes up the entire left side of the screen but is able to show more mailboxes. You can toggle between these two views under Appearance/Layout in the dialog. The top section of the folder pane contains quick links to your favorite folders. Add folders here through the right mouse button context menu . Please see the Using Folders section for more information about how to use folders.
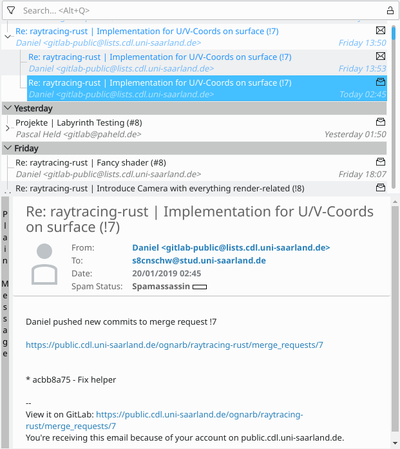
Message list (in the upper right by default)

This pane lists header information (message Status Flags, Sender, Subject, Date, and other optional columns like Size, Attachment Flag, Important Flag, etc.) for the messages in the currently selected folder. Clicking on a header will select that message and display it in the Message pane; you can also select more than one message by holding down the Ctrl key when clicking on messages. Change the view of your message list by selecting . You have several options here.
- - A simple, backward compatible, single row with clickable sort columns.
- - A fancy multi-line, multi-item with status icons, no sort columns.
- - A fancy multi-line, multi-item, status icons and clickable sort icons.
- - Allows you to customize your own Message List Theme e.g. add or remove columns from the clickable sort bar.
If you have chosen a theme with a clickable status, you may sort the messages by clicking on the column that you wish to sort; if you click on the same column more than once, sort order will toggle between ascending/descending and some alternative sorting criteria will become available (like sorting by Status when you click on the header of the Subject column). Clicking the right mouse button on the list header shows a pop up menu, which allows you to show or hide several columns in the list. You can customize the columns visible on the sort bar, see Configure Appearance Message List for details.
Message preview pane (in the lower right by default)
This pane displays the currently selected message. Below you will find options to adjust the reader window to your preference. The top of the reader window contains various header options. Go to and try them out until you find one you like! Details for the various headers are as follows:
- - A minimal header with title, From, and To, with a graphical design.
- - Minimal header with a spam status notification.
- - Title, and in parentheses you will find From and the date.
- - Title, From, and To.
- - Title, Date, From, and To.
- - List everything you ever wanted to know about the email, including every server it went through, virus/spam scanners it went through, etc.
- - See Configure Appearance Message Headers to set up custom headers that can be selected here.
- - An example header from the Download New Themes....
- - An example fancy header from the Download New Themes....
- - Allows you to download custom themes created by other KMail users.
If you prefer to view your email in HTML format instead of plain text (Default), click on the bar located on the left hand side of the pane. The text on the bar will inform you which view you are in. If this bar is missing you can enable it in the dialog, from there you want the Message Window tab, and select Show HTML status bar.
If you would like to change how your attachments appear in your messages, go to . Your options are as follows:
- , all attachments appear as icons at the bottom of the message.
- will show attachments as icons, unless the message suggests that they should be displayed inline. You can suggest that certain attachments should be shown inline in your own messages when you select in the attachment's properties dialog.
- shows the contents of the attachments at the bottom of the message. Attachments that cannot be displayed, e.g. compressed files, will still be shown as an icon.
- will not show attachments.
For complex messages you can show the structure of the message by selecting , this will show in the message structure viewer below the preview pane.
You can scroll through the message page-by-page using the Page Up and Page Down keys, or line-by-line using the Up arrow and Down arrow keys; you can also use Keyboard Shortcuts to skip through your messages without having to use the mouse.
