Parley/Підручник
Home >> Applications >> Education >> Parley >> Parley Manual
This manual was written by Sabine Eller, Daniel Laidig and Frederik Gladhorn.
© Sabine Eller, Daniel Laidig та Frederik Gladhorn, 2010
Parley — програма для розширення словникового запасу. Вона допоможе вам збільшити запас слів, зокрема під час вивчення іноземної мови. Ви можете створювати власні збірки словників з потрібними вам словами або звантажити одну з багатьох вже створених збірок словників. Серед вже створених збірок збірки з вивчення мов, а також анатомії, музики, географії, хімії та збірки, призначені для підготовки до іспитів.
Parley is a vocabulary trainer. It helps you to memorize your vocabulary, for example when you are trying to learn a foreign language. You can create your own vocabulary collections with the words you need or select from a great variety of available Vocabulary Collections. There you can find collections containing language vocabulary and also anatomy, music, geography, chemistry or exam preparation.
Parley є дуже гнучким, у програмі використано підхід до вивчення словників за допомогою карток. Програма стежить за процесом навчання у автоматичному режимі. За допомогою Parley ви можете впорядковувати ваші словники і створювати, у разі потреби, власні уроки, але на відміну від звичайних паперових карток у Parley ви можете скористатися різними способами навчання.
На передній частині картки наведено питання, відповідь або переклад якого розташовано на задній частині картки. На початку ви маєте стос карток. Якщо вам відома відповідь або переклад з картки, ви можете відкласти її у окремий стос. Якщо ви не пам’ятаєте відповіді, ви кладете картку у стос карток для пізнішого вивчення.
Основним завданням Parley є розширення словникового запасу. З метою досягнення такого розширення у програмі передбачено декілька різновидів вправ.
Сама програма Parley складається з двох основних частин: програми тестування та редактора збірок словників.
У цьому підручнику терміном збірка словників ми називатимемо файл, що містить дані уроків та словник для цих уроків.
Доступ до обох програм, редактора і програми тренування можна отримати за допомогою початкової сторінки.
Робота програми тестування складається з трьох частин: у першій, налаштування вправи, ви можете вибрати предмет вправляння. Після налаштування ви можете розпочати вправу, після завершення якої буде показано резюме.
Підказка: доступ до можливостей Parley, подібно до інших програм, можна отримати за допомогою контекстного меню, яке викликається клацанням правою кнопкою миші. Варіантами обробки уроків та записів слів можна також скористатися за допомогою контекстного меню.
Початкова сторінка
When you first launch Parley the Start Page welcomes you. At first the Start Page is empty, once you opened some vocabulary collections, it shows you the ones you worked with most recently.
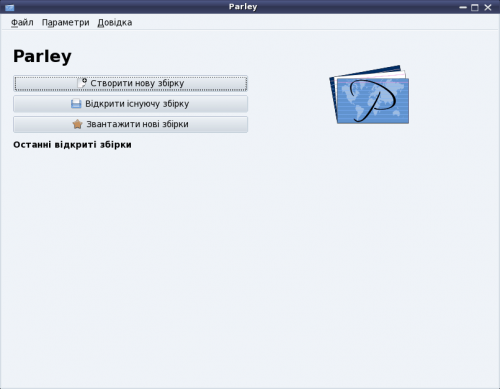
Збірка словників — це файл, у якому містяться слова або вирази і їх переклади або тлумачення, які ви бажаєте запам’ятати. Ці слова впорядковано за уроками.
Щоб розпочати вправу, наведіть вказівник миші на одну зі збірок словників у списку і клацніть лівою кнопкою миші. У відповідь буде відкрито вікно налаштування вправи.
Якщо ви помітили, після наведення вказівника миші на пункт з назвою документа праворуч від нього з’являється невеличка піктограма редагування. Натисканням піктограми редагування ви можете відкрити збірку у режимі редагування замість режиму вправляння.
Якщо ви бажаєте створити вашу власну збірку словників, натисніть кнопку «Створити нову збірку».
Крім того, ви можете відкрити збірку, якщо така збірка вже зберігається на вашому комп’ютері, але її ще немає у списку.
За допомогою останньої кнопки на початковій сторінці ви можете звантажити збірки словників, створені іншими користувачами. Якщо ви самі створите збірку, якою варто поділитися з іншими, ви зможете вивантажити її за допомогою вікна редактора словників.
У пакунку Parley міститься декілька тем. Перемкнути тему (стиль графічних елементів вікна) можна за допомогою діалогового вікна параметрів програми. Докладніше про це ми поговоримо у розділі, присвяченому налаштуванню Parley.
Відкриття існуючої збірки
Let's suppose your collection is already on your hard disk.
Ось як виглядатиме вікно програми Parley після першого запуску:
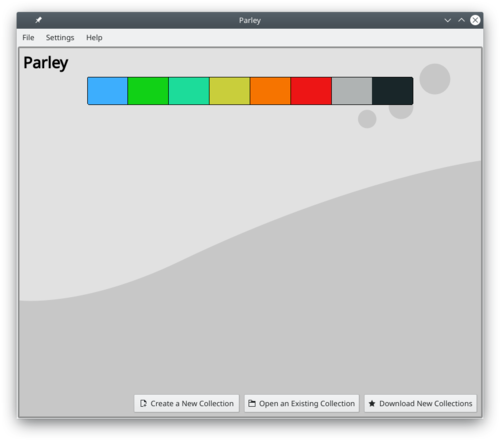
Натисніть кнопку Відкрити існуючу збірку.
За допомогою діалогового вікна вибору файлів перейдіть до каталогу, у якому зберігаються файли даних і позначте відповідний файл наведенням на його позначку вказівника миші з наступним клацанням лівою кнопкою миші. Залежно від операційної системи, якою ви користуєтеся, файл буде негайно відкрито або відкрито після натискання кнопки Гаразд.
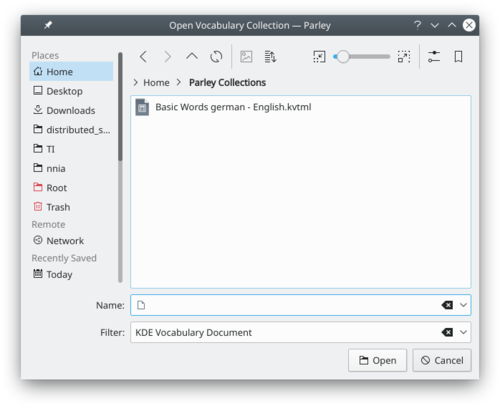
Після завершення завантаження файла буде відкрито вікно налаштування вправи. Докладніше про це вікно ми розповімо у наступному розділі.
Вправляння зі словником
To start practicing you select a document after starting Parley. If you have it opened in the editor already, just click Practice in the toolbar.
Налаштування вправи
Before the actual practice starts, you always get to the Practice Setup page. There are three areas which allow you to choose what to practice:
- The selection of languages
- The selection of the practice mode
- The selection of the lessons that also shows your current progress
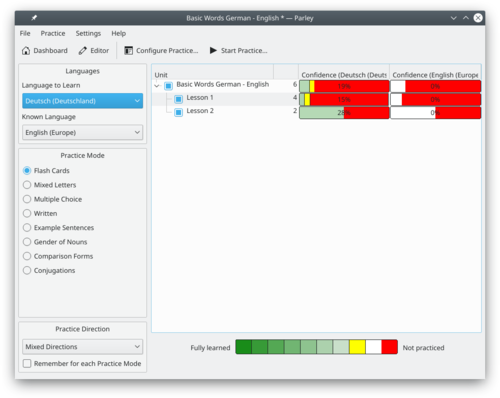
Ліворуч ви можете вибрати комбінацію мов, яку буде використано під час вправи. Якщо ви, наприклад виберете переклад з англійської українською, програма показуватиме вам слова англійською, вам же слід буде вказувати їх переклади українською.
Під панеллю вибору мови ви можете визначити режим вправи. Режим вправи визначає спосіб, у який програма задаватиме вам питання.
На великій панелі, розташованій праворуч, ви побачите список уроків збірки словників. Щоб вибрати урок, з яким ви будете вправлятися, поставте позначку перед його назвою клацанням лівою кнопкою миші. Поряд з назвою уроку буде показано кількість слів, які містяться в уроці. Праворуч від назви буде показано поточний поступ у вивченні уроку.
Додаткове налаштування вправи
The Advanced Practice Configuration allows you to specify more advanced settings that will affect the practice.
Якщо відкрито сторінку Налаштування вправи, доступ до Додаткових параметрів вправляння можна отримати натисканням кнопки Налаштувати вправу на панелі інструментів. На кнопці намальовано зелену піктограму.
Блокування
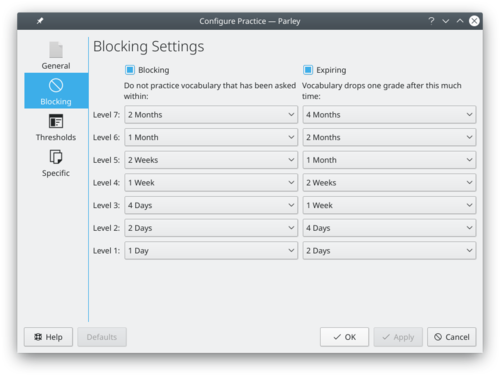
If you plan to practice your vocabulary regularly, you should make sure that the Blocking feature is enabled. The Blocking options are part of the Advanced Practice Configuration. There you go to the blocking page and tick the checkbox that says Blocking. Now you can even configure the interval in which words that you answered correctly will be repeated.
Блокування означає, що між сеансами повторення певного слова буде додано певні часові проміжки. Тривалість проміжку залежатиме від рівня знання слова, отже слова, які ви пам’ятаєте погано, повторюватимуться частіше.
Порогові обмеження
Thresholds are another way of limiting what you want to practice.
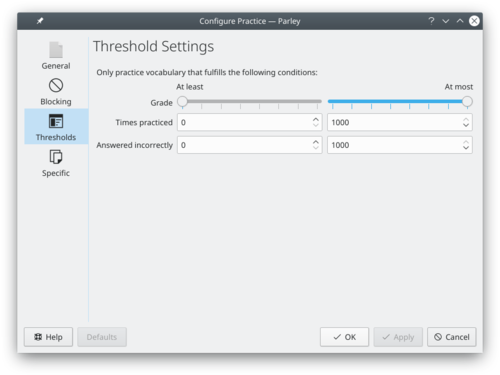
Ви можете наказати програмі використовувати для вправ лише слова, які ви знаєте краще або гірше за певний рівень. Крім того, ви можете наказати використовувати лише питання, які було задано певну кількість разів. За допомогою поля вибору частини мови ви можете визначити для вправи лише слова, які належать до певної частини мови, наприклад, іменники або дієслова.
Додаткові параметри вправляння
You can find several more configuration options for the practice in the advanced settings page.
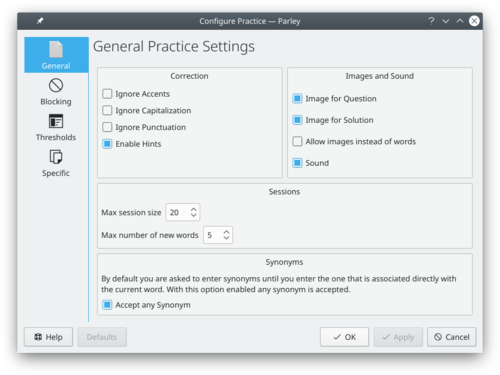
Найважливішими параметрами є:
- Не зважати на помилки з акцентуванням: якщо буде позначено цей пункт, у разі введенні слова з e замість é вам буде зараховано правильну відповідь.
- Не зважати на помилки у регістрі літер: за допомогою цього пункту ви можете наказати програмі ігнорувати регістр літер введених відповідей.
- Уможливити зображення: якщо буде позначено цей пункт, під час вправи програма показуватиме зображення, що відповідають словам, якщо такі зображення передбачено у збірці словників.
- Активні записи під час вправ: визначає кількість слів для повторного опитування перед додаванням нового слова. Якщо ви вкажете невелике число, слова повторюватимуться частіше. Якщо значення буде великим, проміжок між повтореннями слів буде тривалішим.
Тестування
Flash Cards
After having activated the Flash Card Practice Mode and having clicked on Start Practice the following screen shows up. The Flash Card training mode works just as if you would do it with "real" flash cards. You imagine the the result and should you wish some help, you can click on Hint which will start to give you the result one letter at a time.
Крім того, ви можете пропустити поточне слово. Якщо ви натиснете кнопку Відповісти пізніше, програма покаже вам слово пізніше.
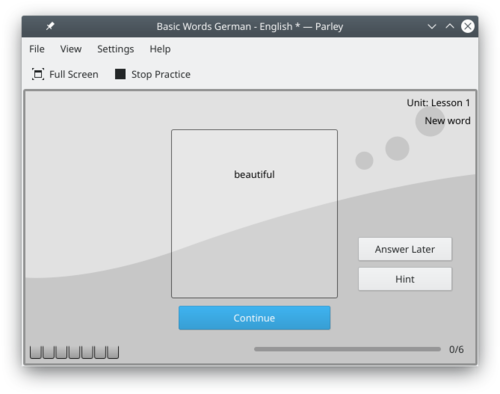
Натискання кнопки Продовжити відкриє відповідь. Після цього, ви маєте визначитися, чи знали ви цю відповідь.
Якщо ви не пам’ятаєте правильної відповіді, натисніть кнопку Я цього не знав (знала). Якщо ви пам’ятаєте відповідь, натисніть кнопку Я це знав (знала).
On the left hand side bottom of the screen you have 7 boxes that show how good you know the vocabulary. These 7 boxes correspond to the blocking levels set under Blocking in the Advanced Practice Configuration
Замість натискання кнопки Продовжити, ви можете просто натиснути клавішу Spacebar.
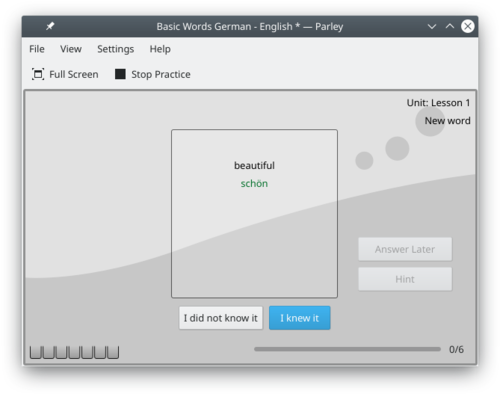
Ви можете у будь-який момент часу перервати вправу натисканням кнопки Припинити вправу.
Переставлені літери
Mixed Letters is a training method that provides you with an immediate help: all letters that are part of the solution are shown mixed up:
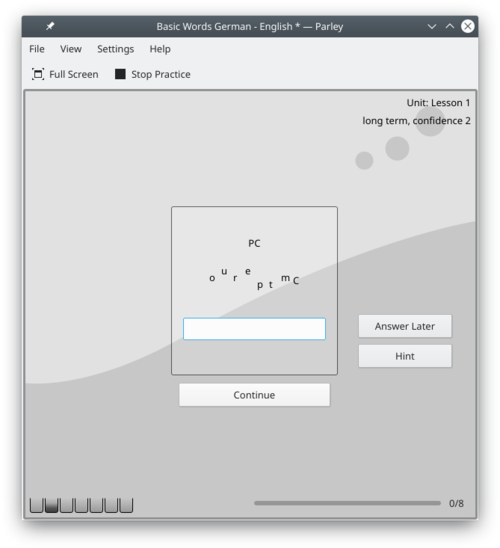
Якщо вам потрібна буде допомога, ви можете натиснути кнопку Підказка — програма показуватиме вам по одній літері відповіді за одне натискання. Звичайно ж, ви можете вирішити відповісти на питання пізніше, для цього достатньо натиснути кнопку Відповісти пізніше.
Щоб вказати відповідь, введіть її у порожнє поле під літерами у зміненому порядку і натисніть клавішу Enter або кнопку Продовжити.
Якщо відповідь була правильною, Parley повідомить вам про це. Після натискання клавіші Enter або кнопки Продовжити ви зможете перейти до наступного питання.
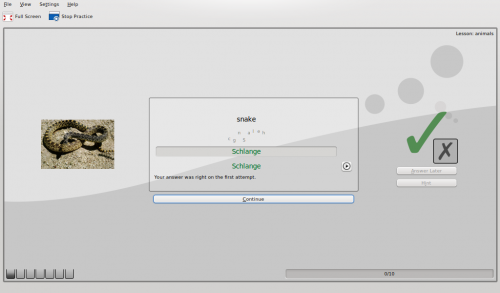
Якщо вами буде вказано помилкову відповідь, програма попросить вас повторити спробу:
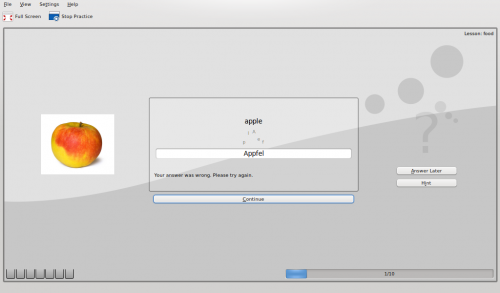
Якщо ви не знаєте відповіді, просто натисніть кнопку Продовжити. Програма покаже вам відповідь. Перейти до наступного питання можна натисканням кнопки Продовжити.
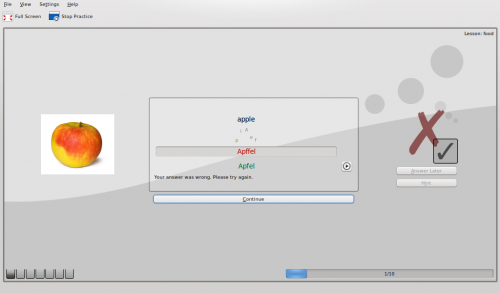
Після того, як відповідь буде показано, праворуч ви побачите велику піктограму, яка позначатиме те, чи була ваша відповідь правильною.
Ви можете змінити оцінку програмою вашої відповіді. Докладніше про це у розділі Зарахування відповіді як правильної.
Вибір з варіантів
Automatic selection of the possible answers
In Multiple Choice mode you are shown a number of potential answers, of which only one is correct. By clicking on Hint Parley excludes one of the wrong answers so that your choice gets more and more restricted with each further click on Hint. Of course you may also choose to Answer Later.
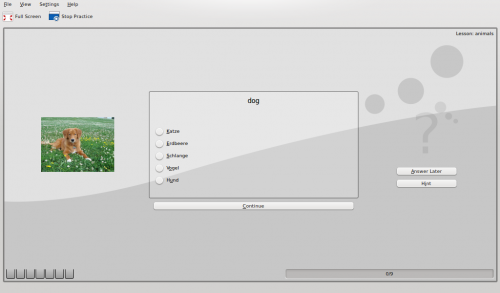
Після вибору правильного на ваш погляд варіанта Parley покаже вікно, подібне до наведеного на знімку нижче, якщо ваша відповідь була правильною. Перейти до наступного питання можна натисканням кнопки Продовжити.
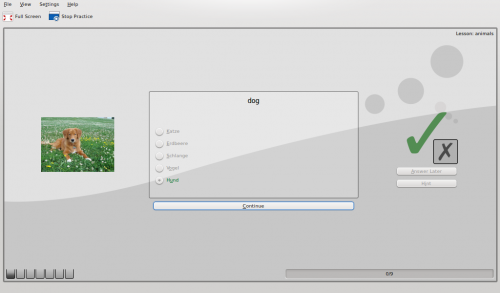
Якщо відповідь була помилковою, програма змінить колір пункту з правильною відповіддю на зелений, а кольори решти пунктів на червоний. Для переходу до наступного питання теж слід натиснути кнопку Продовжити.
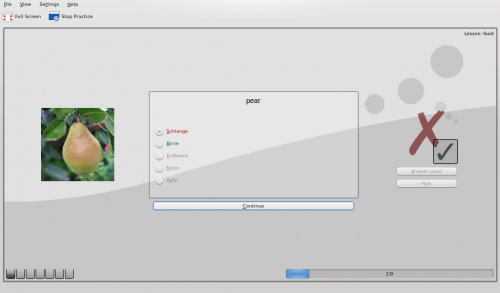
Після того, як відповідь буде показано, праворуч ви побачите велику піктограму, яка позначатиме те, чи була ваша відповідь правильною.
Ви можете змінити оцінку програмою вашої відповіді. Докладніше про це у розділі Зарахування відповіді як правильної.
Якщо ви бажаєте припинити вправу, просто натисніть кнопку Припинити вправу.
With yes/no answers
Normally Parley automatically proposes one correct and several wrong answers in Multiple Choice mode. For some exercises instead you will have preset answers like yes/no or similar. And for these you have to configure the practice by clicking on Configure Practice.
Select the tab Advanced and you will get something very similar to the following screenshot:

If you have just two choices like yes/no in the section Multiple Choice set the Number of choices to 2.
Письмовий
When you select the option Written to do your practice you are supposed to type in the solution. You can use the button Hint which will start to give you the result one letter at a time. Of course you can also decide to Answer Later by clicking on that button.
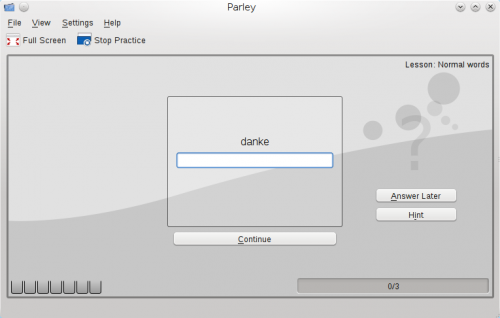
Після введення вашої відповіді натисніть кнопку Продовжити, Parley визначить, чи була ваша відповідь правильною. Щоб продовжити вправляння, натисніть кнопку Продовжити ще раз.
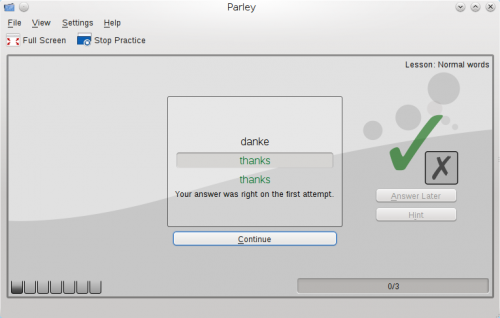
Якщо ви дасте помилкову відповідь, ви можете повторити спробу декілька разів. Якщо ви не бажаєте здійснювати повторних спроб, просто натисніть кнопку Продовжити, щоб наказати програмі показати правильну відповідь.
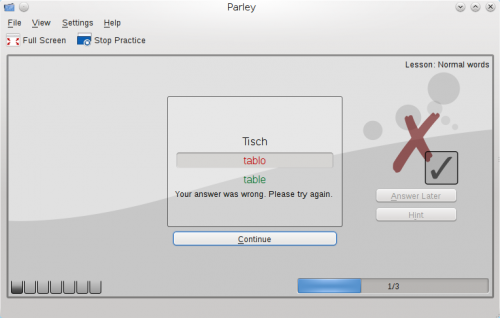
Продовжити виконання вправи можна натисканням кнопки Продовжити. Щоб зупинити виконання, натисніть кнопку Припинити вправу.
Після того, як відповідь буде показано, праворуч ви побачите велику піктограму, яка позначатиме те, чи була ваша відповідь правильною. Ви можете змінити оцінку програмою вашої відповіді. Докладніше про це у розділі Зарахування відповіді як правильної.
Зарахування відповіді як правильної
After the solution is revealed, you see a big icon on the right that indicates if your answer will count as right or wrong. If you see the big checkmark, Parley thinks you were right.
Якщо для того, щоб дати правильну відповідь вам знадобиться декілька спроб, відповідь вважатиметься помилковою.
Щоб змінити стан зарахування відповіді, натисніть невеличку піктограму, розташовану поряд з панеллю показу результату. Велика піктограма на цій панелі завжди відповідатиме стану зарахування відповіді, визначеному програмою.
Відновлення початкового стану вправи
You can reset all your practice scores (remove the grades) to the initial state. When being in edit mode select Edit from the menu bar and then Remove Grades.
Крім того, вилучити всі оцінки для окремих уроків можна за допомогою Налаштування вправи: наведіть вказівник миші на пункт уроку, для якого слід вилучити оцінки, клацніть правою кнопкою і виберіть у контекстному меню пункт Вилучити класи.
Резюме вправи
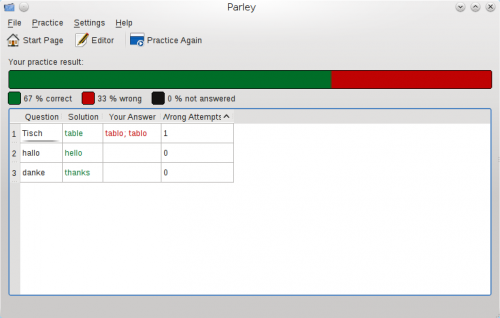
The summary shows up when you finish a learning session. In the big bar on the top it shows you how well you did.
Нижче буде наведено таблицю зі словами, з якими ви вправлялися, де буде показано помилки, яких ви припустилися. Слова, які пов’язано з найбільшою кількістю помилок, буде показано у верхній частині списку, отже визначити слова, над якими слід ще попрацювати, буде дуже просто.
Режими граматичних вправ
With Parley you can also learn specific grammar structures, such as the gender of nouns, the comparison forms of adjectives and the conjugation of verbs. Let's look at some examples.
Артиклі і роди іменників
Once the practice mode Gender of Nouns is activated, click on Start Practice.
У розглянутому нижче прикладі ми вивчатимемо німецьку мову, отже слід буде вибрати один з трьох родів: чоловічий, жіночий чи середній. Якщо ви натиснете кнопку Підказка, програма прибере одну з неправильних відповідей. Звичайно ж, ви можете Відповісти пізніше, якщо натиснете відповідну кнопку.
Щоб програма показувала артиклі замість граматичних назв родів, вам слід ввести артиклі для відповідної мови за допомогою вікна редагування. Крім того, слід мати на увазі, що вправи з артиклями можливі, лише якщо було належним чином вказано роди іменників. Докладніше про встановлення роду можна дізнатися з розділу, присвяченому частинам мови.
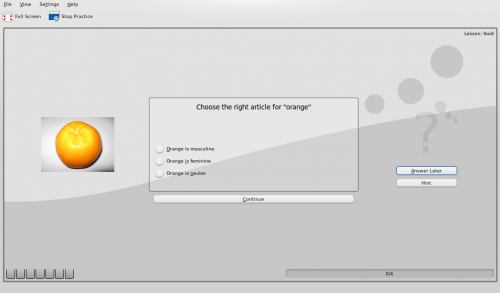
Якщо відповідь була правильною, програма покаже вікно, подібне до наведеного нижче. Щоб продовжити вправляння, слід натиснути кнопку Продовжити.
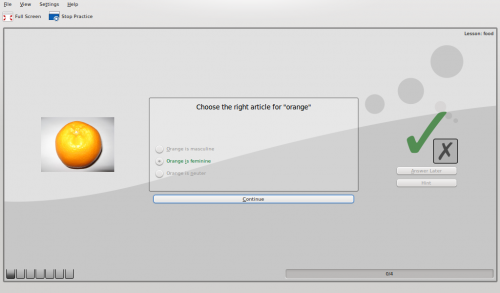
Якщо відповідь була помилковою, програма покаже вікно, подібне до наведеного нижче. Щоб продовжити вправляння, слід натиснути кнопку Продовжити.
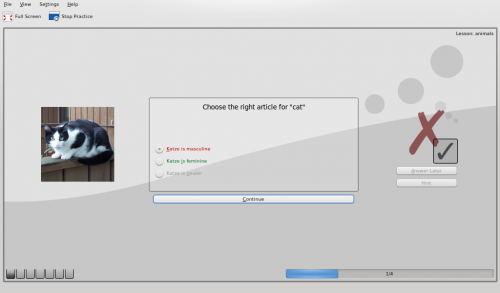
Ви можете у будь-який момент часу перервати вправу натисканням кнопки Припинити вправу.
Ступені порівняння прикметників та прислівників
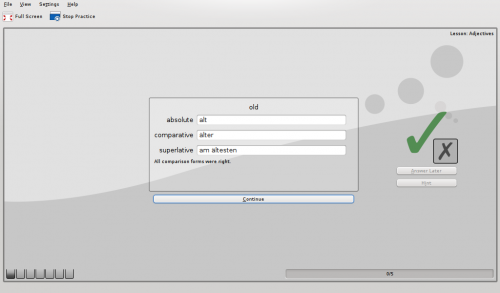
У вікні Вправа виберіть варіант Ступені порівняння, а потім натисніть кнопку Почати вправу, щоб розпочати вправляння.
Подібний варіант вправляння можливий, лише якщо у збірці словників передбачено дані щодо ступенів порівняння. Докладніше про це у розділі Введення ступенів порівняння.
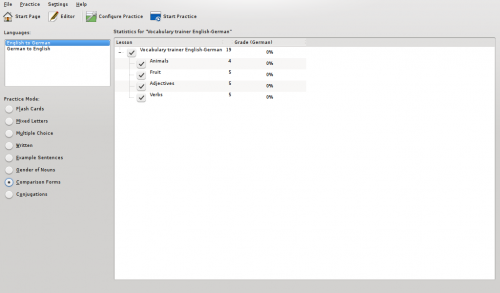
Для виконання вправи вам слід ввести ступені порівняння вказаного слова. У нашому прикладі це ступені порівняння німецькою перекладу англійського слова old. У німецькій мові існує три форми: нормальний, вищий і найвищий. Після того, як вкажете відповідь, просто натисніть кнопку Продовжити.
Дієвідміни
To practice conjugations choose the Conjugations mode and the tenses you wish to exercise.
Для цієї вправи у словнику дієвідміни має бути введено у належному порядку. Докладніше про це у розділі Введення форм дієвідмін.
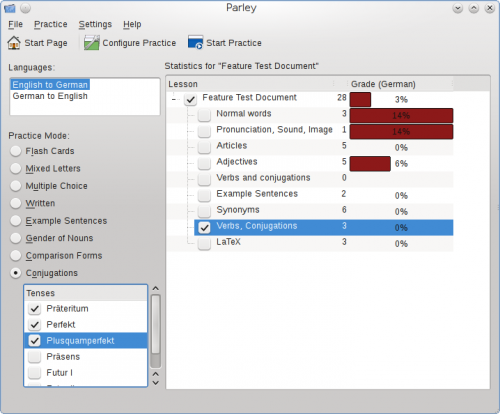
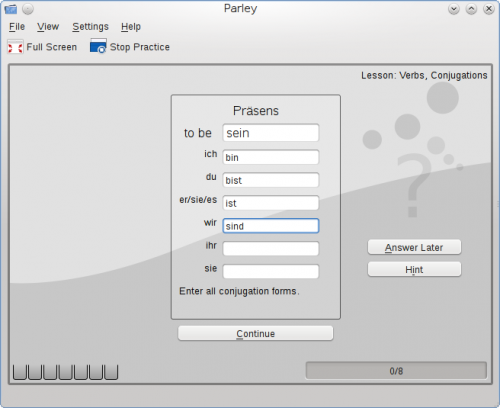
Після вибору режиму вправляння натисніть кнопку Почати вправу. Щоб виконати вправу, вам слід буде ввести належні форми дієвідмін для вказаних часів. Продовжити вправляння можна натисканням кнопки Продовжити
Редагування словника
Налаштування
Before you start using a vocabulary collection or create your own it is helpful to understand the different elements in Parley and configure them accordingly. The next sections will guide you step by step through this process. There are several locations in Parley for settings:
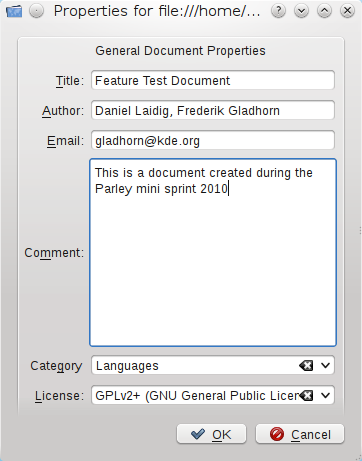
- Пункт меню Файл→Властивості. За допомогою цього пункту ви можете вказати Загальні властивості документа, тобто дані щодо збірки словників та вас, як її автора.
- Правка→Мови Тут ви знайдете пункти мов, якими можете скористатися для вправ
- Пункт меню Вправа→Налаштувати вправу. За допомогою цього пункту ви можете змінити параметри вправляння з вашим словником. Залежно від завдань, які ви ставите перед собою протягом певного сеансу навчання, параметри вправляння можна змінювати на льоту.
- Параметри→Налаштувати Parley — цей пункт призначено для налаштування загальних параметрів та параметрів показу.
Про збірки
Entering meta data like a title and your contact info is relevant if you plan to make your collection available for other people. Use File->Properties to edit the data.
Колонки словника
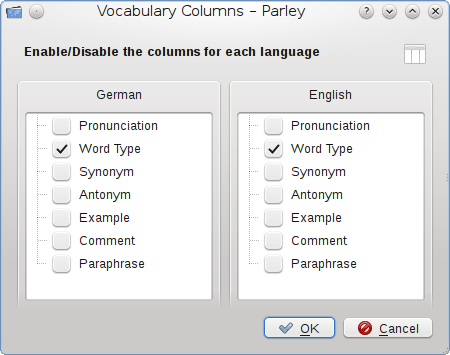
Depending on what your learning sessions are going to be about it can be relevant to have further Vocabulary Columns show up in your edit section. To choose these columns select View from the Menu bar and then Vocabulary Columns. There you can determine if the columns for Pronunciation, Word Type, Synonym, Antonym, Example, Comment and/or Paraphrase are to be shown.
Мови і граматика
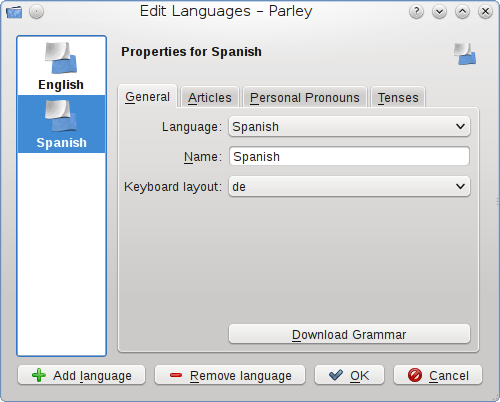
Set up some grammar details to let Parley help you. Use Edit->Languages to pull up the grammar dialog.
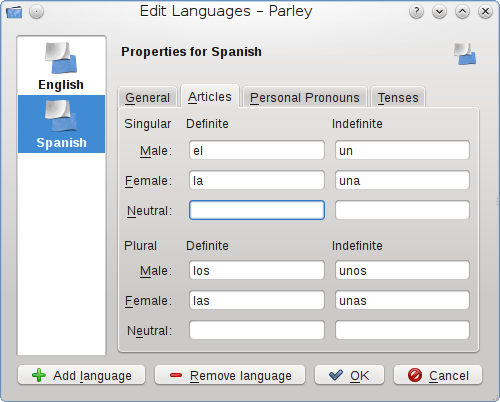
У англійській мові існує два артиклі: визначений артикль the і невизначений артикль a. У більшості інших мов таких артиклів значно більше. Всі ці артиклі можна вказати за допомогою вкладки артиклів.
Для визначення форм дієвідмін слід вказати всі особові займенники. У деяких мовах форми дієвідмін для займенників «він», «вона» і «воно» є однаковими. Якщо ви маєте справу саме з такою мовою, вам не слід позначати пункт Чоловічий та жіночий роди мають різні відмінювання! Просто вкажіть займенники для всіх трьох форм.
| Однина | Множина | |
| Перша особа | I | we |
| Друга особа | you | you |
| Третя особа | he/she/it | they |
Часи: залежно від вибраної мови, ви можете ввести часи, з якими згодом вправлятиметеся у дієвідмінюванні. Приклад для англійської: Simple Present, Simple Past, Future I тощо.
До речі, щоб додати нову мову до вашої збірки, натисніть кнопку Додати нову мову.
Трошки докладніше про іспанську
На вкладці Загальне введіть загальні параметри мови, у нашому прикладі
- Мова = Іспанська
- Назва = Іспанська
- Розкладка клавіатури = us
Якщо ви не впевнені щодо значення, яке слід вказати у полі Розкладка клавіатури, не заповнюйте це поле. Якщо поле не буде заповнено, Parley просто використає типову розкладку клавіатури для вашої системи.
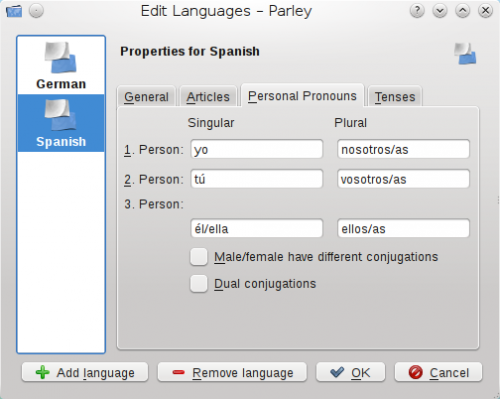
Звернімося тепер до вкладки Артиклі. У іспанській мові іменники поділено на два роди: чоловічий і жіночий. Тому поле Середнього роду заповнювати не потрібно.
У іспанській мові Особові займенники третьої особи однини та першої, другої і третьої особи множини мають декілька форм. З міркувань однорідності всі форми слід вводити з використанням роздільника /.
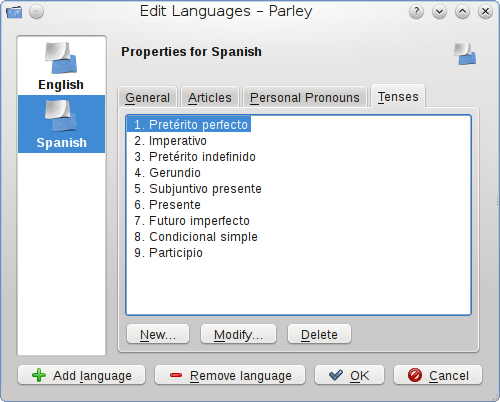
На вкладці Часи ви побачите перелік часів, для яких у мові існують різні форми дієслів. Щоб додати новий запис часу, натисніть кнопку Створити. Щоб змінити запис, натисніть кнопку Змінити. Вилучити запис можна натисканням кнопки Вилучити.
Уроки
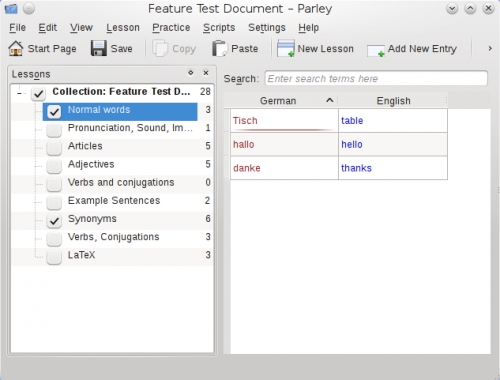
On the left you have a list of lessons. If you started a new collection, this list might be empty except for one lesson that was created by default for you.
Якщо список уроків не показано, вам слід увімкнути його показ за допомогою пункту меню Перегляд->Уроки.
Позначки перед пунктами з назвами уроків відповідають урокам, які включено до вправляння. Число, показане поруч з назвою уроку — кількість слів у ньому.
New Lesson
Add a new lesson: Select where this lesson belongs to, for example the collection My Spanish Lessons.
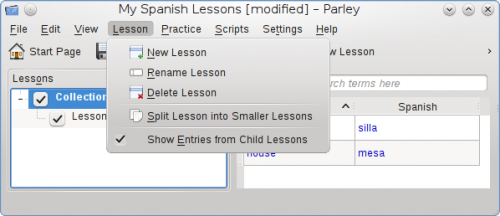
In the Lesson menu, select New Lesson.
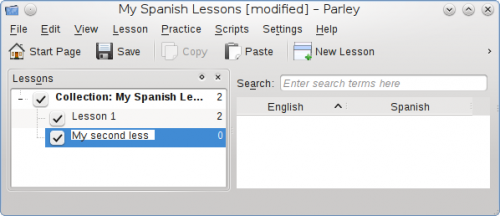
Please make sure to select the right point in the tree structure of lessons before selecting New Lesson. In our case, wanting a Sub-Lesson of Collection: My Spanish Lesson it is exactly that one that needs to be selected before going ahead with New Lesson.
Moving, Renaming and Deleting Lessons
To change the name of a lesson, double click it, or right click on the lesson and choose "rename". You can also delete it this way (but you'll lose its contents also then).
If you don't like the arrangement of lessons, you can move a lesson with the mouse. You can drag it onto another lesson, then it will become a child of that lesson.
Splitting a Lesson
If your lessons grow too big, you can choose to split them up to make learning easier in small units. 20 words for a lesson is probably a good size. Right click a lesson, or use Lesson->Split and the lesson will be separated into child lessons. You can choose to randomize the words that are put into the new lessons before assigning them, or to keep them in order.
What is Shown in the Table
Parley shows always the words of the lesson that you have currently selected. You can enable to see the words in sub-lessons contained in this lesson also. Use Lesson→Show Entries from Child Lessons to enable this. That way, you can browse all words by selecting the document lesson at the very top.
Word Types
Parley lets you associate word types with the words. Word types are for example: Nouns, Verbs, Adjectives and Adverbs.
In order to work with word types, enable the word type tool: View→Word Types
You can categorize the word types just like lessons.
If you want to see all words of a certain type - e.g. all nouns, simply select the noun category, and you will see only nouns in the table.
The easiest way to set the word type, is to drag and drop a word onto its type. You can even do this with multiple words at the same time.
Words or Sentences
Adding New Vocabulary
Use "Add New Entry" in the toolbar to add new words. You can start typing the word in the first language right away. By default Parley lets you enter another word when you press enter in the last row, so you don't have to keep using the add button. After entering the first word, press enter or tab to go to the next language.
Editing Words
If you want to replace a word, select its entry and start typing. To change the word instead, double click the entry and you can change the contents of the cell without losing the old word.
Press TAB to go to the next word. Enter leaves the editing mode. You can use the arrow keys to move around.
Synonyms
Synonyms are hard to set up and do not always work really well. Here is how you set them up in any case:
- Use View→Synonyms to see the synonyms tool.
- Select first word (A) you want to make synonyms, then click on the second word (B)
- The button in the synonym tool changes it's text to "A and B are synonyms"
The words will now be shown as connected in the synonym tool and can be recognized as synonyms in the practice.
Adding Images
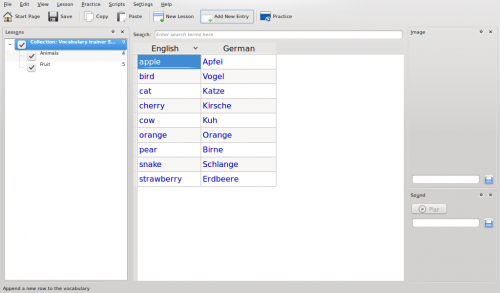
First show the sound tool by selecting View in the menu bar and then clicking on Image. The checkbox in front of Image will then be activated. This will show up the picture section on the right hand side of the Parley screen
To add an image to a word make sure the word is highlighted. In the image section on the right hand side click on the Folder icon and choose the picture you wish to associate.
Adding Sound
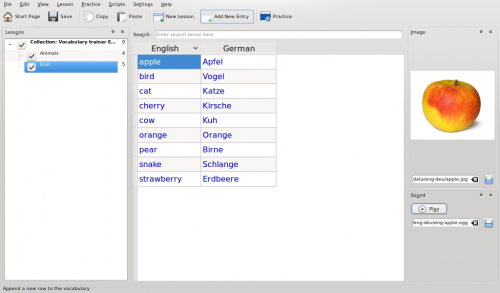
First show the sound tool by selecting View in the menu bar and then clicking on Sound. This will show up the sound section on the right hand side of the Parley screen.
To add a sound to a word make sure the word is highlighted. In the sound section on the right hand side click on the Folder icon and choose the sound you wish to associate.
Entering Comparison Forms
In order to enter comparison forms, make sure the comparison forms tool is enabled. You open it with the menu: View→Comparison Forms
First select a word that is an adjective or adverb.
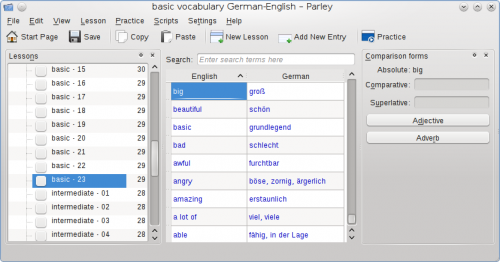
Click the Adjective or Adverb button in the comparison forms tool.
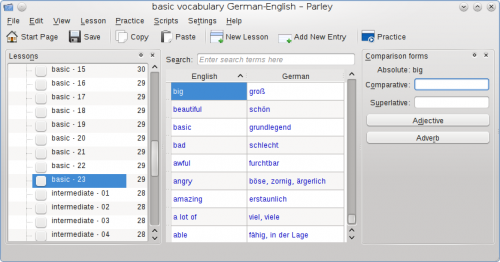
Enter the comparison forms.
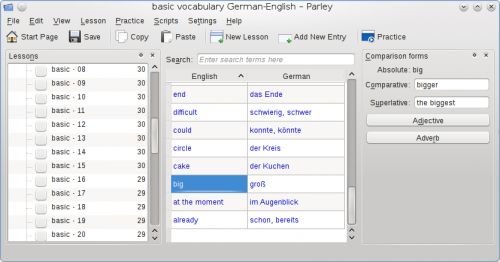
Now you can use the Comparison Forms Practice mode.
Entering Conjugation Forms
In order to enter conjugation forms, make sure the conjugation forms tool is enabled. You open it with the menu: View→Conjugation
First select a word that is a verb.
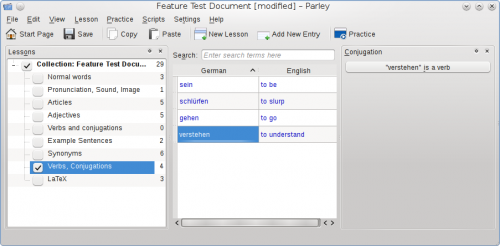
Click the ... is a Verb button in the conjugations tool.
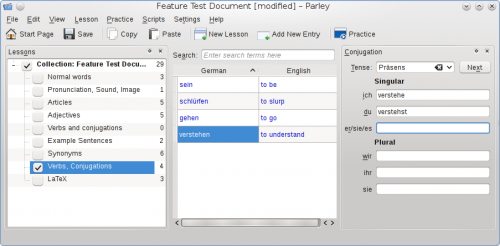
After selecting the right tense in the tense selection box, enter the conjugation forms.
The tenses can be configured for each language: Languages and Grammar.
Now you can use the Conjugations Practice mode.
Creating New Files
In this section we will describe how to create new files and this not only with the usual vocabulary learning part, but also for grammar exercises, mathematics etc.
New Collection: Vocabulary English-German
In this section we describe how you can create a vocabulary training file including pictures and sound. In a second stage we will also add adjectives and verbs. This is a very complete example and therefore quite long. Eventually you will not need all points for your project.
Since we wish to add sound-files and pictures, we should make sure that these will all be in one folder which for convenience is being called eng-deu. Our data file we create with Parley will be saved in the same folder. This will help a lot when you decide to share your work with others.
So this is what we have in terms of sound files and pictures:
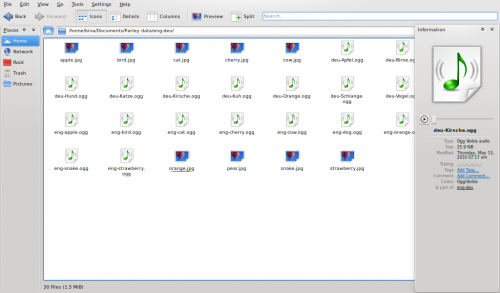
Let's start from the Start Page which is shown once you launch Parley:

Click on the button Create a New Collection.
The General Document Properties page shows up which is being filled as follows (just adapt to what your file is about):
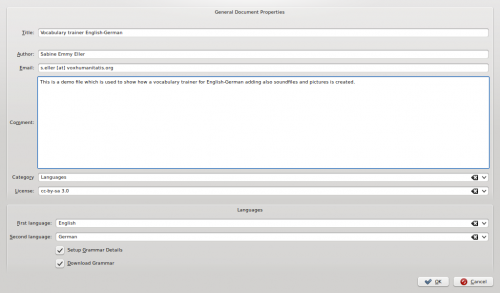
Next click on OK. The following screen asks you to set up the language details. Here we don't want to change anything and therefore we just click on OK.
As a first step, let's create the vocabulary part. We will think about the addition of the sound files and pictures in a second stage. This is what the lesson looks like:
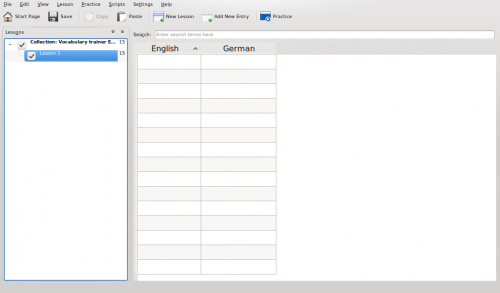
Before we do anything else, let's save the file to the folder with the pictures and sound-files. Click on the Save icon and select the folder using the navigation. In this example we will call the file Trainer eng-deu - once you entered the name just click on save.
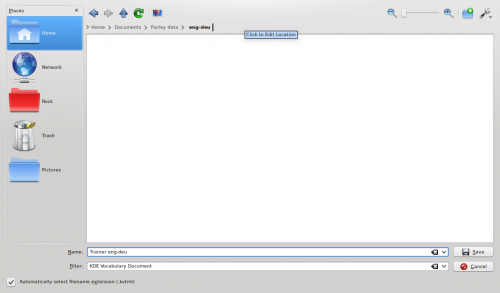
If you now check your folder where the sound-files and pictures are, you will also find the file Trainer eng-deu.kvtml
Let's have a short look at the words we want to add: apple, bird, cat, cherry, cow, orange, pear, snake, strawberry. We have animals and fruit and therefore we decide to create two lessons that are called: Animals and Fruit.
We now rename Lesson 1 to Animals and then we add a lesson called Fruit. Right-click on Lesson 1 and choose Rename Lesson from the options shown. Now Lesson 1 is highlighted and you can simply overwrite it by typing in Animals. When done, hit the return key. Now right-click on Collection: Vocabulary trainer E... which is the root of the lesson tree and choose New Lesson from the options shown. In the new field write Fruit and hit the return key again.
First, let's insert the animals. Please click on the lesson Animals and you will get an empty table you can fill in. Click with your mouse in the first field, and insert the source terms. Then, insert the target terms in the second column. Once you've inserted all 4 English animal names with their German translation the screen looks like this:
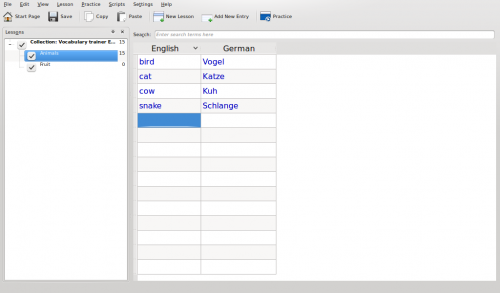
In our case we want only 4 entries in the animals lesson. There are many empty lines that should be deleted. To do this click on the first empty field, and keep the shift key pressed while clicking on the last empty field. All lines to be deleted will be highlighted. Then, press the Del key and confirm the question Do you really want to delete the selected entries? by clicking on the Delete button.
Let's add the fruit terminology. Just click on the lesson named Fruit. This second lesson is completely empty. Since we have five fruit terms we need to add five lines. Therefore, press the Ins key five times, and then, just like before, we add our terminology.
Don't forget to save every now and then ...
A click on the root of our lesson tree Collection: Vocabulary trainer E... and Parley will show us all entries that are present in the two lessons:
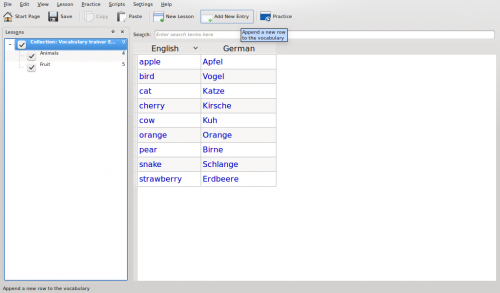
Time to add sound and images. First of all we need to activate the Image and Sound views. From the menu bar select View and there click on Image and then Sound. Once these options are activated, two new sections are shown on the right hand side of the Parley editing screen: Image and Sound.

Select the English word apple by clicking on it. It is highlighted, so let's add the picture. In the image section on the right hand side click on the Folder icon and choose the picture you wish to associate.
To add the pronunciation for the English apple, do the same in the Sound section, selecting the relevant sound file.
By clicking on the Play button in the sound tool you can listen to the pronunciation.
The screen will then look like this:

Then click on the German translation Apfel. The field is now highlighted to indicate the selection. You will note the picture with the apple is associated also to the German term. In the sound section select the pronunciation, just like before.
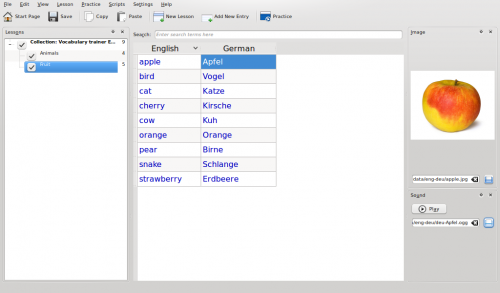
Just go ahead like this for all terms.
Time to add adjectives and verbs as lessons to our project. So just do as before with the lesson Fruit and create two new lessons: Adjectives and Verbs. Let's assume we will add big, small, old, young, narrow' in the adjective lesson and to go, to come, to buy, to drink, to eat in the verb lesson.
The following shows a screenshot with all inserted terminology. Now, words are mixed and it would be nice to see what is a noun, adjective or verb.
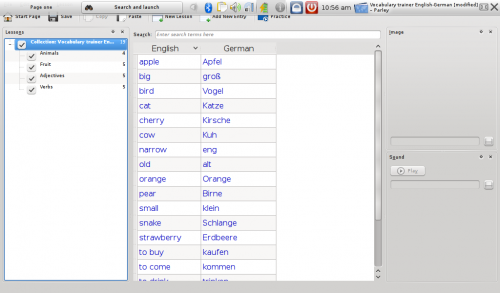
As the next step we are going to show the Word Type. Select View in the menu bar and then select Vocabulary Columns. We activate Word Type for English and German by clicking on the checkbox in front of Word Type. Then click on OK to accept the changes.

By clicking on the fields in the column Word Type you can select the word type and for those languages where nouns have a gender you can also select the Noun/Gender combination. Below the Word Type column with part of the selections already done.
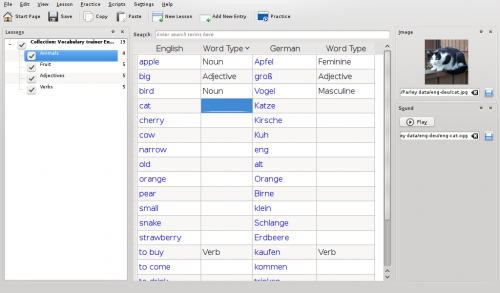
Once we have specified all the word types, we will first considerAdjectives, adding Comparison Forms to them. So let's move to the Adjectives lesson only.
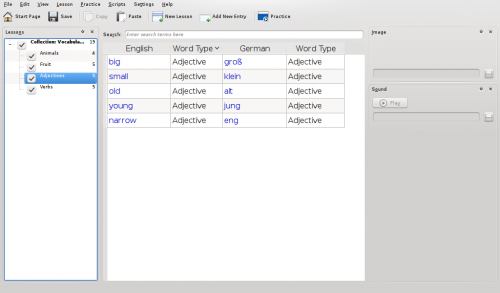
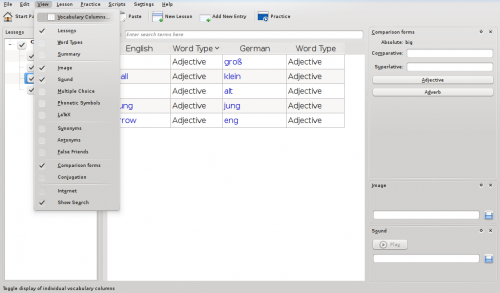
To show the Comparison Forms on the right hand side of the screen, select the View in the menu bar and activate the Comparison Forms checkbox.
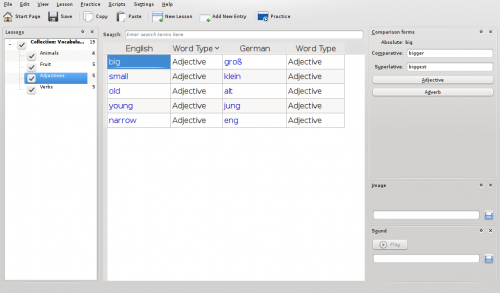
Edit the Comparison forms by adding Comparative and Superlative to the single adjectives. First, click on the adjective for which you wish to add the comparison forms, in our case big, and add bigger and biggest. Then, continue with the next adjective to complete, until all comparison forms have been entered.
Finally, let's consider the Conjugation form of the Verbs. Select the Verbs lesson and then activate the conjugation section on the right hand side by selecting View from the menu bar and activating Conjugation. As an example we edit the present tense (Präsens) form of gehen. Please first select Präsens from the drop down menu and then add the verb forms.
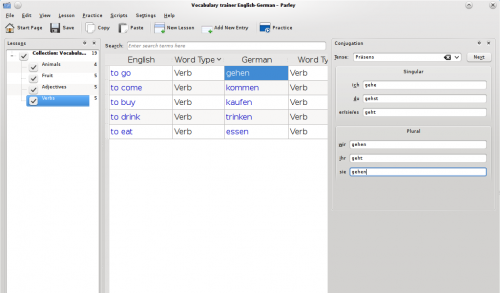
This needs to be done for all verbs, and in all possible tenses.
Once you are done you can start to practice by clicking on the Practice button.
New Collection: Single Names and Collective Names
This exercise was created for the 3rd class of an Italian primary school. Pupils are supposed to connect single names with collective names, such as tree → woods
When you start Parley you get the start page, eventually also listing some previously used files (that you cannot see here).

Click on Create a New Collection and the following screen with empty or partly filled fields will show up:
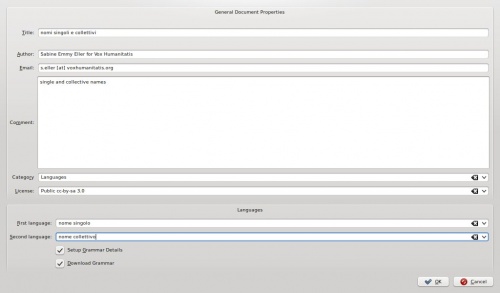
Fill in the title, here nomi singoli e collettivi, your name, e-mail address, in the Comment section you can write down a more detailed description, select your category and license. Then there we have something special: instead of indicating the first and second language, like it normally would happen, we added nome singolo (single name) and nome collettivo (collective name). Setup Grammar Details and Download Grammar are not needed here. In the screenshot they are still activated - please deactivate them by just clicking on the checkboxes. When you are done, please click on OK.
The Properties page for nome singolo comes up and here you see it already with the necessary changes made:
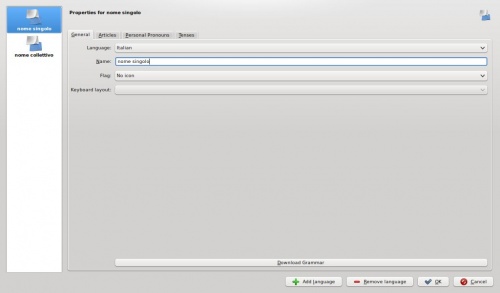
On the left hand side you can see where the data you are adding belongs to. nome singolo. Choose the language, here Italian and insert nome singolo in the following editable field. Then click on OK.
Now the Properties page for nome collettivo is shown:
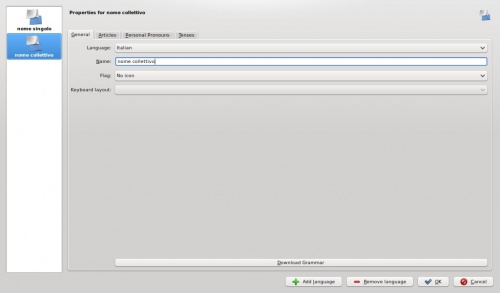
Like before: choose Italian as language and insert nome collettivo and click on OK.
And now you can start to edit:
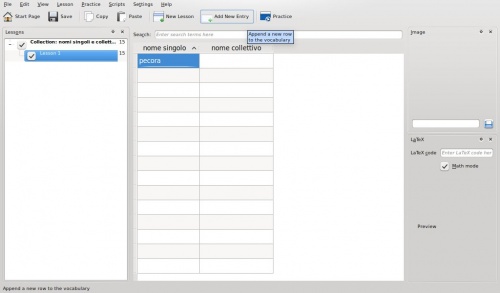
Just insert the nome singolo (single name) in the first column and the corresponding nome collettivo (collective name) in the second column.
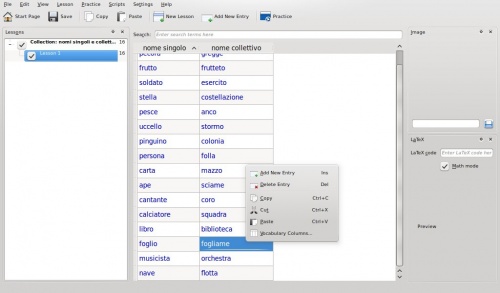
If the number of available fields is not enough, just right-click anywhere on the edit section and choose Add New Entry. Don't forget to save your file every now and then. When you have finished adding all entries you will want to see if Practice mode works fine. Well just click on the Practice button right above the edit section and the page with the practice settings comes up:
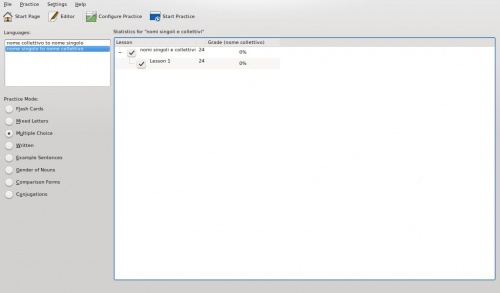
In this case Multiple Choice is a good option, but also Written will do fine. After choosing the Practice Mode just click on Start Practice and have fun.
Getting Additional Collections
When you are on the Start Page you have the possibility to install Collections directly from the server, provided you are online. Just click on Download New Collections.
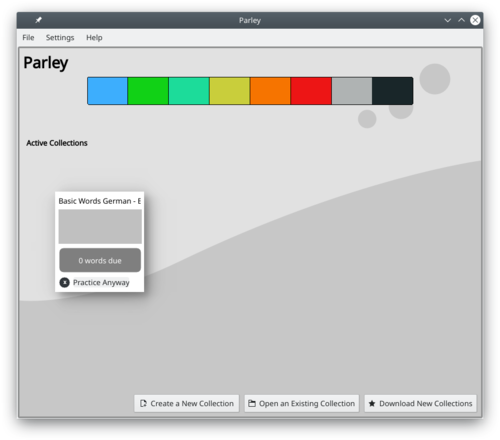
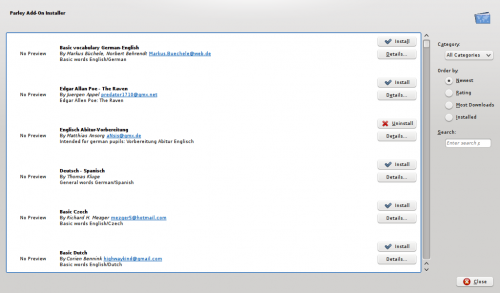
A window with many interesting collections opens. Just select what you find most interesting and click on Install. Then open the file to practice or edit.
Configure Parley
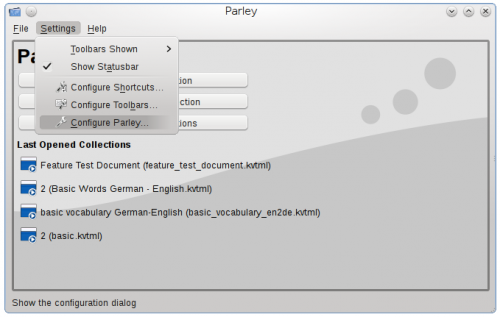
You can configure the appearance of Parley from the Start Page or from within the Edit section. Select Settings from the menu bar and then Configure Parley.
Theme Tab
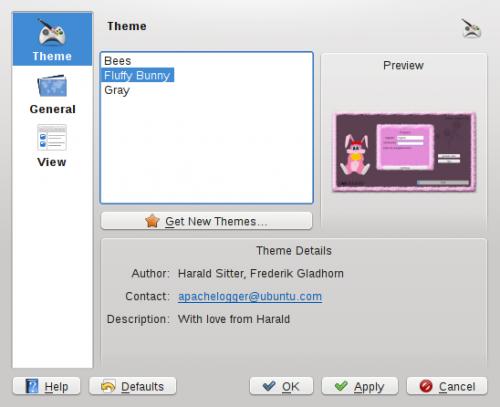
The configuration opens with the Theme section. This is the place where you can choose how Parley should greet you when launching it: an elegant Grey version, the all time busy Bees or the Fluffy Bunny for all those who love pink. Note that it could well be that Fluffy Bunny is not in your version: if you want it, read the following section.
Once you selected your preferred theme, click on OK.
Screenshots of the Bees and Fluffy Bunny themes:
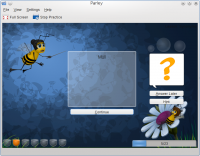
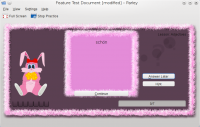
And if these are not enough: you can click on Get New Themes to find more themes. Over time we hope that more and more themes come along. If you know how to create SVG graphics (for example with Inkscape), you can create your own theme and share it with the world.
Additional themes can be found on kde-look.org
General Tab
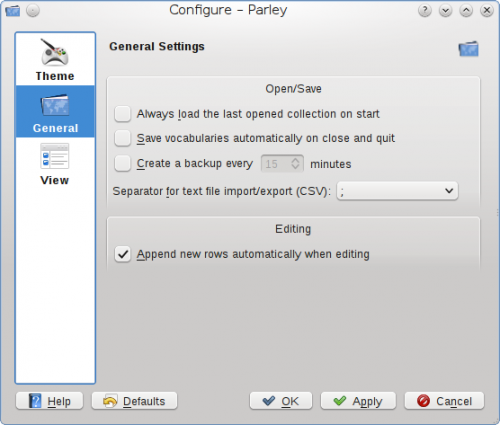
The General tab gives you some options regarding the behavior of Parley.
Open/Save options
Always load the last opened collection on start will immediately take you back to the vocabulary you were learning. Often you will use this together with the second option Save vocabularies on close and quit because it's just handy not to have always answer the same question if changes (including learning results) should be changed or not. The option Create a backup every ... minutes can be very handy to help you save your work frequently. One less thing to think about.
Sometimes the import and/or export of text (CSV) files can be very handy and there you need the proper separator to elaborate data afterwards or to be able to read the data you got from somewhere else. Parley allows you to choose among various separators to make sure you can re-use your data.
Editing option
Here you can determine whether Parley automatically appends new rows while you are editing your vocabulary collection. This can be useful if you want to add many entries, before then splitting them up into various lessons. On the other hand, it can be good to have this option off if you want to work by creating lessons with a set maximum number of entries.
View Tab
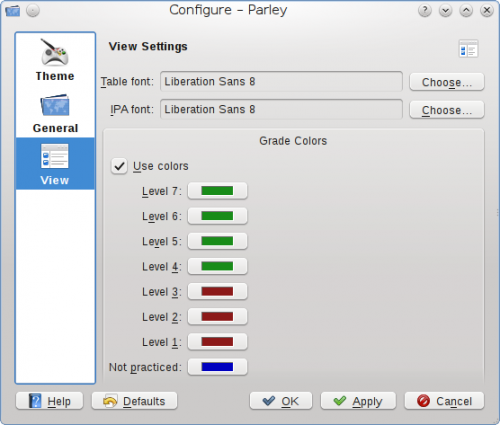
The View Settings allows you to change font and its size, very handy when you work on a netbook for example, and you can choose the Grade Colors you like best.
Parley on Windows
It is possible to install Parley together with other Educational software on Windows systems. For further info please visit http://windows.kde.org
The steps to be followed in short:
Download the installer here: http://windows.kde.org/download.php
Then follow the installation procedure like for any other Windows software - screenshots are here: http://www.winkde.org/pub/kde/ports/win32/installer/manual/
When you come to the Package selection screen, select the language(s) you wish the software to be available in and the package - in this case kdeedu. If you don't select any language you will automatically get English.
Then finish the installation process by clicking on next, following the coming screens just like you normally do with other windows software.
Please note that the Parley team does not deal with the Windows-Installer and therefore we cannot easily answer your questions. Should you have difficulties, please contact the KDE-Windows team directly. You can do so by subscribing to the mailing list here: https://mail.kde.org/mailman/listinfo/kde-windows or join them on IRC at irc://freenode.net Channel: #kde-windows.
Notes For Advanced Users
Using Parley for Exam Preparation
- what to bear in mind with long questions / answers?
- how to start with a new Exam
- example 1 with capitals
- example 2 with sentence
You can upload your files and share them with others. Use the upload button from the file menu in the Editor within Parley.
If that does not work, you can also visit kde-files.org. In either case the files will show up in the Download New Collections dialog on the Start Page.
File format
If you are interested in the file formats that Parley can read and stores the vocabulary collections in, visit: Parley File Formats on userbase.kde.org

