Digikam/Tutorials/Setup of digiKam for Windows compatibility
Introduction
It is safe to say that digiKam (7.4) is the most powerful image metadata management photo gallery software. Unless you use command-line tools, there is no more universal program to read and write any metadata that you can imagine than digiKam (it even allows you to define new metadata namespaces to read and write data to, in case something is missing). As it is free for everyone, open-source, writes metadata back to files and runs on multiple operating systems – digiKam is truly future-proof tool to manage all your image and video metadata (people face tags, descriptive tags, location, captions, star ratings and more).
Unfortunately as digiKam tries to be (and can be) cross-compatible with everything at once, the default digiKam settings cannot satisfy everyone. This tutorial provides a suggestion how to best configure digiKam for new users or people who have managed their photos using any of the Microsoft software, including Windows built in metadata tools.
The recommended configuration
Of course you can use digiKam with default settings, but here are the reasons why you may want to follow this tutorial and change the Metadata configuration.
The Advantages:
- Less garbage in the files – the default configuration writes the same metadata multiple times under many metadata fields. While it is good for ultimate compatibility outside digiKam, it practically guarantees that any other software will read and modify only part of those fields. As a result, if another software is involved, your image will carry both updated metadata as well as old metadata that was originally created by digiKam but not recognized by the other software that did the latest edit (for example OneDrive, Lightroom, etc.)
- More robust – This configuration keeps your digiKam tagged images cross-compatible with Microsoft OneDrive and Windows so you can correctly use and edit metadata even on Windows computers where digiKam is not installed (for example if you send files to your relatives). In addition a lot of major photo metadata software, including online services will correctly read Microsoft compatible tags, because it is one of the most common image metadata formats embedded into image files).
- This configuration will correctly preserve hierarchical tag structures, without creating lots of duplicate tags (when the same information is written in many metadata fields, other software, for example Microsoft Windows may interpret the data as multiple separate tags)
The Drawbacks:
- By disabling Read and Write to less common metadata fields, you are also stopping digiKam from correctly importing such metadata. But it is not very likely to find files which exclusively use the less common metadata fields which we are disabling – usually the same information will be duplicated in another enabled field. (Plus it is possible to individually disable writing certain metadata fields while still reading them by un-checking “Unify read and write” in the Advanced Metadata settings).
What you need to know
- You have to re-check the Metadata settings every time you update digiKam to a new version, before you resume using digiKam as usual. Currently (digiKam 7.4) you do need to repeat the manual Metadata setting changes after each digiKam update.
- There may be bugs, special exceptions or just format changes that could break cross-compatibility that we try to achieve (from digiKam to Microsoft programs). The good news is that such metadata issues are almost always resolvable either by tools built in into digiKam or in the worst cases by other programs, where ExifTool is usually the ultimate solution to just about any metadata problem (see one old example here).
- If you are migrating from some Microsoft metadata editing software, there is a dedicated additional tutorial to help specifically WLPG, OneDrive and other Microsoft software users- [LINK]
- The statement “This configuration keeps your digiKam tagged images cross-compatible with Microsoft” does include a technicality that if you save people face tags in digiKam it will automatically create descriptive tags for each person in a hierarchy “People/<face tag name>”. This is not the same as WLPG behavior, but still works very well in Microsoft software especially if digiKam is your primary metadata editor. It is still easy to make edits in WLPG on the files that were tagged in digiKam with the configuration from this tutorial.
- If you encounter some problems while following this tutorial – please add a “Warning” box to the tutorial to warn everyone about a potential issue and consider filing a bug report at https://bugs.kde.org/describecomponents.cgi?product=digikam
Change the settings
Here are all the steps to correctly set up your digiKam for the recommended configuration.
Step 1 - Enforce Tag Hierarchy
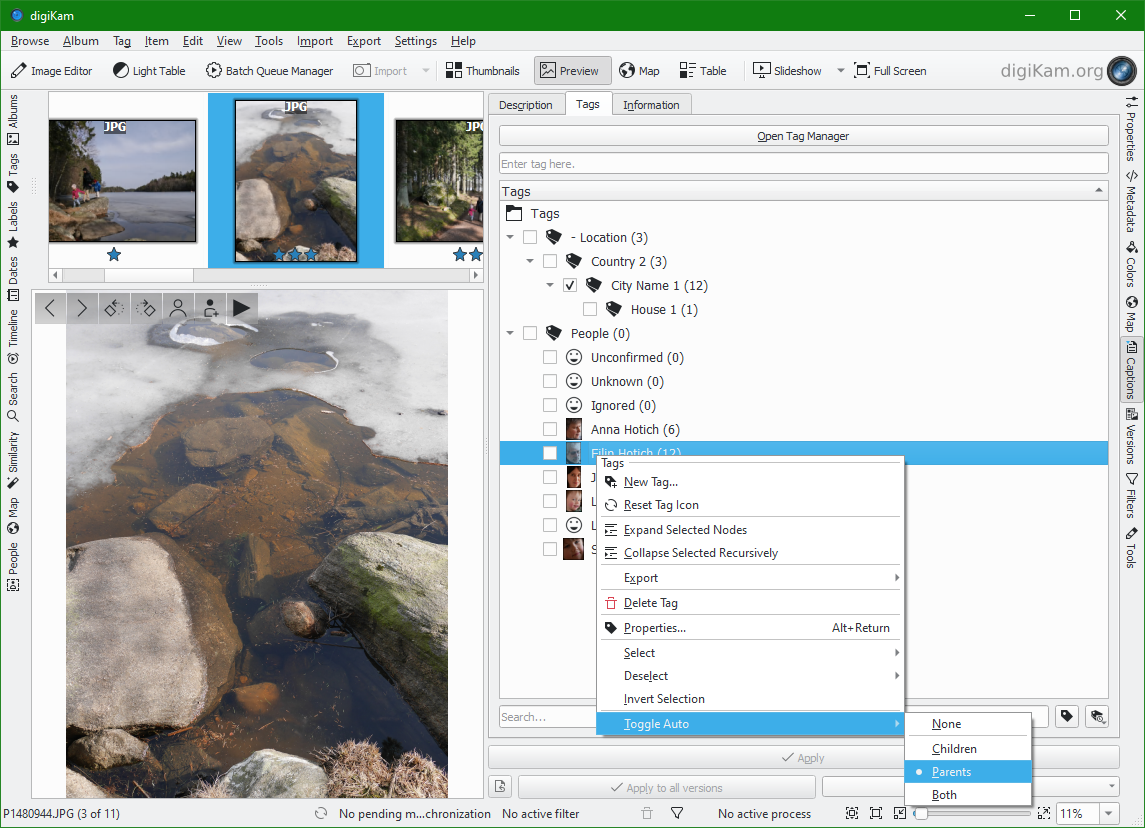
→ setting is essential to avoid braking Tag Hierarchy by only selecting a sub-tag, without its hierarchical parent tags. (For some reason, by default in v7.4 this setting is NOT enabled).

Step 2 - Fix which metadata is written into files
The main Metadata settings are under → → → . Here we will set DigiKam to not-write to various unnecessary Metadata fields. (For simplicity we are also disabling reading of those fields, but you are welcome to disable only the writing by un-checking the “Unify read and write”.
- Start with (aka Comments): here deselect all namespaces except for “Xmp.dc.description” and “Exif.Image.ImageDescription”.

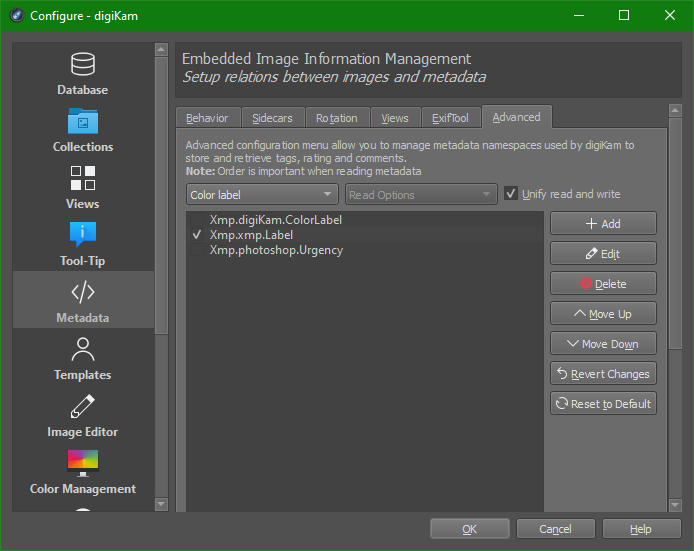
- Under – leave only “Xmp.xmp.Label” (it is enough)

- Under – leave only “Xmp.xmp.Rating”.

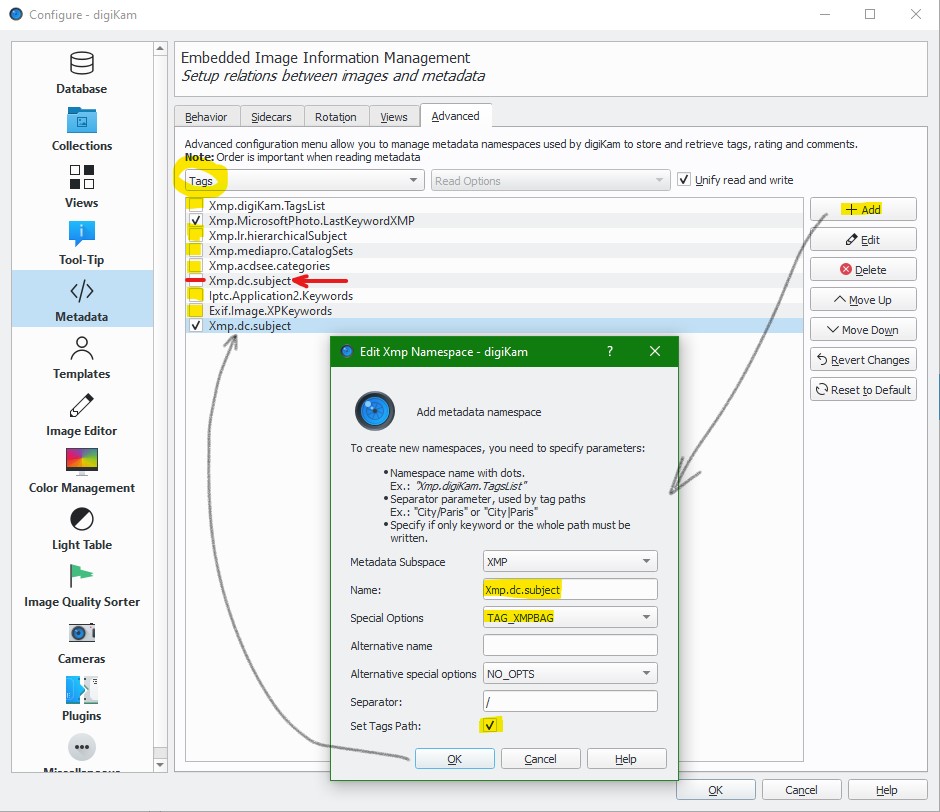
- Under we have a more complex case (see screenshot):

| Name: | Xmp.dc.subject | (substitute for the existing one) | ||
| Spec_options: | TAG_XMPBAG | |||
| Separator: | / | |||
| Set Tags Path: | YES | <== this is the FIX to the main problem! |
- Leave enabled "Xmp.Micosoft Photo.LastKeywordXMP" namespace (as it is used by WLPG)
- Then disable all other namespaces (unless you have specific reason to keep some of them enabled)
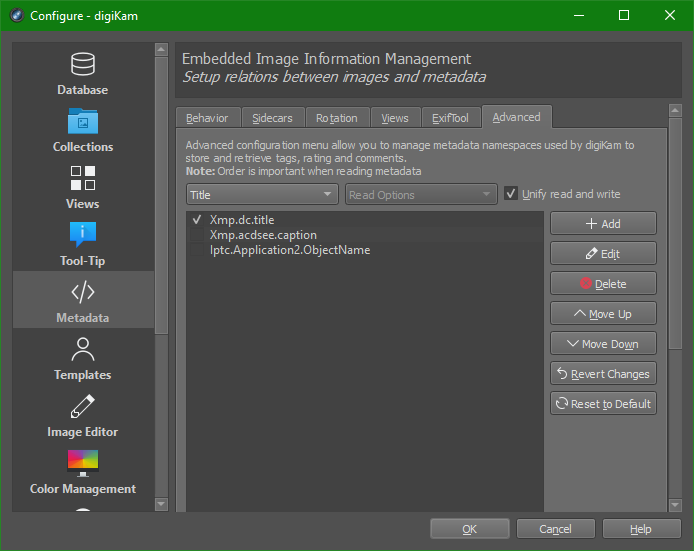
- Finally under – it is OK to leave only “Xmp.dc.title”, but I still strongly recommend to NOT use “Title” as Metadata field due to conflict with Microsoft software. It is more robust to add “Caption” and maybe change the filename where needed.

Step 3 - Other important Metadata settings
About this tutorial
This tutorial was originally written for digiKam 7.4 in 2021-12. You are very welcome to edit, update and Upgrade this tutorial page to make it better and keep it up to date. No attribution or copyrights in this page (all illustrations are original as well)!


