Digikam/Sort-hvide fotos
Omdan fotos til sort-hvid med digiKam =
Fra Dmitri Popovs blog, 11 februar 2011.
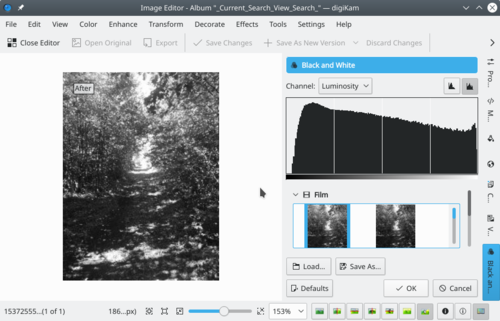
Hvis du holder af sort-hvid fotografering, så kan du glæde dig over, at digiKam har et ganske stærkt værktøj til at konvertere farvefotos til sort-hvid. For at forandre det aktuelt redigerede farvefoto til sort-hvid skal du blot vælge menuen . Men for det meste har det konverterede foto brug for yderligere justeringer, og værktøjet giver dig et par nyttige værktøjer til dette.

The section provides a handful of filters that emulate different film types like Agfa Pan, Kodak Tmax, Kodak TriX, and Ilford SPX. These filters offer a quick and easy way to tweak the black and white photo. Which film filter works best depends on the currently edited photo, so you might want to try several filters to achieve the best result. Select the filter you like, and you can immediately see the result in the preview pane.
As the name suggests, the section contains several color filters, including orange, green, yellow, and red. While you can experiment by applying different filters to the photo, the easiest way to find out which filter is best suited for the specific photo is to use the context help. Press Shift + F1 and click on any filter to get a brief description of it. Once you’ve applied the desired filter, you can specify its intensity by using the slider.
Besides the straight black and white conversion, digiKam lets you turn your photos into duotone images. And the section offers several tone filters such as sepia, platinum, and green.
Finally, the section lets you manually adjust the curve and the contrast. This feature can come in handy if you want to fix under- or overexposed areas and improve the overall contrast of the photo.
