digiKam/Геопозиціювання
Geotag Photos with Open GPS Tracker and digiKam
Transcribed from Dmitri Popov's blog, 16th February 2011
You don’t need a fancy camera with a built-in GPS receiver to geotag your photos. An Android device with the Open GPS Tracker app and digiKam can do the job just fine. The app lets you track your route and save it as a GPX file which you can then use to geocorrelate your photos in digiKam.
Geocorrelation is a relatively simple process which assigns geographical coordinates from the GPX file to the photos based on their time stamps. So for this technique to work its magic, you must sync the time on your Android device with your camera. When you head for a photo walk, launch Open GPS Tracker on your Android device and start a new tracking session. When you are back home, stop the tracking session, and use the button in Open GPS Tracker to save the recorded track in the GPX format on the SD card or send it via email to your machine.

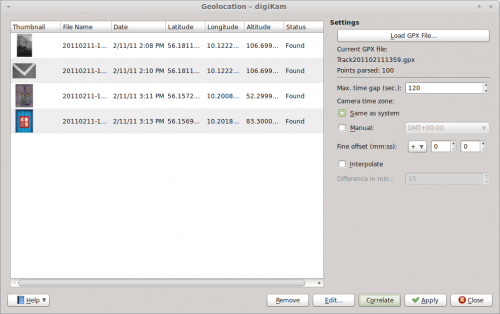
Offload then the photos from your camera to digiKam, select them, and choose . Press the button and select the GPX file. digiKam should then automatically assign geographical coordinates to the photos. By default, digiKam can tolerate a 30-second gap between the time settings of the camera and the GPX track. If the gap is longer, the application may fail to assign geographical coordinates to some of the photos. In this case, you can increase the time gap in the menuchoice>Max time gap</menuchoice> field. Press then the button to refresh the geographical coordinates. This makes geocorrelation less precise, but you can use the button to adjust the coordinates manually. Once you’re satisfied with the result, press the button to save the assigned coordinates in the photos’ metadata, and you are done.
