Digikam/Comprimir
Tornar a comprimir les imatges utilitzant digiKam
Transcrit des de l'article d'en Mohamed Malik, el 19 de febrer de 2011
Molta gent sosté que les imatges s'han de prendre sempre amb l'ajustament JPEG més alt disponible, però, jo sóc del parer que no, degut a moltes raons.
Quan estic prenent fotos dels seus amics i familiars i altres ocasions normals sempre mantinc l'ajustament JPEG en el nivell bàsic. En aquest cas tenim diversos factors que s'han de tinir en compte. No sóc un expert en el camp de la fotografia, però, aquesta només és la meva opinió personal. La majoria de les càmeres tenen l'ajustament JPEG fi, normal i bàsic. JPEG és un format amb pèrdua, és a dir, està comprimit. No obstant, la principal diferència entre JPEG fi i totes les altres opcions és que cada compressió elimina colors que no són visibles per l'ull humà.
If I’m shooting JPEG fine then I can only shoot 2300 pictures into my 16GB memory card, however at the basic setting I can shoot 8200 pictures in the same card. For me storage matters and there is no need to shoot that high quality images when they all look the same on the computer. We only need that quality if we are printing each and every image to a canvas, other than that I see no need.
digiKam gives you the option to re-compress your images. This is useful if you have many JPEG pictures with JPEG setting fine ( on scale 0-100). Changing the scale from 100 to 85 can significantly reduce the file-size & look the same.
Example : A 3.1 MB file at JPEG setting 100. When this image was re-compressed to a quality of 85 the image size came just 1MB. Meaning hundred similar file will have a total of 310MB, when these hundred pictures are re-compressed to a scale of 85 you will get approximately 100Mb, in the meantime saving 210MB of hard drive space. If you have many images like I do and if you need to convert these images it will saves GB’s of hard-drive space.
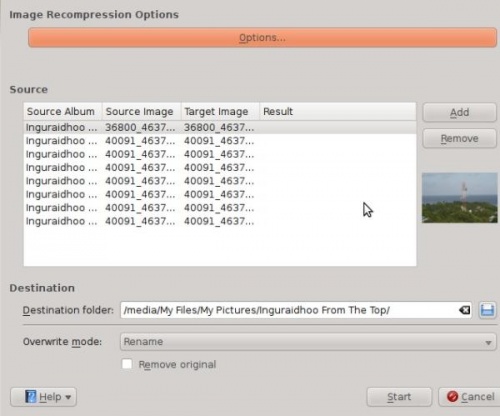
To re-compress your files using digiKam go to and a wizard will pop up.

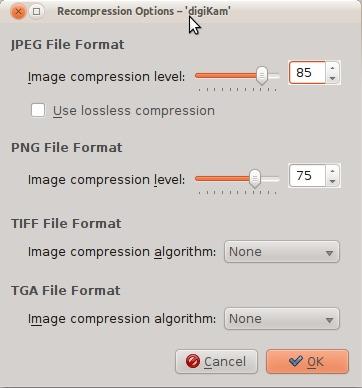
Then click . By default digiKam has a compression level of 75. Change this setting as you wish. Please bear in mind that when you move the scale beyond 75 it will show degrade in image quality. In my personal opinion a value of 75-85 is most adequate.

As well as JPEG files, it can do the same for other file formats such as TIFF and PNG’s as well. Choose either to remove the original or to keep it. If you are doing this for the first time, I advise you to keep your original and later take a look yourself and delete them if you wish. Some data is lost by compression, so it can be useful to have the original for important images.

