Krita/Tutorial 2
Krita tutorial - Part II
Welcome to the second part of my tutorial! This somewhat boring (but still useful!) episode will cover:
- Layer management tips and tricks
- General image editing tips and tricks
Tips:
- Unless you always draw everything on the same layer, always remember to make a new, transparent layer to draw on instead of the background layer (unless you're drawing the background). I always forget to do this, and haven't found an easy work-around yet...
- Better yet, get the habit of stuffing things into layer groups.
Layer management
Krita has lots of ways to manage layers and their visibility. I'll be addressing some of them in more detail.
Reminder tips:
- Filling a layer with a color: Backspace (background color) or Shift+Backspace (foreground color).
- Delete a layer's content: delete. Use this instead of Backspace to clear a transparent layer.
Alpha locking (alpha = transparency)
Suppose you want to draw some clothes. You have a "base" layer, and you want to add:
- a layer for shadows
- a layer for highlights
- a layer for patterns
- then a layer for textures
You want everything to be constrained to the area of the drawn clothes.
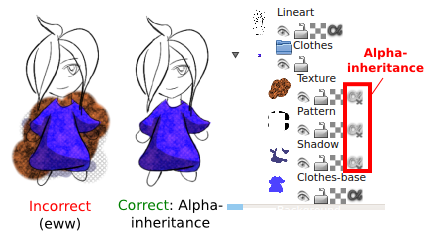
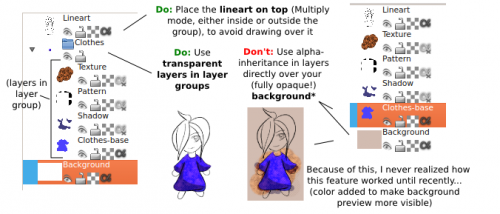
Alpha-locking locks the visibility state of a layer to only areas visible on all the layers below it, in the same stack.
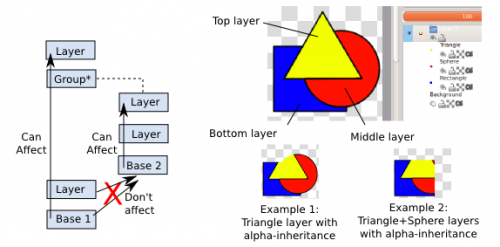
To activate alpha lock for a group:
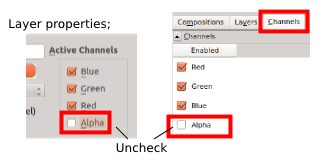
- Right-click on the group folder, select Properties, and uncheck "alpha"
- Or select the group folder, go to the Channel docker, and uncheck "alpha":
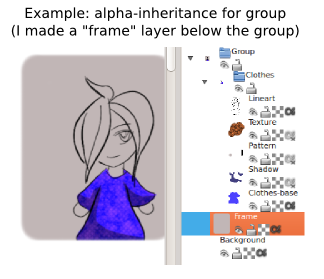
Do's and don'ts:
Tip: Comic frames
This feature works with vectors layers, which makes it handy to create comic frames. See Anitim's Comic with Krita tutorial on Youtube for more.
Layer masks and Erase mode
A layer or group's transparency mask basically dictates their visibility state:
- Black mask areas -> fully visible areas
- White mask areas -> invisible areas
- Grey mask areas -> transparent areas
- Unlike true erasing, your original drawing is still there: you can turn off the mask to make the corresponding layer or group fully visible again.
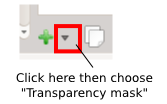
Tips:
- You can add masks to groups. Their position relative to the layers in the group doesn't seem to matter.
- You can duplicate or clone masks and move that to another layer or group, in case you need several layers to "share" masks.
Creating and editing masks
To edit a mask, you basically have to erase on it. You basically have 3 ways to give shape to a mask: create from selection, brush on erase mode and gradients.
Selection to mask
If you have a selection active, then when you make a mask, the mask will automatically take the shape of the selection.
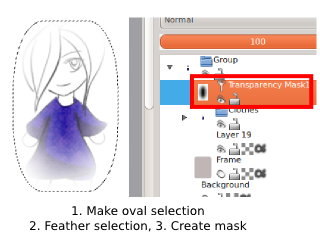
Tip: You can feather the selection for a more smooth transition: choose in the top menu.
Brushes on Erase mode
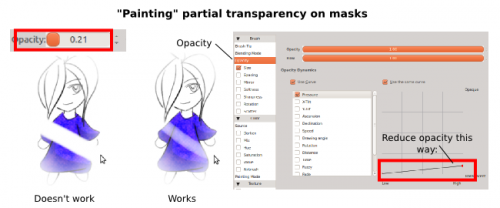
You can toggle on the "Erase mode" on most brushes with E. Drawing on the mask again with a not-invisible brush will allow you to "add opacity" again. Warning:
- - The opacity setting from the top toolbar seems to be ignored: even if you lower the opacity from there, you will still end up erasing 100% from the mask. This is rather a problem when you want just partial transparency.
- However, opacity from the brush editor seems to work. So, if you need partial transparency, open up the brush editor, lower the opacity there, and erase away.
Gradients
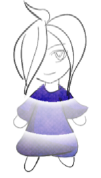
You can also use gradients on "Erase" mode. Remember that on erase mode:
- The opaque areas of the gradient will erase the mask
- The transparent areas will leave it intact
You can create custom gradients too. The example left uses a radial gradient with several full opacity and partial opacity stops.
Custom gradients in Krita
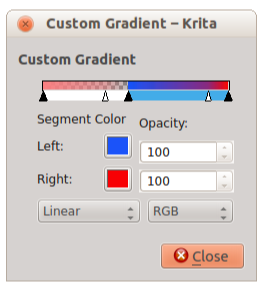
- The black arrows represent control points with the colors left or right.
- The white arrows just determine the speed of transition.
- To add a new segment, click a segment, right-click and choose "split segment"
- Note: Each segment has independent "left" and "right" values (shown in the example). This means you can easily create "abrupt" transitions.
- If you Don't want abrupt transitions, click the color button, copy the html value, open the color of the next segment, and paste the value in.
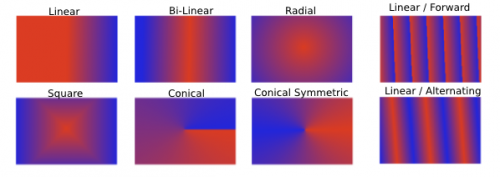
Gradient shapes: (from Tool options)
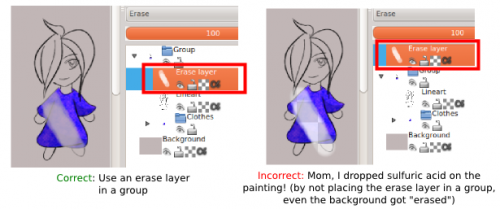
Layers on erase mode:
Erase mode works a lot like masks, except:
- It affects all the layers and groups beneath it
- The opacity setting from the top toolbar works properly when erasing with brushes.
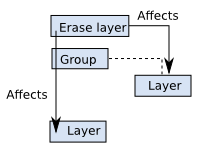
Basically, easier than making masks, though you have to stuff corresponding layers into sub-folders.
Filter brushes, masks and layers
I'm sure you've noticed by now that Krita has: filter brushes, filter masks And filter layers?
| Feature | Description | Comments |
|---|---|---|
| Filter brush | "Draw" filters with a brush! | -Not everything works as expected... - Many default settings start with "none", so remember to actually enter a value! |
| Filter mask | Apply a filter to a layer or group! | - Non-destructive editing! You can turn the filter-mask on or off at any time. - Right-click -> Properties to adjust filter settings |
| Filter layer | Applies filter to All layers below it | - You can tweak your whole image with a filter without flattening it first! - You can erase parts of the filter layer! |

