Digikam/Exportar a través de DLNA
Exportar fotos des de digiKam a través de DLNA
Transcrit des de l'article d'en Dmitri Popov, el 4 de març de 2013
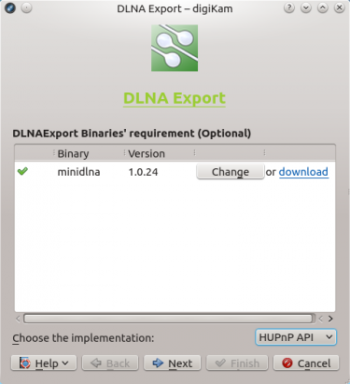
Necessiteu enviar ràpidament les fotografies del digiKam a un dispositiu sobre la mateixa xarxa? Sempre que el dispositiu sigui compatible amb DLNA, podreu fer-ho utilitzant el connector de Kipi «DLNAExport». Escolliu per obrir l'assistent Exporta a DLNA. Des de la llista desplegable , seleccioneu o . Ambdues opcions tenen els seus avantatges i inconvenients. miniDLNA suporta miniatures i funciona amb tots els dispositius compatibles amb DLNA. Però no pot entendre la jerarquia de les carpetes o els àlbums virtuals. També, miniDLNA es basa en l'antic protocol UPnP 1.0.0. HUPnP, al seu torn, utilitza l'últim protocol UPnP i suporta la jerarquia de les carpetes i els àlbums virtuals. Els inconvenients són la manca de suport per als dispositius de Sony i les miniatures.
If you choose the option, you have to install the miniDLNA package on your system. To do this on Debian and Ubuntu-based Linux distributions, run the apt-get install minidlna command as root. Once miniDLNA has been installed, press the button in the DLNA Export window and specify the path to the miniDLNA binaries (usually it’s /usr/bin).

Press then the button, and select the collection you want to export. You have three options here: you can pick the desired albums in the section, or select tags under the tab to export photos containing specific tags. If you already have saved searches in digiKam, you can select them in the section to export photos matching specified search criteria. Note that tags and searches cannot be used with miniDLNA, as it doesn’t support virtual albums.
Press again and hit the button to start the DLNA server. You can then access the shared photos from any device on the network using a dedicated DLNA client, or DLNA-enabled software.
