Kdenlive/Manual/Overgange
Overgange
Overgange styrer, hvordan Kdenlive går fra et klip til det næste. Du kan tilføje mange forskellige overgangseffekter ved hjælp af Kdenlives overgange.
Hvordan man tilføjer en overgang
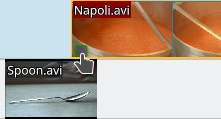
For at tilføje en overgang skal klippene justeres på tidslinjen, sådan at afslutningen af det ene klip overlapper med begyndelsen af det andet.
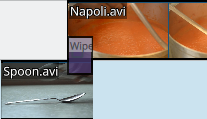
Højreklik så på tidslinjen der, hvor overlappet forekommer, vælg og vælg en af overgangene fra undermenuen.
Se Kom godt i gang - overgange
Properties Tab (version >= 15.12)
In kdenlive version 15.12 the effect stack is merged with the "Transition" Tab to create a "Properties" window/tab.
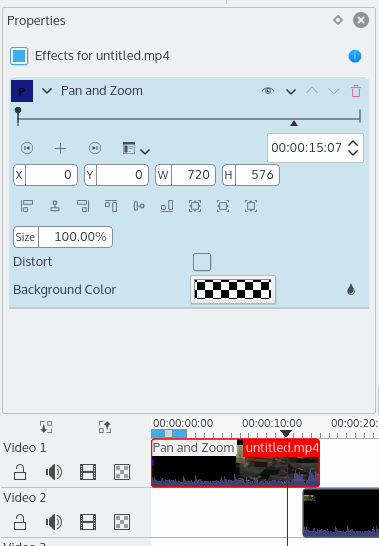
The Properties window displays the settings for the effects on the currently selected clip (Figure 1) or the settings for the currently selected transition (Figure 2) depending on whether it is a clip or a transition that is currently selected.
 |
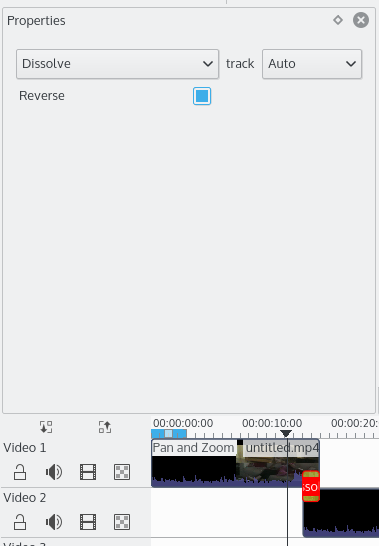 |
If you select the transition in the timeline  its properties will appear in the Properties tab (Figure 2).
You should preview your transition to make sure it is running in the direction you expect. For example, if it is a Dissolve transition and it is running in the correct direction, then the first clip should dissolve into the second clip. But if it is in the wrong direction, the first clip will suddenly disappear (replaced by the second track). It will then fade back in and abruptly jump to second clip. If your transition is in the wrong direction, just select the Reverse check box in the Properties tab.
Transition Tab (pre version 15.12)
Hvis du markerer overgangen i tidslinjen  så vises dens egenskaber i fanebladet Overgange.
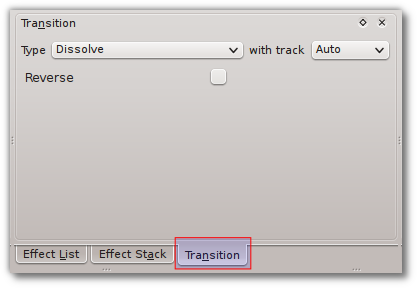
Hvis dialogen Overgange ikke er synligt, så brug menuen for at tilføje den.
Du bør nu få forhåndsvist din overgang for at sikre dig, at den kører som du forventer. Hvis det for eksempel er en opløs-overgang og den kører i den rigtige retning, så skal det første klip opløses og det nye dukke op; men hvis den kører i den forkerte retning, så vil det første klip pludseligt forsvinde (erstattet af det andet klip): Det vil så gradvist dukke op igen og til sidst abrubt springe til det andet klip. Hvis din overgang går den forkerte vej, så markér blot checkboksen i fanebladet Overgange.
Hvordan man opretter overgange med et enkelt klik
There is a shortcut for creating transitions between two tracks that overlap.
In Version 17.04 you hover the mouse over the lower grey rectangle that appears at the end of the clips on the timeline and a tool tip will appear saying "Click to add Transition". If you click a dissolve transition will be automatically added.
{{#ev:youtube|e1f0Yc8Fh3c}}
Older Versions: If you hover the mouse over the overlapping region on the timeline, a green triangle will appear. Clicking this adds a dissolve transition between the tracks.
{{#ev:youtube|h1k7GbEssqA}}
Automatiske overgange
If a transition is set as an "Automatic Transition" and you adjust the overlap between the two clips involved in the transition, then the length of the transition will automatically adjust to cover the region where the clips overlap.
You can toggle off this feature on a transition by selecting the transition and choosing Automatic Transition from the menu.
Transitions will be created with the Automatic transition property set to true by default if the Automatic Transitions Button is active.
When Automatic Transition is off and you move a clip to change the overlapping region, then the length of the transition does not automatically adjust.
Miksning af titler, billeder og video ved hjælp af overgange
{{#ev:youtube|f6VHlOZutm8|500|left|Image and Title Layers Transparency Tutorial - qubodupl/Open Source Bug}}
Liste med overgange
Se også Effekter og overgange for en alfabetisk liste over effekter og overgange.
Se også Alfaoperationsovergange for en sammenligning af de forskellige typer alfaoperationsovergange (addition, addition_alpha, alphaatop, alphain, alphaout, alphaover and alphaxor).
- addition
- addition_alpha
- Affine
- alphaatop
- alphain
- alphaout
- alphaover
- alphaxor
- burn
- Cairo Affine Blend
- Cairo Blend
- color_only
- Composite
- Composite and transform
- darken
- difference
- Dissolve
- dodge
- grain_extract
- hardlight
- Hue
- lighten
- Matte
- multiply
- overlay
- Region
- Saturation
- screen
- Slide
- softlight
- subtract
- UV Map
- value
- Video Quality Measurement
- Wipe
FAQ
Q: Hvordan tilføjer man en overblændingseffekt?
A: Få et par klip i hvert sit spor til at overlappe i tid og klik så på den grønne trekant, som lyser op i hjørnet af det øverste klip (se overgang).
